The content of this page has not been vetted since shifting away from MediaWiki. If you’d like to help, check out the how to help guide!
After you have detected interest points in your images, you can proceed to register them. In MultiView mode, select the views to be registered, right-click and choose Processing › Register using Interest Points….
The interest point-based registration consists of two steps:
- 1) Pairwise Matching of corresponding interest points in two views/view groups. For this step, we offer a variety of algorithms (see below).
- 2) Iterative Global Optimization of the registration (estimation of consensus transformations when one view is linked to multiple others).
Basic Registration Options
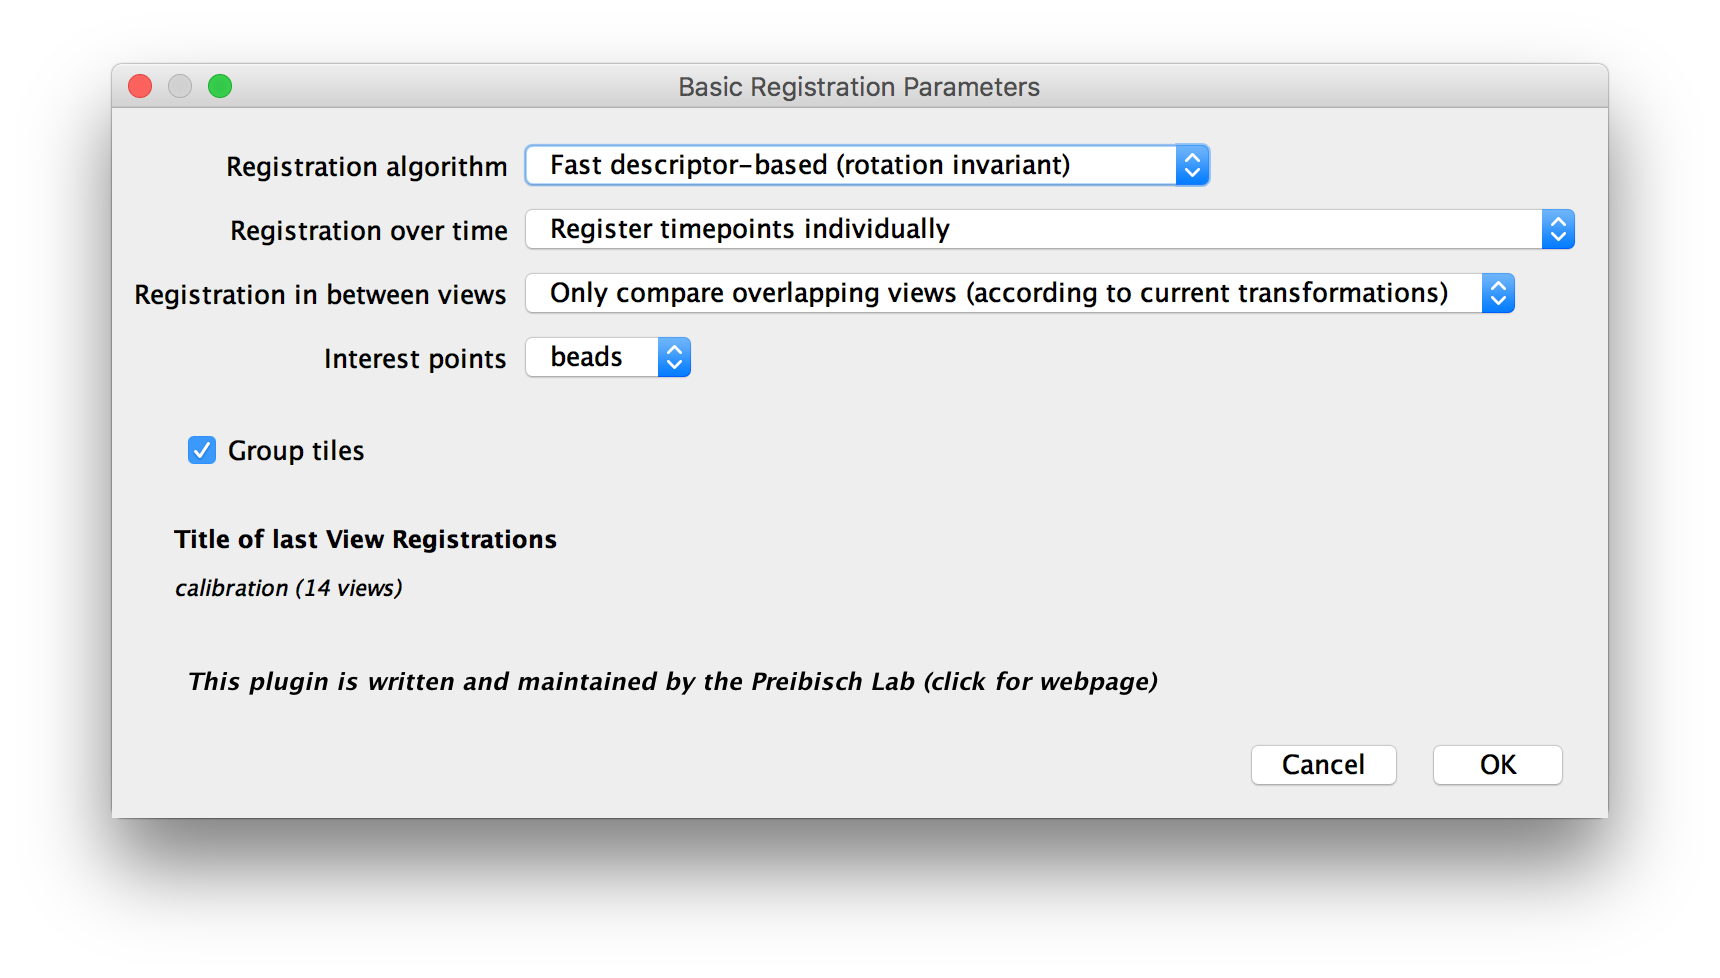
In the first dialog, you will be asked for some basic parameters for the registration.
- Registration algorithm: how to perform the pairwise matching of interest points. The individual algorithms are described in detail below.
- Registration over time: When your dataset contains multiple time points, you can choose to:
- Register time points individually: to process each time point after the other. This way, the different views in each time point can be aligned, but no registration between time points is performed. It is generally a good idea to first register the views of the individual time points and then perform another round of registration to align them over time (keeping the registration within timepoints from the first round).
- Match against one reference time point (no global optimization): to align the views of all time points to a selected reference time point (In addition to aligning within the timepoints). Use this if you sample moved very little over time.
- All-to-all timepoints matching (global optimization): to compare every time point to every other time point. This is the most computationally expensive option but will provide a globally optimal time series registration.
- All-to-all timepoints matching with range(‘reasonable’ global optimization): to compare each timepoint to neighboring time points in a defined range. This is a good compromise when your sample moved over time.
- Registration in between views: Whether to compare Only overlapping views or to Compare all views against each other. When you already have a rough alignment of the views, e.g. from microscope metadata or a first round of registration, we recommend to only compare overlapping views. Comparing all views will increase the computational cost but might be necessary when you have a bad or no pre-registration.
- Interest points: the interest points to use for registration.
- Group Tiles and Group illuminations: (Only available if you have multiple Tiles or Illuminations in your dataset) Tick this to group the Tiles and/or illumination directions within one Channel/Angle/TimePoint. Grouped views will be moved together. Use this if you already aligned Tiles in Stitching mode. Since we also have to do less comparisons this way, this will also speed up the registration process.
Specific Registration Options
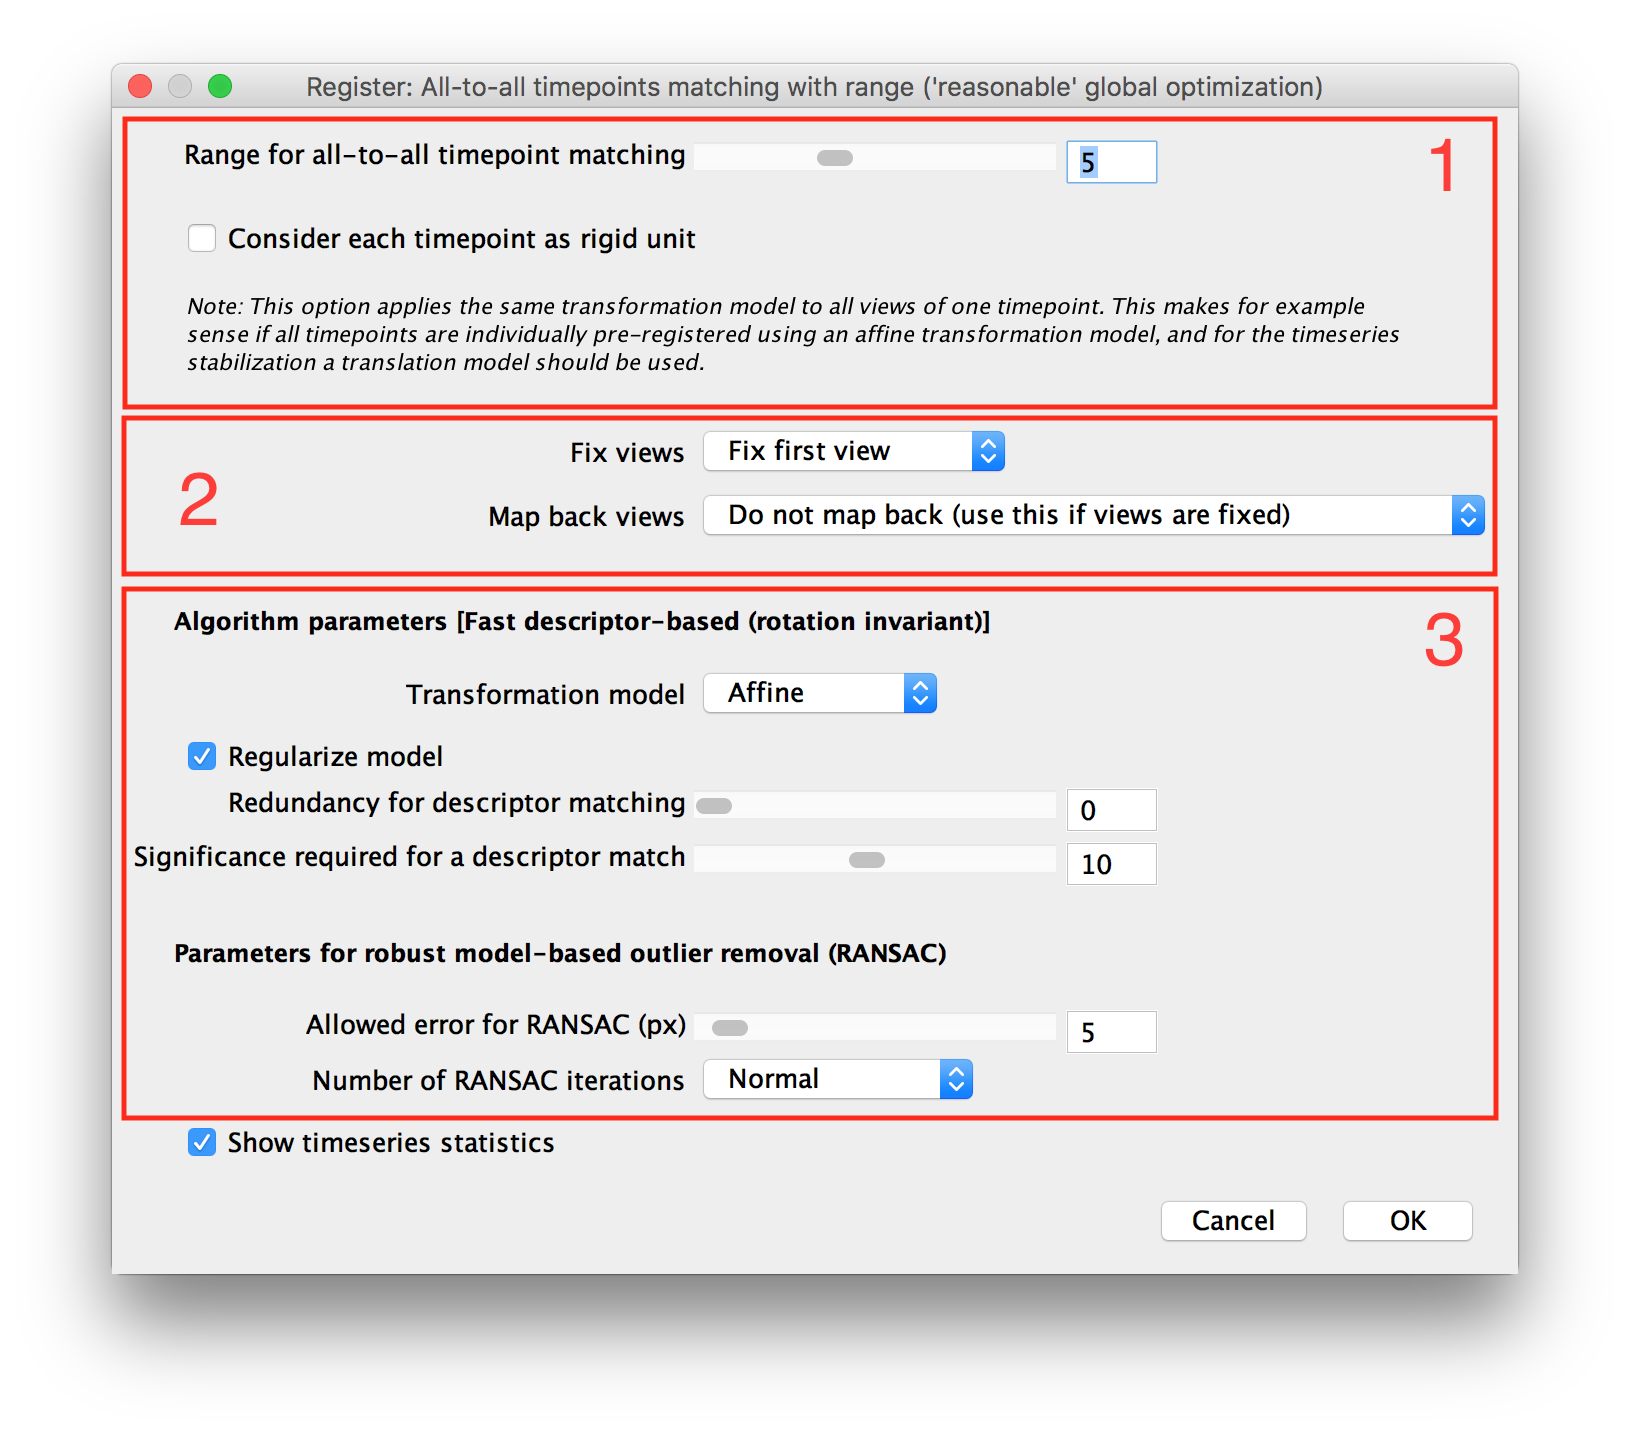
Depending on the choices you made in the previous dialog, you will be asked for some more specific parameters in the following dialog. The options here are grouped into 3 parts:
- 1) Time Series Registration Options (only available if the dataset has multiple time points and you chose NOT to register timepoints individually in the first dialog)
- 2) View Fixing and map-back Transformations (not available when registering relative to a refenence timepoint)
- 3) Registration Algorithm Parameters
Time Series Registration Options
If you chose to perform time series registration in the previous dialog, you will be asked for specific options here.
If you selected to Match against one reference time point (no global optimization) in the previous dialog, you will be asked to choose the reference time point here.
When performing All-to-all timepoints matching with range(‘reasonable’ global optimization), you will be asked for the range, i.e. how may preceding and succeeding time points to compare each time point to, here.
Furthermore, regardless of which time series registration scheme you use, you can select to Consider each time point as rigid unit. By selecting this, we will not move the views within a time point but only align the timepoints to each other. Use this if you performed a first round of registration using Register time points individually.
In multi-timepoint datasets (even when not registering timepoints relative to each other), you can also tick to Show timeseries statistics at the bottom of the dialog. This will cause a graph of the registration errors over time to be displayed after the registration is complete.
View Fixing and map-back Transformations
After the pairwise matching of the interest points is done, we perform global optimization to determine transformations for the whole set of views from the pairwise transformations.
Since the registration works with relative transformations and will by default determine a non-identity transformation for all views, all views might move a little in an unpredictable (but correct relative to each other) way. You might, however, want to keep one or more views where they are and only move the others relative to them.
There are two, roughly equivalent, ways of achieving this:
- View Fixing: keep some view(s) at their original location in the optimization progress (restrict their transform to identity).
- Mapping back the views: calculate a transformation that “undoes” the registration for a reference view and apply that to all views (moving the reference view back to its original location but keeping optimized relative transformations).
The following settings in the Advanced Registration Parameters dialog control view fixing and mapping back:
- Fix Views: You can select to fix the First View, to manually Select Fixed Views or turn view fixing off by selecting Do not fix.
- Map back Views: You can select to Map back to first View using either a Translation model or a rigid model or Map back to user defined view, with the same options for transformation models. You can also turn mapping back off via Do not map back (use this if views are fixed). Note that if your registration results in a more complex transform (e.g. Affine) than the translation/rigid map back model, the mapping back will “undo” the registration as well as possible, but not perfectly.
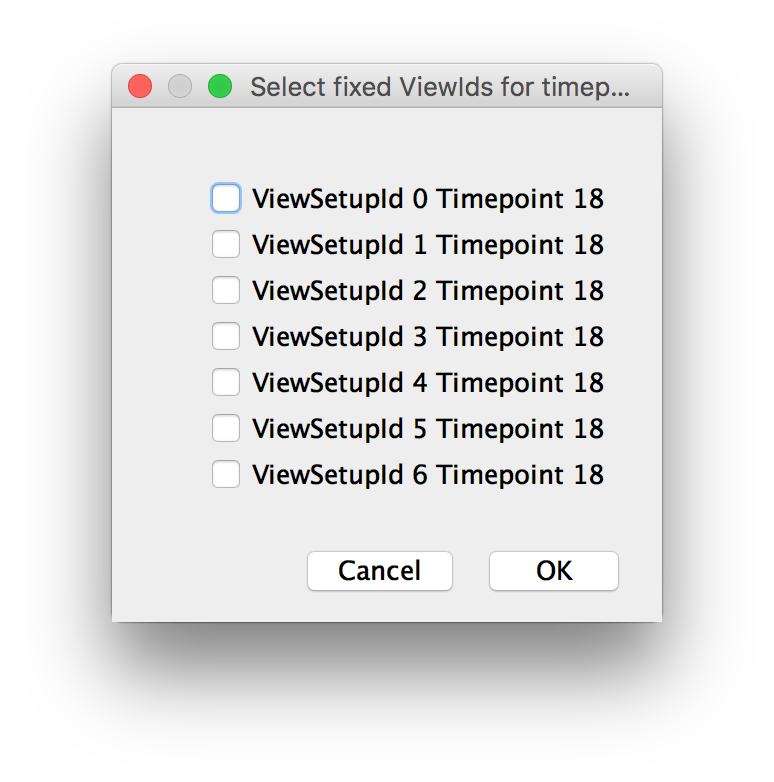
If you chose to manually select the views to fix or map back to, you will be asked for those views in another dialog after clicking OK.
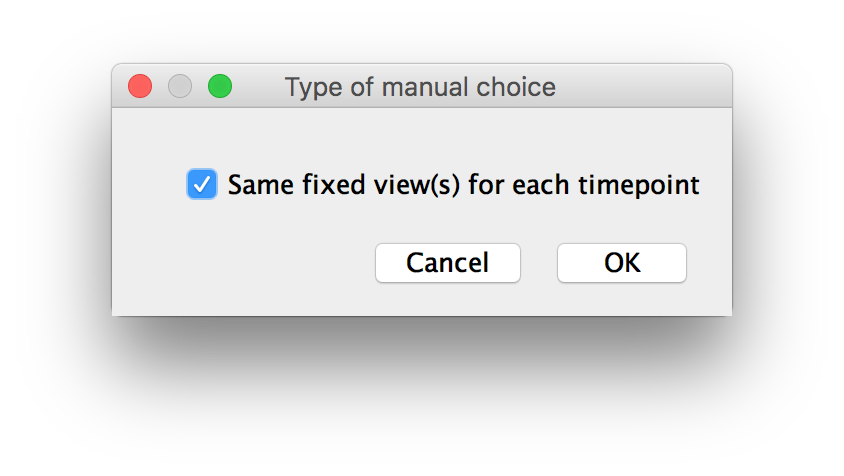
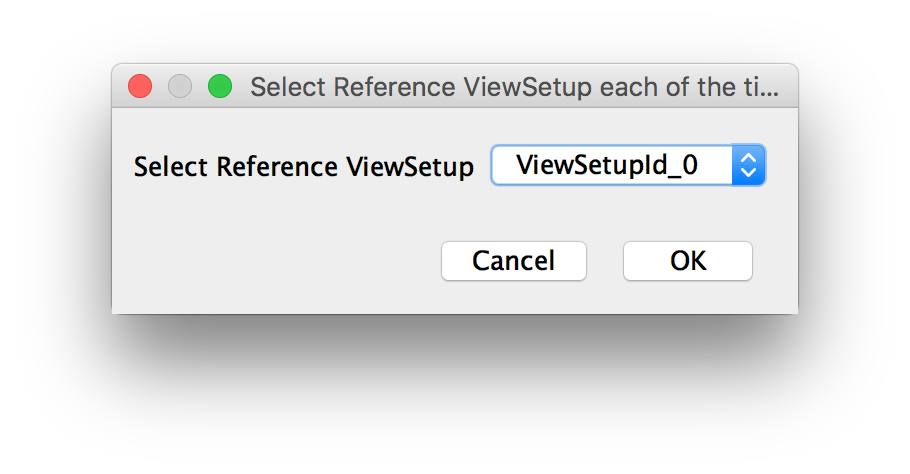
When registering timepoints individually, you will be asked whether you want to fix/map back to the same view in each timepoint or select different ones for each time point.
When manually selecting views to fix, you can choose to fix multiple views (optionally, this is repeated for each timepoint, see above).
When mapping back, you can select a single view to map back to.
Registration Algorithm Parameters
Depending on which Registration algorithm you selected in the first dialog, you will be asked for different options here. Note that the algorithms offer various levels of invariance:
- rotation invariance: works even if the views are rotated and shifted relative to each other (according to the current transformations). Use this e.g. when aligning views from multiple angles.
- translation invariance: requires that the views are only shifted and not rotated relative to each other. Use this e.g. to correct thermal drift in time series.
- no invariance: requires the views to already be roughly aligned to work. Use this for refinement of existing registrations.
Fast descriptor-based (rotation invariant)
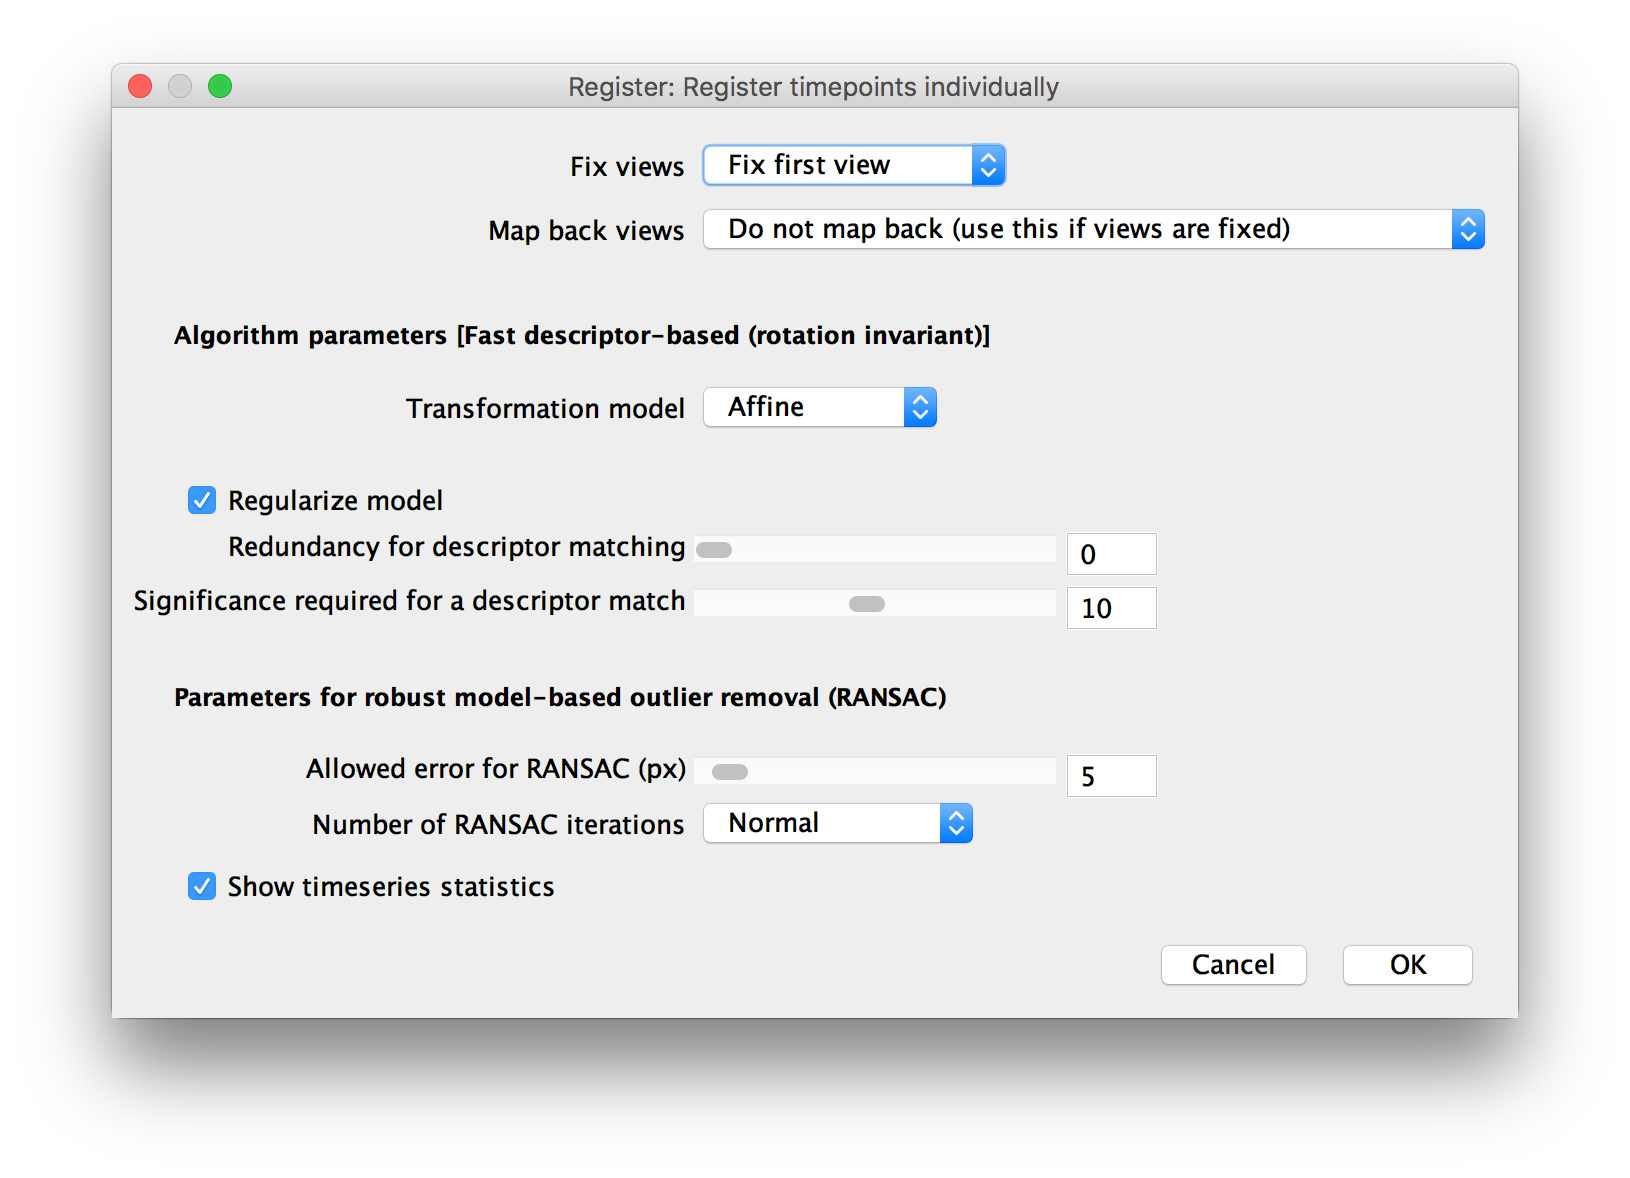 Parameters for Fast descriptor-based (rotation invariant) registration
The Fast descriptor-based (rotation invariant) registration is the default choice for aligning views from multiple angles. It first constructs a descriptor for every point based on the “constellation” of its 3 nearest neighbors and matches it to the most similar point in other views. By using a special local coordinate system, we can find the points in other views even if they were imaged from different angles.
To ensure that we only match truly corresponding points, we first filter the point matches by their similarity (relative to the next best match) and then apply model-based outlier removal via the Random Sample Consensus (RANSAC) algorithm.
The corresponding point matches of all selected views are then iteratively aligned to each other in the following global optimization.
You can set the following parameters for this algorithm:
- Transformation Model: which type of transformation (translation, rigid transform or affine transform) to use to align the views.
- Regularize model: check to compute transformations of another type simultaneously and return a weighted average
- Redundancy for descriptor matching: the number of next nearest neighbors (after the closest 3) to consider when constructing the descriptors. A descriptor will be created for all 3-neighbor combinations, resulting in \({3+redundancy}\choose{3}\) descriptors for each interest point. Increasing the redundancy greatly increases the computational cost of interest point matching but might lead to better matching if you have many or uniformly spaced interest points.
- Significance required for a descriptor match: In the point match filtering step: how much more similar a potential match has to be (compared to the next best one). For example, 1 means no filtering, while 10 means that the descriptor distance has to be at l0 times smaller than the next closest candidate.
- Allowed error for RANSAC (px): By how much a point match has to deviate from the consensus model be filtered out by RANSAC.
- Number of RANSAC iterations: RANSAC is an iterative and randomized procedure - if you have very little actual corresponding points but may candidate pairs, it may not find the corresponding subset. Increasing the number of iterations can help, but it also increases the computational cost.
Fast descriptor-based (translation invariant)
The Fast descriptor-based (translation invariant) registration works essentially the same as the rotation invariant version but uses axis-aligned local coordinates to construct the 3-neighbor descriptor.
Because of this, we can not find corresponding points in two views that are rotated relative to each other, so make sure you already have (approximately) aligned different angles before using this registration strategy.
The parameters for this algorithm and their meaning is the same as for the rotation-invariant version (see above).
Precise descriptor-based (translation invariant)
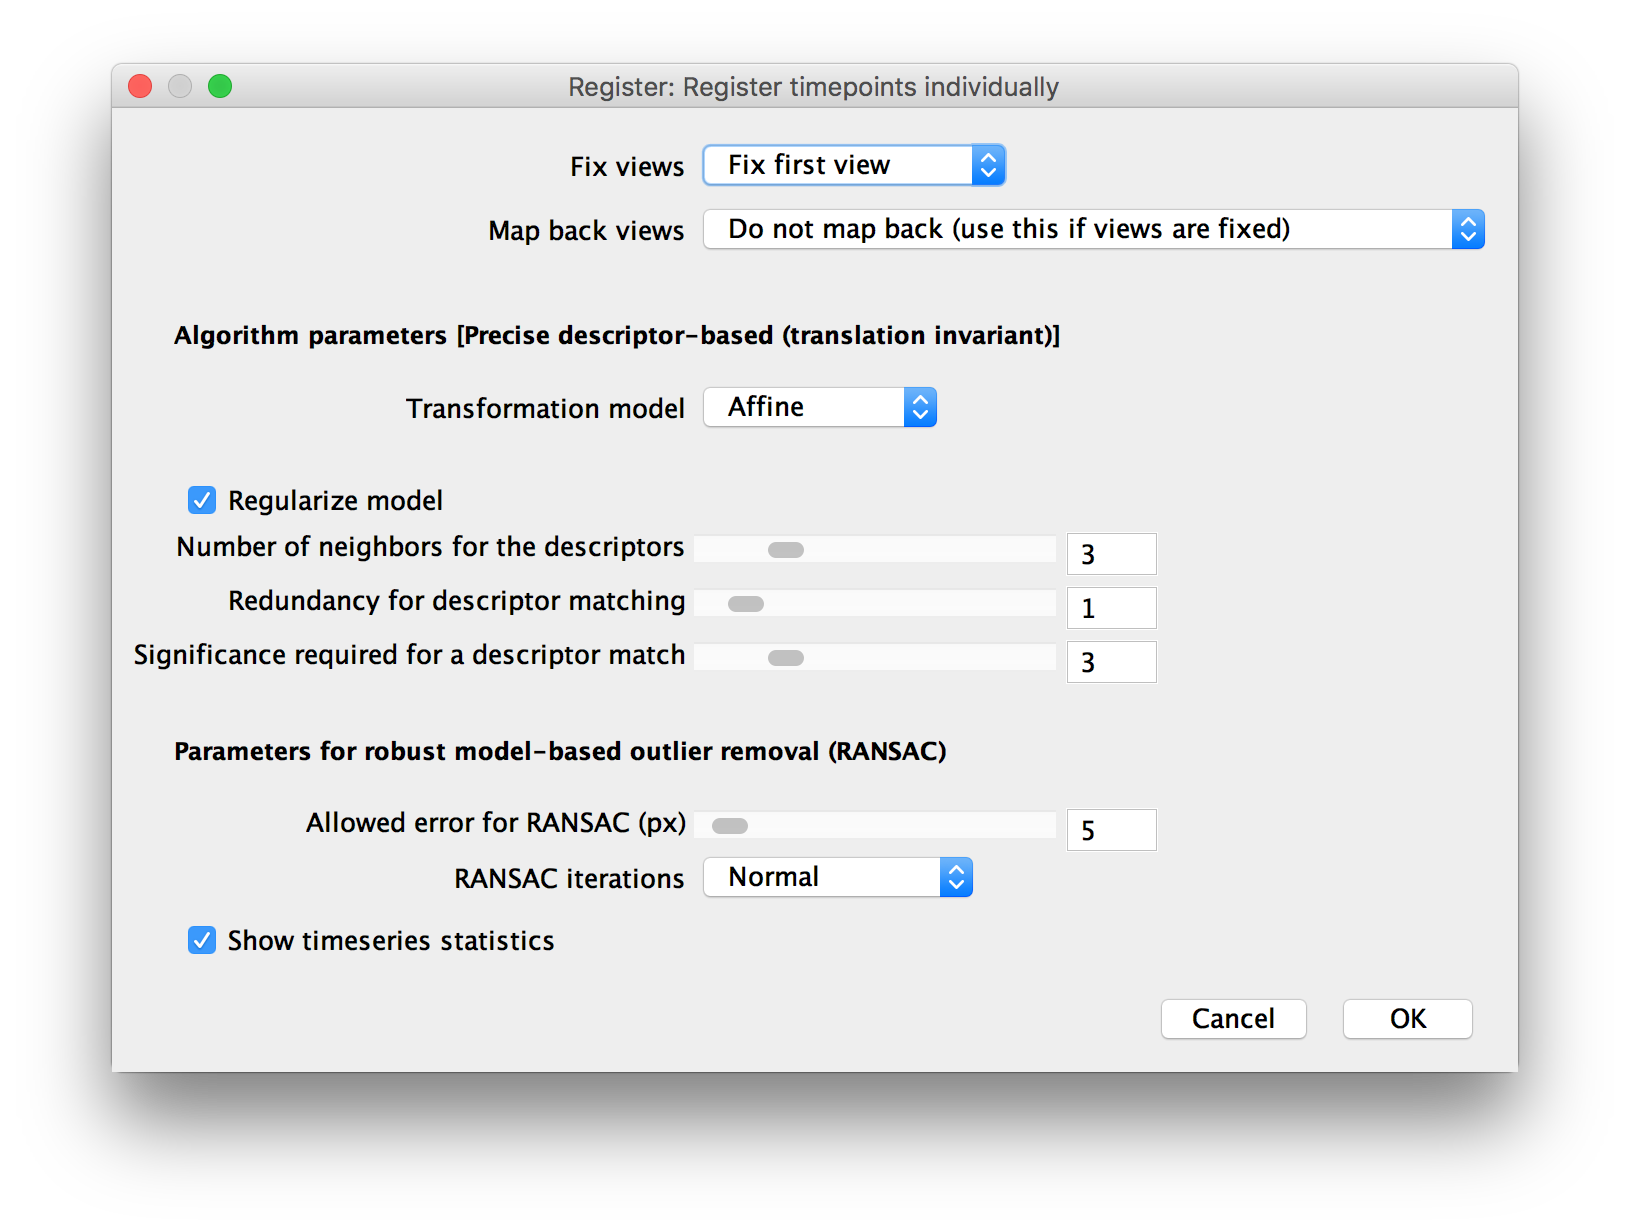 Parameters for Precise descriptor-based (translation invariant) registration
The Precise descriptor-based (translation invariant) registration work essentially the same as the fast descriptor-based registration algorithms with the main difference being that you can manually specify the number of neighbors of an interest point to use for constructing the point descriptor. Due to the more flexible descriptors, it lacks the specific optimizations for 3 neighbors and is slightly slower than the fast versions.
In addition the the parameters for the Fast descriptor-based registration, you can set one additional parameter for the precise version:
- Number of neighbors for the descriptors: how many neighbors of each point to use for the descriptor construction. More neighbors will lead to a more specific matching. In images with a lot if (potentially spurious) detections, you might also want to increase descriptor redundancy. Be aware that this might increase the computation time considerably - depending on this parameter and the selected redundancy level, we will construct \({\\#neighbors+redundancy}\choose{\\#neighbors}\) descriptors for each point.
Center of mass (translation invariant)
The Center of mass-based registration will align views not by matching individual interest points of view pairs but by aligning the center of all the interest points.
This method is very simple and typically not accurate (unless you have detected exactly the same interest points in every view), but will suffice to e.g approximately stabilize a time series if none of the other methods work.
Note that since we reduce all the interest points in a view to a single center of mass, we can only estimate a translation model (no rotation/scaling) using this strategy.
This method has a single parameter:
- Type of Center Computation: How to compute the center of the interest points. Can be Average (mean) or Median. The median tends to be more resistant to outliers (e.g. spurious detections outside the sample).
Assign closest points with ICP (no invariance)
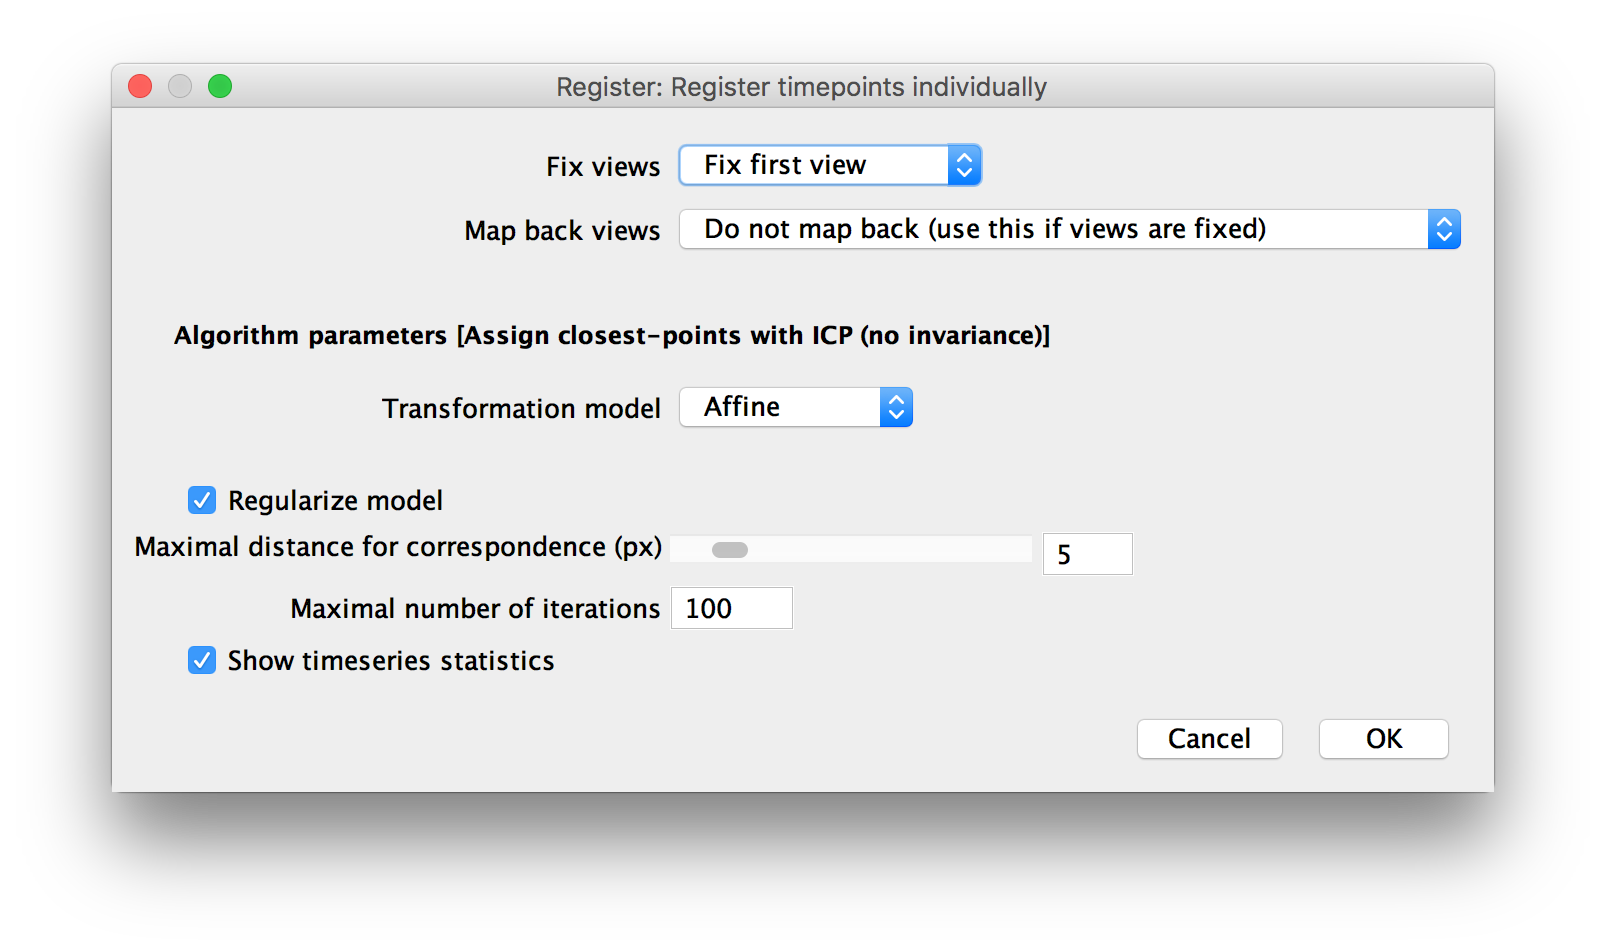 Parameters for ICP-based (no invariance) registration
In addition to the descriptor-based registration algorithm, we also offer registration via a slightly modified version of the Iterative Closest Point (ICP) algorithm.
ICP works by matching each point in one image to the closest point in the other (if one exists within a defined search radius) and then estimating a transformation from the matched points via least squares. The points of the first image are then transformed by the current transformation estimate and the process is repeated until nothing changes or for a maximum number of iterations.
Note that since ICP uses, as the name implies, the closest points in two images, it only works if the images are already roughly aligned (it has no invariance to translation or rotation). It should therefore be used to refine existing registrations, but not to compute registrations de-novo.
In the parameter dialog, you can set the two parameters described above:
- Maximal distance for correspondence (px): How close the neighboring points in the two images have to be for a match. Decreasing this can lead to a finer registration, but the pre-registration has to be good enough. Alternatively, a larger distance will lead to a coarser alignment but might still work with worse pre-registrations.
- Maximal number of iterations: for how many iterations to run. Ideally, the algorithm should converge beforehand. If you keep running for the maximum number of iterations, increasing this might help.
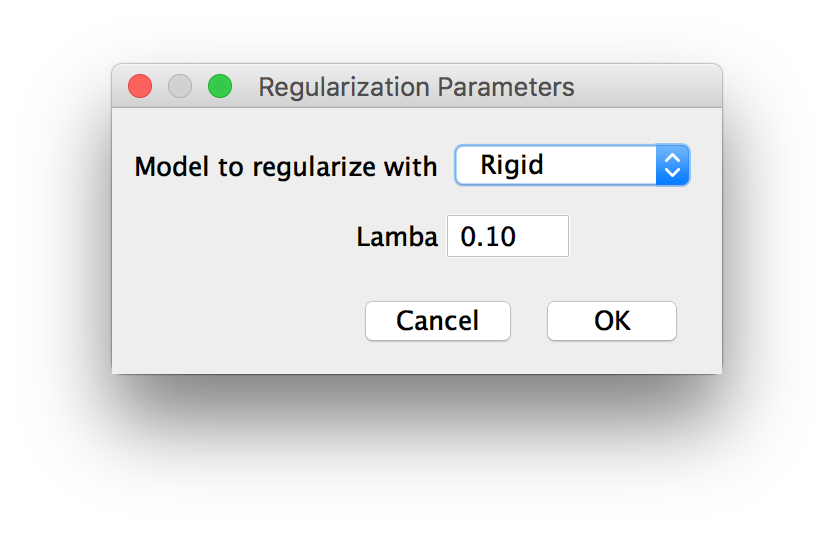
Regularization Options
If you opted for Regularization of the transform in the previous dialog, you will be asked for the type of the second transformation model to estimate and a lambda (\(\in[0,1]\)), i.e. how much weight you want to give to the regularizing model in the final averaged result.
Grouping Options
If you chose to group tiles or illuminations in the first dialog, you will be asked how to perform the grouping in another dialog.

The options for Interest point grouping are:
- Group interest points (simply combine all in one virtual view): Replace the grouped views by one virtual view in the global optimization. Interest points that are detected in multiple images are merged. This is faster but might lead to inaccurate registration if the views within the groups are not properly per-registered and the merge distance is set too high (e.g. tiles were not properly stitched beforehand).
- do not group interest points, compute views independently: Use the views as-is, but group in the global optimization (compute the same transformation all views in a group).
Furthermore, you can specify the interest point merge distance. If you choose to group interest points, points from multiple images that lie within this distance to each other will be replaced by their center.
Go back to the main page