The content of this page has not been vetted since shifting away from MediaWiki. If you’d like to help, check out the how to help guide!
Overview
For deconvolution, it is necessary to have a Point spread function (PSF) for each image you want to deconvolve. An ideal PSF should represent how a point emitter smaller than the diffraction limit of your optical setup is imaged by your microscope.
PSFs can be be calculated theoretically, but this requires exact modeling of your microscope, so it is more common to use images of sub-diffraction fluorescent beads to estimate the PSF. Since it is common to use fluorescent beads for multi-view registration, you might already have a source of PSFs in you data.
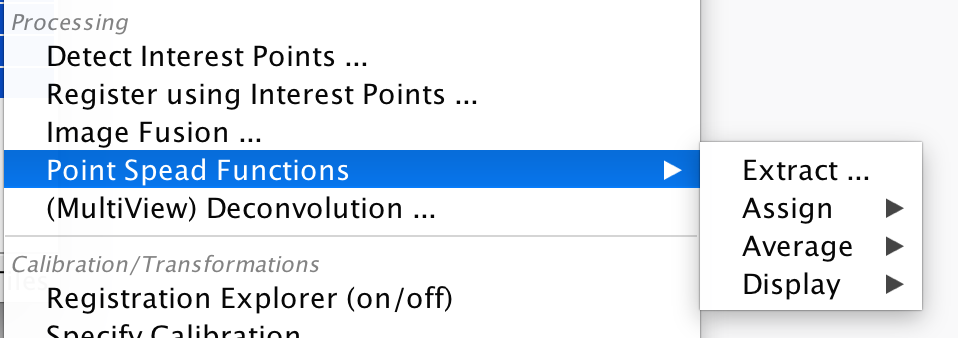
Functions for assigning PSFs to images and managing PSFs can be found in MultiView mode in the right-click menu under Processing › Point Spread Functions.

PSF management
Extracting PSFs
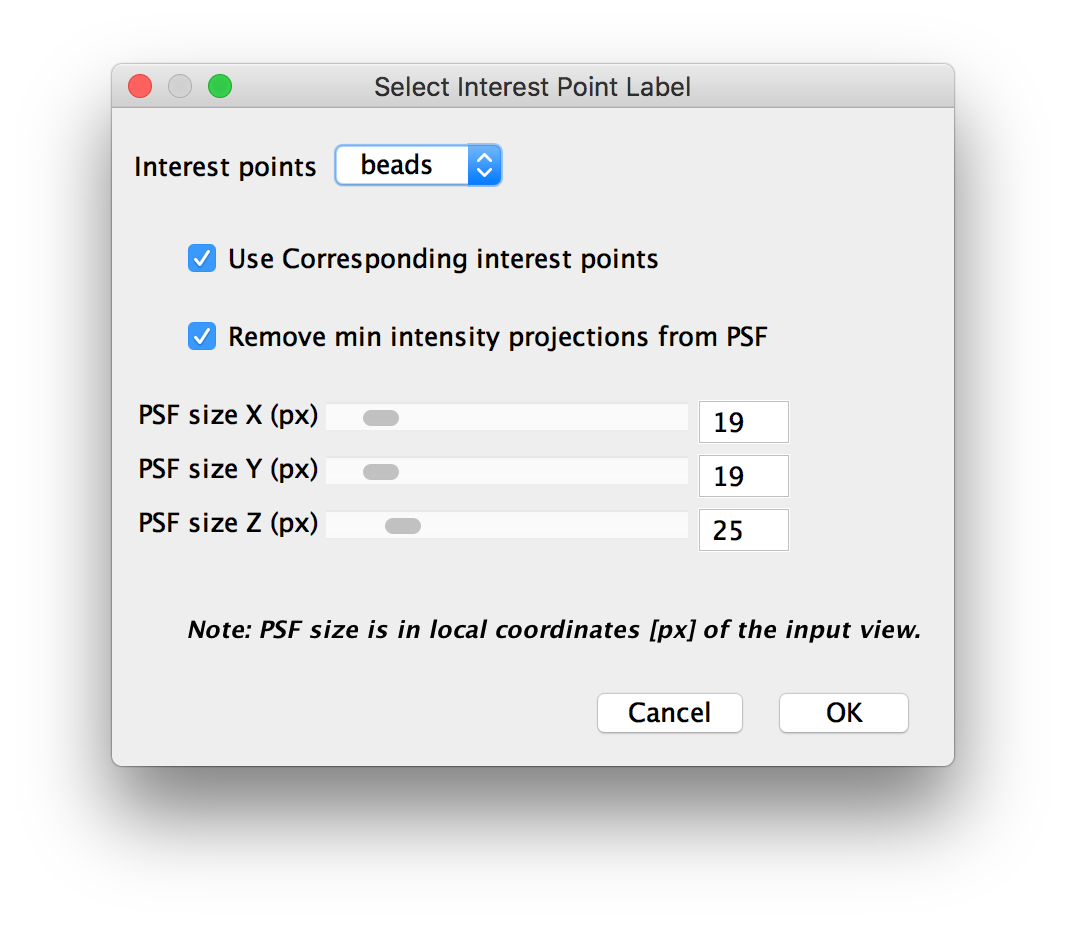
Extracting PSFs is the process of taking previously detected interest points and creating PSFs from them. Clicking this menu entry will bring up the PSF extraction dialog:

Here, you have a few options:
- Interest Points: which interest points to use for PSF creation.
- Use corresponding interest points: check this to only use interest points that have a correspondence in another image. This only works if you have already performed registration with those points. This is useful to quickly exclude spurious detections, but for the best results, you might want to manually curate a set of points that only consists of beads.
- Remove min intensity projection from PSF: check this to remove the minimal intensity projection (thrice, in x, y and z) from the resulting averaged PSF. This should reduce background noise.
- PSF size: the volume (in raw image pixels) to cut around the interest points for PSF generation. The default typically works well for reasonably sampled images, but you might want to increase the size if you have oversampling.
Click OK to turn the selected interest points into PSFs. This will generate a single PSF for all selected views (the interest points in each view will be averaged).
We will save the extracted PSFs as TIFF files in your project directory once you click Save in the main window. This is necessary for subsequent steps such as deconvolution, so make sure to save.
Assigning PSFs
The Assign PSF sub-menu contains functions for assigning existing PSFs to the selected Images. It contains a Assign from view entry that allows you to quickly assign the PSF of one view to all selected views.
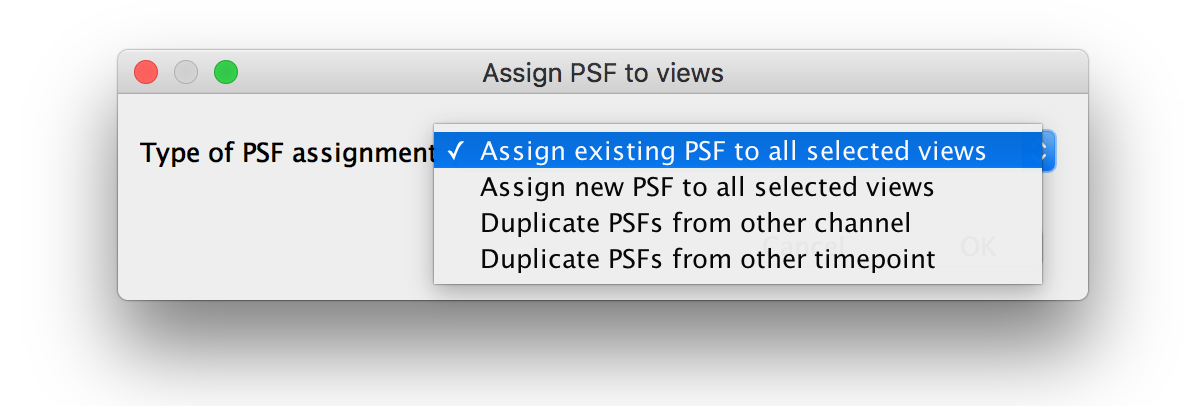
It also contains an Advanced… option allowing for more flexible re-assignment and loading of external PSFs from files. Clicking this will bring up the following dialog:

The options here are:
- Assign existing PSF to all selected views: After selecting this, you will be asked for one view in the next step. The PSF from this view will be assigned to all selected views (same as the quick assign in the menu).
- Assign new PSF to all selected views: After selecting this, you will be asked for a PSF file in the next step. The PSF in that file will be assigned to all selected views. The PSF files have to be 3D TIFF stacks with odd dimension sizes and the center of the PSF at the center of the image.
- Duplicate PSFs from other channel: After selecting this, you will be asked for a source and target channel. For all selected views of the target channel, we will assign the PSF from the corresponding view in the source channel.
- Duplicate PSFs from other timepoint: After selecting this, you will be asked for a timepoint. For all selected views, we will select the corresponding view at the selected timepoint and copy the PSF of that view.
Averaging PSFs
You can use this sub-menu to replace the individual PSFs of the selected views by their average PSF or simply display the averaged PSF. The available options are:
- Display only: display the average PSF of the selected views as an ImageJ image.
- Display only (remove Min Projections): display the average PSF of the selected views as an ImageJ image, subtract minimum intensity projections from the average (see above).
- Assign to all input views: average the PSFs of all selected views and assign the average PSF to all of them.
- Assign to all input views (remove Min Projections): average the PSFs of all selected views and assign the average PSF to all of them, subtract minimum intensity projections from the average (see above).
- Display & assign to all input views: average the PSFs of all selected views and assign the average PSF to all of them and also display the resulting PSF in ImageJ.
- Display & assign to all input views (remove Min Projections): average the PSFs of all selected views and assign the average PSF to all of them, subtract minimum intensity projections from the average (see above). Also display the resulting PSF in ImageJ.
Displaying PSFs
You can use the function in this sub-menu to quickly display your PSFs as ImageJ images. The available options are:
- Raw PSF for each view: show the raw PSF for each selected view.
- Averaged PSF: show averaged PSF of all selected views.
- Averaged transformed PSF: show averaged PSF of all selected views, with the individual PSFs transformed to world coordinates according to the registrations of the views.
- Maximum Projection of averaged PSF: show a Maximum intensity projection of the averaged PSF of all selected views. Note that the projection will be done along the smallest (px) axis of the PSF.
- Maximum Projection of averaged transformed PSF: show a maximum intensity projection of the averaged PSF transformed to world coordinates according to the view registrations.
Go back to the main page