The content of this page has not been vetted since shifting away from MediaWiki. If you’d like to help, check out the how to help guide!
Overview
Uneven illumination and fixed pattern noise can lead to artifacts in stitched images. If the aberration is the same for multiple images, it can be corrected via a process called flatfield correction. We offer on-the-fly correction for a user-provided dark image and/or bright image.
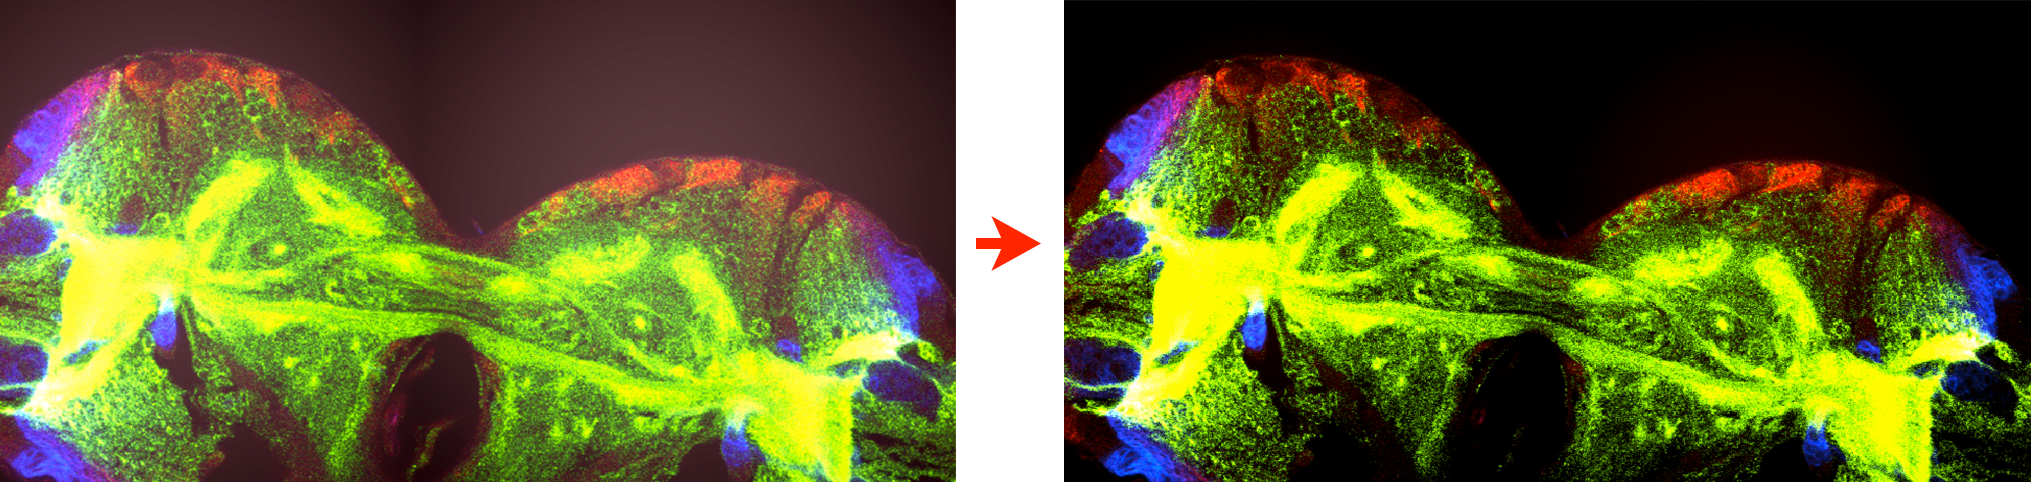
We perform the correction by calculating a corrected image pixel \(C_{x,y,z}\) according to Flat-field correction:
\[C_{x,y,z} = \frac{(R_{x,y,z} - D_{x,y}) * \overline{(B-D)} }{(B_{x,y}- D_{x,y})}\]with
- \(R\) = raw image
- \(B\) = bright image (image of a uniformly bright sample), 1 if not provided by user
- \(D\) = dark image (image with no sample and illumination, camera offset), 0 if not provided by user
Usage
You can find the flatfield correction as Flatfield Correction (experimental) … in the right-click menu under Preprocessing (stitching mode) or Modification (MultiView mode).
Click on the menu item and you will be presented with a dialog allowing you to set bright and dark images for every (channel, illumination direction)-combination of your images.
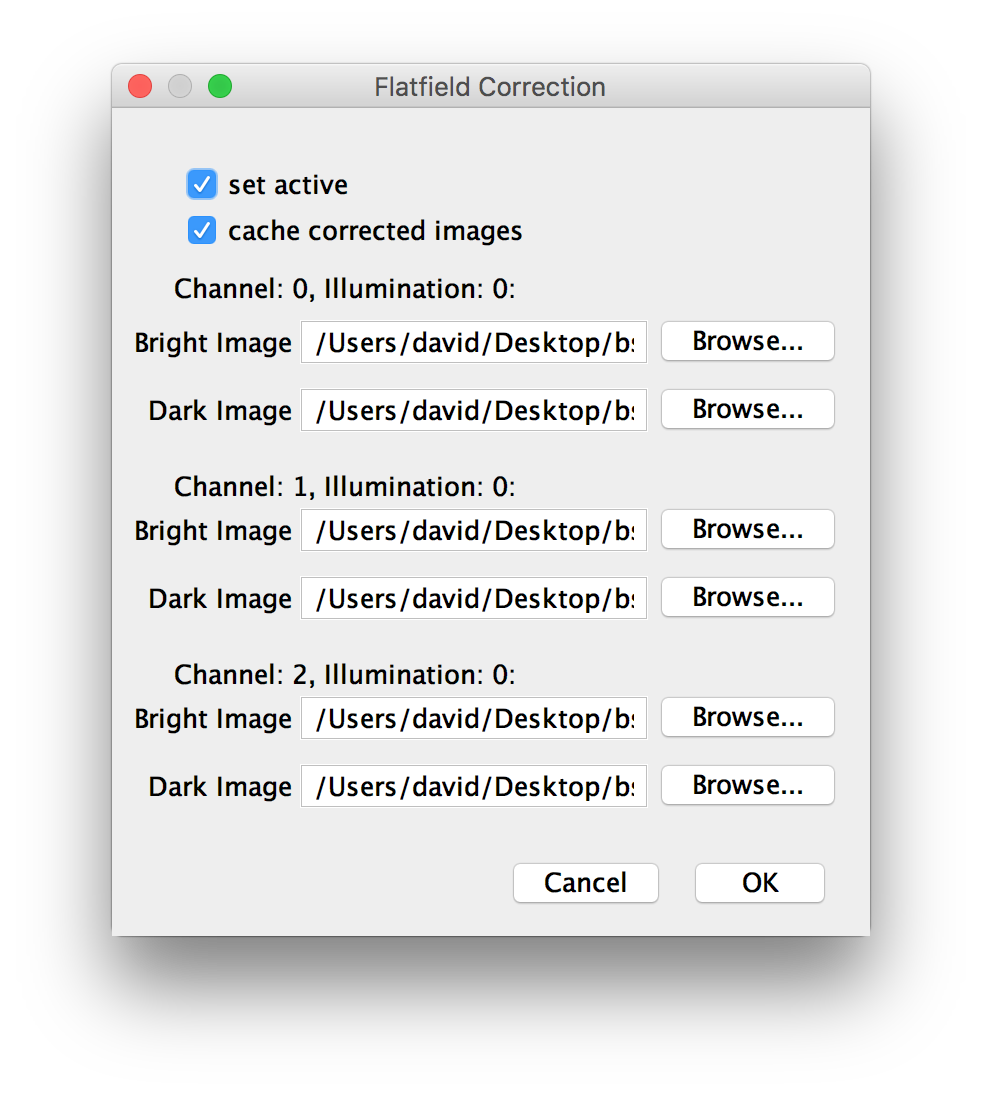
You can specify the dark and bright image files by dragging and dropping the file, entering the path manually or selecting the file by clicking Browse….
The dark and bright images should be provided as TIFF files. The images should have the same width and height as your raw images. If you use 2D flatfield images to correct 3D stacks, the same correction will be applied to every slice.
Furthermore, you can set the correction active. Use this to activate or deactivate the flatfield correction to compare results.
You can also choose to cache corrected images. This will reduce the amount of calculations we have to re-do if you have enough memory to save previous results. We advise to keep this activated.
If you click OK, the correction will be applied to you images. Note that if the BigDataViewer is open, it will close and reopen to re-load the corrected images. If you with to change the correction settings, you can click through the dialog once more, e.g. to deactivate the correction.
Since we calculate the correction on-the-fly, it will slow subsequent processing steps. If you plan on doing flatfield correction, we advise to first load the data virtually, apply the correction and then, if you are content with the results, re-save as HDF5 to “burn-in” the correction.
Go back to the main page