


This page was last revised for version 5.0.11.

API Documentation
The complete API is hosted at javadoc.scijava.org/SNT (release builds; updated on major releases) and at morphonets.github.io/SNT/ (always reflects the latest source).
Script SNT with an AI Agent
SNT ships a ready-to-use skill (a portable prompt file) that primes an AI coding agent (Claude, Gemini, Copilot, Codex, etc. and other agents with web access) with SNT’s conventions, API patterns, and anti-patterns. Paste this into your agent’s chat to get started:
Fetch https://raw.githubusercontent.com/morphonets/SNT/refs/heads/main/SKILL.md, follow its rules, then help me script SNT.
If your agent lacks web access, use Scripts › Develop › Download Agent Skill (SKILL.md)… to save the file (by default into a folder named snt), and place it in your agent’s skills directory (e.g., .claude/skills/snt/SKILL.md) or paste its contents directly. Agents can also use the Develop helper scripts to look up the API installed in your Fiji and to inspect the state of an SNT session. See Agentic Scripting for details.
SNT Scripts
A key feature of SNT is its extensibility via scripts. This section provides an overview to the ever-growing list of SNT scripts. These can be accessed through the Plugins › NeuroAnatomy › Neuroanatomy Shortcut Window, the Scripts menu in the main dialog, or the Templates › Neuroanatomy menu in the Script Editor. Typically, holding ⇧ Shift while selecting a script from a menu outside the Script Editor will open it.
SNT Scripts are intentionally written in multiple languages to demonstrate flexibility, but the majority is written in Groovy and Python (Jython), for no other reason that those seem to be the most commonly used language by its developers. Script parameters are typically used for simpler routines.
Bundled Templates
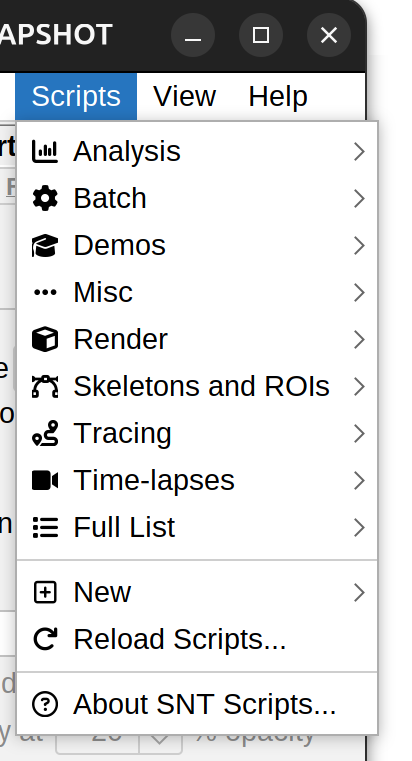
Scripts menu in main dialog
There are 50+ scripts currently bundled in SNT. These are organized into non-rigid categories: Analysis (typically handling quantifications) , Batch (Bulk processing of files), Demos (teaching examples), Develop (helpers for script and agent development, see below), Render (visualizations), Skeletons & ROIs (pixel-based analyses), Tracing (Tracing-related tasks), and Time-lapses (time-lapse utilities).
Bundled scripts can be accessed in two ways:
- Scripts menu in the main SNT dialog and SNT Shortcuts window (hold ⇧ Shift while selecting a script to have it open in the Script Editor)
- In the Templates › Neuroanatomy › list in the Script Editor
Your script can also be bundled with SNT, or made available through the Neuroanatomy update site. Did you write a useful routine? Please announce it, or submit a pull request so that it can be distributed with Fiji!
Adding Scripts to SNT
There are a couple of ways to have your own scripts appear in SNT’s Scripts menu:
Any script saved into Fiji’s “scripts” subdirectory containing SNT in the filename (e.g., C:\Users\user\Desktop\Fiji.app\scripts\My_SNT_Script.py or /home/user/Fiji.app/scripts/My_SNT_Script.py) will be listed in Scripts menu:
-
Go to Scripts › Develop › New Script from Template… from the SNT dialog. You can choose to open an instance of Fiji’s Script Editor with preloaded boilerplate code in the scripting language of your choice or to assemble your boilerplate using the Script Recorder
-
Save the script in Fiji.app/scripts/ including ‘SNT’ anywhere in its file name
-
Run Scripts › Reload…, and your new script should appear in the full list of scripts found at Scripts › Full List….
Develop Menu
The Scripts › Develop menu groups tools for writing scripts, whether by hand or with an AI agent:
- New Script from Template… and New Script from Clipboard… open the Script Editor with boilerplate code or with the code in your clipboard
- REPL opens the REPL
- API Lookup and Inspect Session run the helper scripts described below
- Download Agent Skill (SKILL.md)… saves SNT’s agent skill to disk
API Lookup
Lists the public API (sc.fiji.snt.*) of the SNT version installed in your Fiji, so that class and method names do not need to be guessed. The Mode parameter defines what is listed: search (classes and methods matching a keyword), class (constructors, methods and fields of a class), classes (classes of a package) or packages. Query is the keyword, class name or package name (case is ignored), and Output can be Console, JSON or Text window. Deprecated members are omitted unless Include deprecated API is checked. If a class is not found (e.g., it was renamed), similar names are suggested.
Inspect Session
Reports the state of the SNT session in which it runs as JSON: SNT and Java versions, the image being traced (dimensions and calibration), and the number of paths and trees (with cable length, branches and tips for each tree). A reconstruction can be loaded first, and the report can be saved to a file. Run from the Script Editor or the menu, it reports on your live session. Run headlessly, it reports on a fresh one.
Running the Helpers Headless
Both scripts are bundled in SNT’s jar (script_templates/Neuroanatomy/Develop/) and can be run from the command line, which is how agents use them:
fiji --headless --run API_Lookup.groovy 'mode="class",query="TreeStatistics",output="JSON"'
fiji --headless --run Inspect_Session.groovy 'reconstruction="/path/to/cell.swc"'
Output is always printed to the console unless Text window is chosen (and a GUI is available).
Agentic Scripting
An AI agent can write, run and debug SNT scripts for you, provided it knows SNT’s conventions and can check its work against the Fiji you have installed. Getting there takes four steps:
- Give the agent the skill. Paste the one-line prompt from above, or save the skill with Scripts › Develop › Download Agent Skill (SKILL.md)… into your agent’s skills directory
- Let it reach your Fiji. Agents with a shell (e.g., Claude Code, Codex) can run Fiji headless and use the Develop helpers to verify class names and inspect results. Chat-only agents cannot: paste their script into the Script Editor, run it, and paste back any error
- State the goal, inputs and outputs. What data you have, what you want measured or drawn, and where the result should go
- Iterate on test data first. Ask the agent to try the script on SNT’s demo data (e.g.,
snt.demoTree()), then on one of your files, and only then on the whole batch
Things that help: ask for script parameters (#@) instead of hard-coded paths so the script can be reused; ask it to adapt one of the bundled templates rather than starting from scratch; and always sanity-check a result you know (e.g., a cell you have measured before). Agents can be confidently wrong, so review a script before running it on irreplaceable data.
Example Conversation
The following conversation shows a typical flow for a common task. Note how the agent checks the API instead of relying on memory, tests on demo data, and asks before touching the real files.
You:    I have a folder of SWC files. I want a CSV with the cable length, number
        of branches and mean branch length of each cell. Can you write a script?

Agent:  Sure. Two quick questions: should it also search subfolders, and are
        the files calibrated in microns (I would report lengths in the units
        stored in the reconstructions)?

You:    No subfolders. Units are whatever is in the files.

Agent:  Understood. I'll adapt SNT's "Measure Multiple Files" template and first
        confirm the method names in your Fiji.
        > API_Lookup.groovy mode="class" query="TreeStatistics" output="JSON"
        TreeStatistics has getMetric(String) and getSummaryStats(String), with
        constants LENGTH, N_BRANCHES and BRANCH_LENGTH. Here is the script:

        #@ File (label="Input folder", style="directory") dir
        #@ File (label="Output CSV", style="save") csv
        import sc.fiji.snt.Tree
        import sc.fiji.snt.analysis.*
        table = new SNTTable()
        dir.eachFileMatch(~/.*\.swc/) { f ->
            stats = new TreeStatistics(new Tree(f.absolutePath))
            table.insertRow(f.name)
            table.appendToLastRow("Cable length", stats.getMetric(TreeStatistics.LENGTH))
            table.appendToLastRow("N branches", stats.getMetric(TreeStatistics.N_BRANCHES))
            table.appendToLastRow("Mean branch length",
                stats.getSummaryStats(TreeStatistics.BRANCH_LENGTH).getMean())
        }
        table.save(csv.absolutePath)

        I'll test it on a demo cell before using your folder.

Agent:  > fiji --headless --run measure.groovy 'dir="/tmp/demo",csv="/tmp/out.csv"'
        The demo file produced a single row of plausible values that match the
        statistics SNT reports for that cell in its own dialogs. Running
        it on your folder now... done. 48 files measured, saved to results.csv.
        One file (cell_17.swc) has a single path and thus a branch length of
        zero: you may want to check it.

You:    Great. Add the number of tips as well.

Agent:  Done: added an "N tips" column (TreeStatistics.N_TIPS). The updated
        script and CSV are saved alongside the previous ones.
Script Recorder
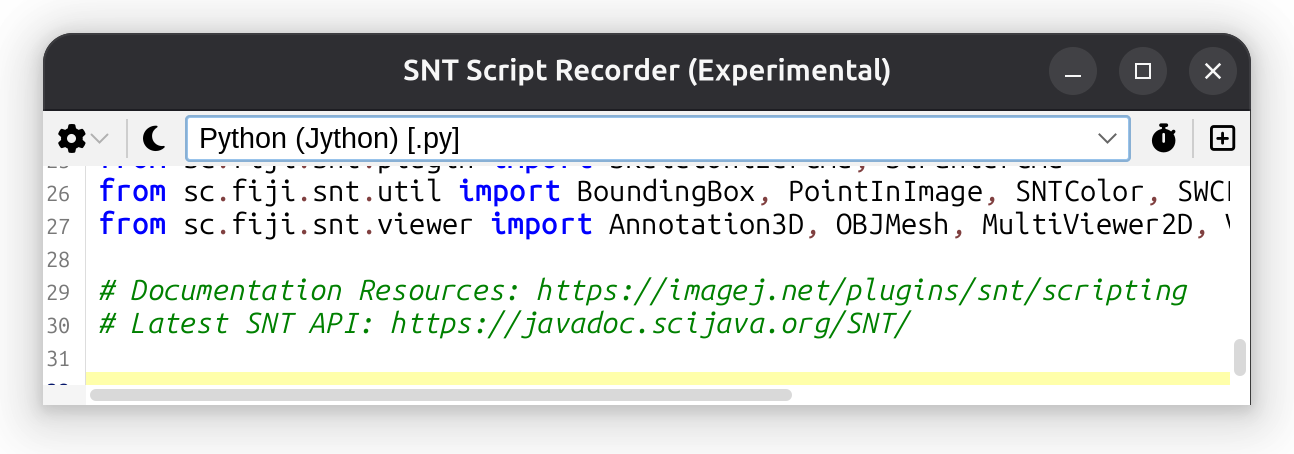
SNT features a script recorder that similarly to ImageJ’s macro recorder converts menu and button clicks into executable code. Note however that while the recorder captures simple commands well, it struggles to capture those that are more complex or particularly interactive.
The goal of the recorder is twofold: 1) simplify prototyping of new scripts and 2) Log your actions during a tracing session. This is particularly useful to assemble reproducible records.
There are two ways to start the recorder: Scripts › Record… or by pressing the Record button in Command Palette.
As a rule-of-thumb, commands that are simple or do not involve prompts record flawlessly. This includes setting filters for visibility of tags, applying Tags, or filtering paths in the Path Manager. Commands for fully automated reconstructions, or generating secondary layers should work well. However, many others remain limited.
REPL
SNT’s Scripting REPL (Read–Eval–Print Loop) is opened using Scripts › Develop › REPL. It is a Script Interpreter instance with pre-initialized variables that are entry-points to the API of current SNT session. The REPL serves as a commandline prompt with access to all of SNT classes.
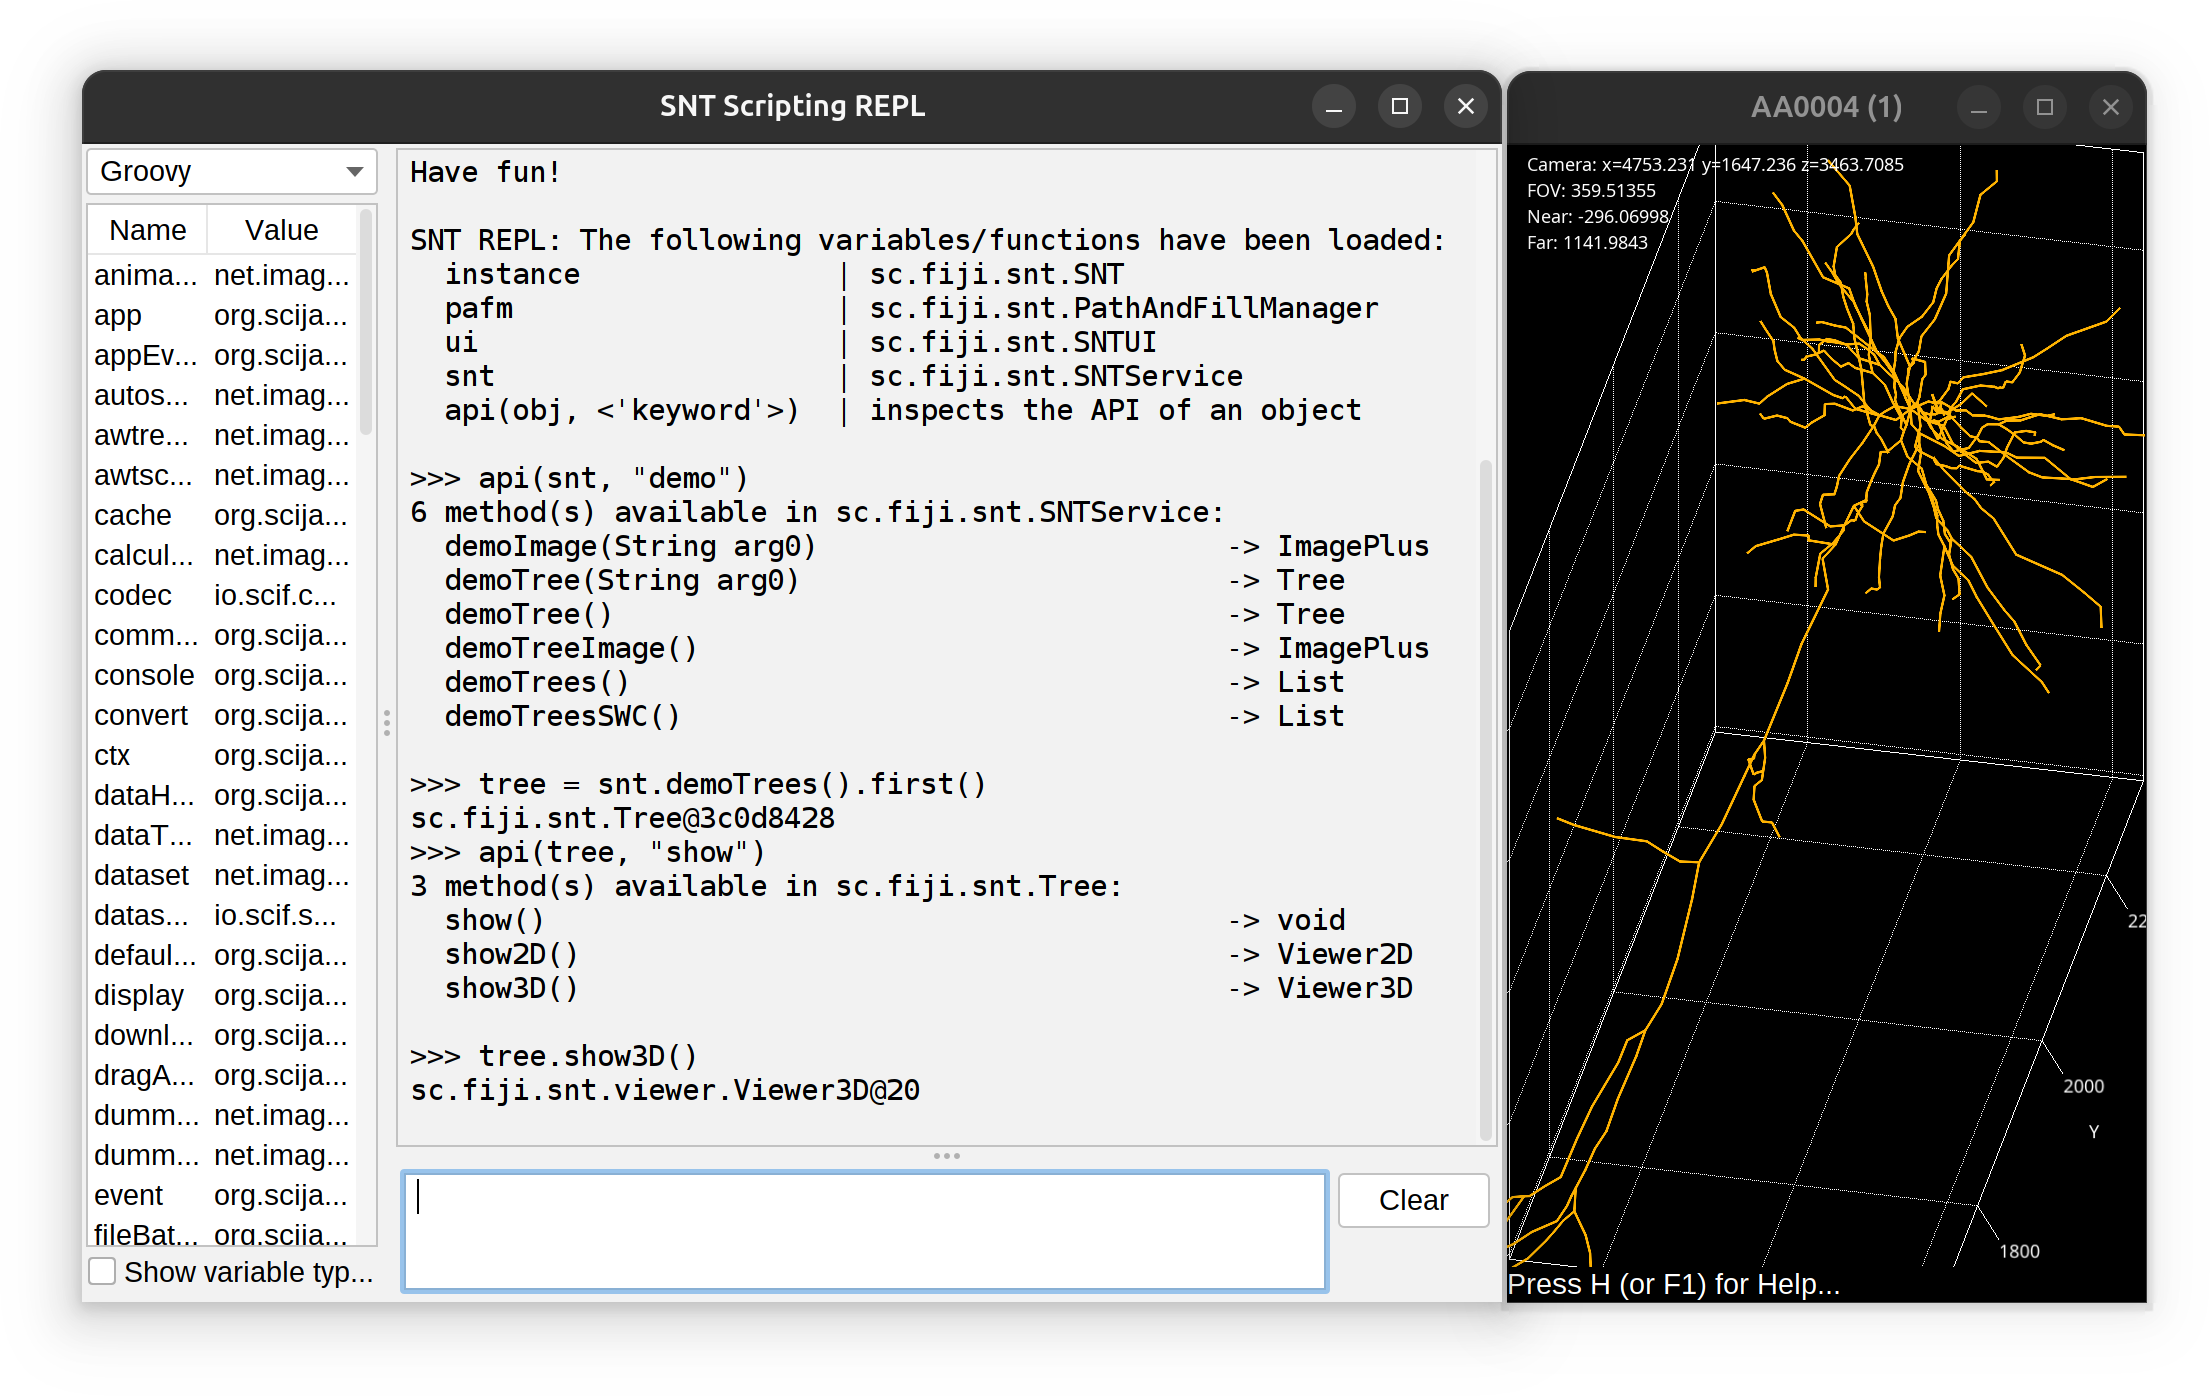
The REPL has access to all of SNT’s API. The prompt does not feature auto-completion but you can use api(object, 'optional keyword') to obtain a list of methods associated with an object. Example: To find out all of the ‘demo’ methods in SNTService, one would use:
>>> api(snt, "demo")
7 method(s) available in sc.fiji.snt.SNTService:
  demoImage(String arg0)                -> ImagePlus
  demoImgPlus(String arg0)              -> ImgPlus
  demoTree()                            -> Tree
  demoTree(String arg0)                 -> Tree
  demoTreeImage()                       -> ImagePlus
  demoTrees()                           -> List
  demoTreesSWC()                        -> List
Analysis of External Data
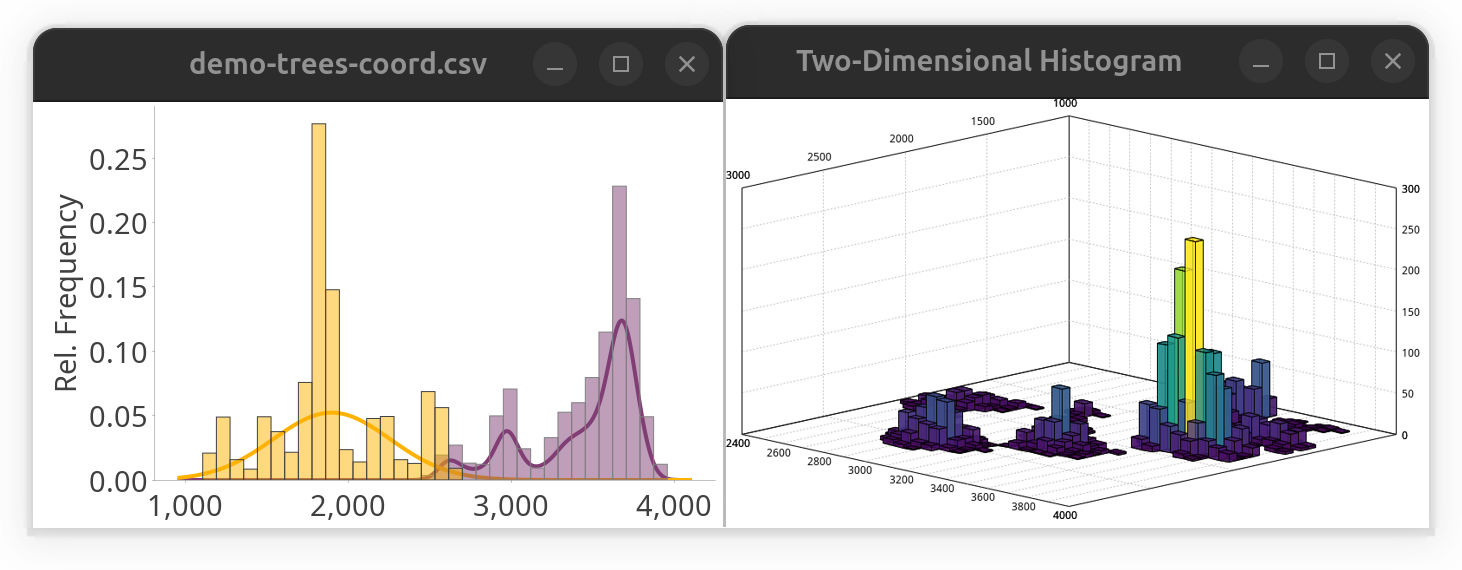
While SNT is not a statistical analysis software, it does offer some convenience methods to parse third-party data. E.g., to take a quick peek at a distribution of tabular values, one could use the following snippet to plot a histogram while fitting a Gaussian mixture model to the data. While it is written in Groovy, it would run almost verbatim in any other scripting language because it relies only on the SNT API.
import sc.fiji.snt.analysis.*

path = "https://raw.githubusercontent.com/morphonets/misc/master/dataset-demos/csv/demo-trees-coord.csv" // url or path to local file
table = SNTTable.fromFile(path) // read data into a table
headers = ["y", "z"] // headers of columns to be plotted
histogram = SNTChart.getHistogram(table, headers, false) // table, col. headers, radial plot?
histogram.setGMMFitVisible(true) // fit Gaussian mixed model to data
histogram.show() // display histogram
Alternatively, the same data could be plotted in a two-dimensional histogram:
import sc.fiji.snt.analysis.*
import sc.fiji.snt.util.*

path = "https://raw.githubusercontent.com/morphonets/misc/master/dataset-demos/csv/demo-trees-coord.csv" // url or path to local file
table = SNTTable.fromFile(path) // read data into a table
SNTChart.showHistogram3D(table.get("y"), table.get("z"), ColorMaps.get("viridis")) // show 3D histogram of the same columns using viridis LUT
Note that this approach would work for both local and remote files. The result of both snippets side-by-side:
Python Notebooks
Direct access to the SNT API from the Python programming language is made possible through the PySNT. This enables full integration between SNT and any library in the Python ecosystem (numpy, scipy, etc.). PySNT’s Tutorial Notebooks include several tutorials at different complexity levels.
Fiji Scripting
Scripting in Fiji’s script editor is perhaps best done using Groovy and Jython. The latter as quite good autocompletion for objects that are not script parameters. The best way to start a new script is by choosing a boilerplate Scripts › Develop › New Script from Template… in SNT or Neuroanatomy › Boilerplate in the script Editor. These templates hold boilerplate code in several programming languages (namely BeanShell, Groovy and Jython), and include the most essential imports and script parameters to facilitate rapid development.
For serious scripting, Fiji’s Script Editor may not be powerful enough for your needs. The most robust way to script SNT in Groovy is to use an IDE: the SNT scripting project sets one up for you.
Further Resources
As mentioned, SNT’s source code repository includes both Bundled Template Scripts and Jupyter notebooks. But additional snippets, examples, and further tutorials do exist online, including:
Example
Programmatic control over an open instance of Reconstruction Viewer (either called from within SNT or as a standalone application) can be achieved by selecting the Scripting › Record Script… command. It will then open an instance of SNT’s script recorder loaded with a boilerplate template containing the most essential imports and script parameters. The default programming language for this template can be chosen from the Recorder’s drop-down menu.
The following script exemplifies how to extend the boilerplate template to control the Viewer in real-time.
# Last tested: 2024-07-12, SNTv4.3.0pre
#@ Context context
#@ DatasetService ds
#@ DisplayService display
#@ ImageJ ij
#@ LogService log
#@ LUTService lut
#@ SNTService snt
#@ UIService ui

from sc.fiji.snt import Path, PathAndFillManager, SNT, SNTUI, Tree
from sc.fiji.snt.analysis import GroupedTreeStatistics, MultiTreeStatistics, NodeStatistics, TreeStatistics,\
            ConvexHullAnalyzer, PersistenceAnalyzer, ShollAnalyzer, StrahlerAnalyzer, NodeColorMapper,\
            TreeColorMapper, PathProfiler, PathStraightener, RoiConverter, SkeletonConverter, SNTChart, SNTTable
from sc.fiji.snt.analysis.graph import DirectedWeightedGraph
from sc.fiji.snt.analysis.sholl.parsers import TreeParser
from sc.fiji.snt.annotation import AllenCompartment, AllenUtils, VFBUtils, ZBAtlasUtils
from sc.fiji.snt.io import FlyCircuitLoader, MouseLightLoader, NeuroMorphoLoader
from sc.fiji.snt.plugin import SkeletonizerCmd, StrahlerCmd
from sc.fiji.snt.util import BoundingBox, PointInImage, SNTColor, SWCPoint
from sc.fiji.snt.viewer import Annotation3D, OBJMesh, MultiViewer2D, Viewer2D, Viewer3D

# Documentation Resources: https://imagej.net/plugins/snt/scripting
# Latest SNT API: https://javadoc.scijava.org/SNT/

# Rec. Viewer's API: https://javadoc.scijava.org/SNT/index.html?sc/fiji/snt/viewer/Viewer3D.html
# Tip: Scene details can be printed to Console using `viewer.logSceneControls()` or recorded
# by pressing 'L' (mnemonic: [L]og) when viewer is frontmost
# If opening this template from the standalone RV, the instance ID of the Viewer (e.g., 2)
# will be automatically passed as a parameter to getRecViewer()
viewer = snt.getRecViewer()

# Added code begins here ##################################################################
import time

def do_stuff(viewer):

    viewer.logSceneControls()

    # Load a neuron from Mouse Secondary Motor Area from the MouseLight database.
    loader = MouseLightLoader("AA0100")
    if not loader.isDatabaseAvailable():
        ui.showDialog("Could not connect to ML database", "Error")
        return
    if not loader.idExists():
        ui.showDialog("Somehow the specified id was not found", "Error")
        return

    # Extract nodes with tag "axon".
    axon = loader.getTree('axon')
    # Do the same for the dendrites.
    dendrites = loader.getTree('dendrites')

    # Load the Allen CCF Mouse Reference Brain and add it to the scene
    viewer.loadRefBrain('mouse')

    # Add both Trees to the scene
    viewer.addTree(axon)
    dendrites.setColor('cyan')
    viewer.addTree(dendrites)

    # Get the OBJMesh object representing the maximum depth Allen CCF compartment
    # containing the soma point and add it to the scene.
    soma_annotation = loader.getSomaCompartment()
    viewer.addMesh(soma_annotation.getMesh())

    # Enforce side perspective.
    viewer.setViewMode('side')

    # Next, we will apply a color mapping to the axon
    # using branch order as the metric and the Ice Lut.
    # Make an instance of TreeColorMapper using SciJava context.
    mapper = TreeColorMapper(context)
    # Get the net.imglib2.display.ColorTable object.
    lut = mapper.getColorTable('Ice.lut')
    # Color code the axon and render in scene.
    # The min and max values returned by the mapper are used
    # to set the range of the color bar legend.
    bounds = viewer.colorCode(axon.getLabel(), TreeColorMapper.STRAHLER_NUMBER, lut)
    viewer.addColorBarLegend(lut, bounds[0], bounds[1])
    # Display a text annotation of the cell ID and metric used by the mapper.
    scene_annotation = "{}: Branch Order".format(axon.getLabel())
    viewer.addLabel(scene_annotation)

    # Begin a rotation animation for the objects in scene.
    viewer.setAnimationEnabled(True)
    # Wait some time before applying a new color mapping
    # based on path distances, using a different LUT (Fire).
    time.sleep(5)

    lut = mapper.getColorTable('Fire.lut')
    # Remap the axon Tree and update scene.
    bounds = viewer.colorCode(axon.getLabel(), TreeColorMapper.PATH_DISTANCE, lut)
    viewer.addColorBarLegend(lut, bounds[0], bounds[1])
    scene_annotation = "{}: Path Distance".format(axon.getLabel())
    viewer.addLabel(scene_annotation)


do_stuff(viewer)
Generating Filtered Images in Bulk
This section describes how to generate Filtered Images outside SNT in bulk. Note that there are many tutorials on this topic. Arguably, the easiest way to process multiple images is to 1) record a macro that processes a single image, then 2) wrap it in a loop to iterate over all files in a directory. For example, using IJ1 macro language:
d = getDirectory("Select a directory");
files = getFileList(d);
extension = ".tif";

for( i = 0; i < files.length; ++i ) {
    filename = files[i];
    if( endsWith(filename,extension) ) {
        l = lengthOf(filename);
        el = lengthOf(extension);
        basename = substring(filename,0,l-el);
        expected_window_name = "result";
        output_filename = d + File.separator + basename + ".tubes.tif";
        open(filename);
        run("Gaussian Blur...", "sigma=2 scaled stack"); // processing step here
        selectWindow(expected_window_name);
        saveAs("Tiff", output_filename);
    }
}
The same process can be accomplished more completely in a script using ImageJ Ops. For example, in Jython: