The content of this page has not been vetted since shifting away from MediaWiki. If you’d like to help, check out the how to help guide!
Suppose you wish to gather measurements from an image using real spatial units (µm, miles, etc), rather than just in “pixels”. If your image data was in a format that contained spatial calibration meta data, and Fiji (maybe using bio-formats) was able to read it, then your image might already be spatially calibrated. You can see that in the info bar at the top of the image, as there will be micro meters or some other spatial unit next to the numbers. If the image is NOT spatially calibrated already then the dimension will be labelled “pixels”. If that is so, then you need to spatially calibrate the image before you can measure distances and areas in it!
The process of spatial calibration involves calibrating a single image against known values, then applying that calibration to your uncalibrated image. This assumes, of course, that both images are at the same magnification. Here’s an example: The stage micrometer image on the left shows 100 micrometers. The same magnification was used to take the image on the right, a stopped spinning disk confocal scan head. We want to measure the distance between the spots and the area of the spots.
Image of a stage micrometer

Image of a stopped spinning disk confocal scanner head
-
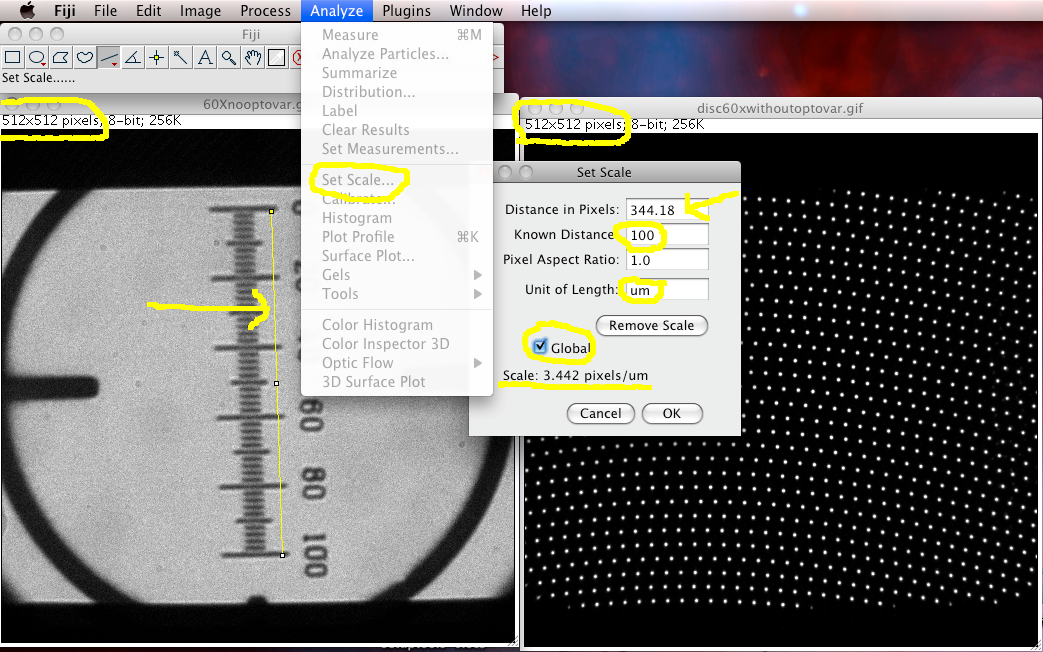
Open the stage micrometer image, and the uncalibrated test image. Select the stage micrometer image. Notice that the images are not spatially calibrated, and their scale is reported in the top info bar in pixels, not real spatial units.
-
Use the Line Selection tool to draw a selection line of a known length on the stage micrometer image.
-
Go to menu “Analyze - Set Scale”
-
Set the known distance of the line you drew in the “Know Distance” Field. The tool knows how many pixels long the line you drew was!
-
Set the units of the measurement (um, mm, whatever)
-
Now turn on the “Global” option by clicking the check box, so all open images will take the same spatial calibration when you click OK. (If not then only the image with the line selection is calibrated.
-
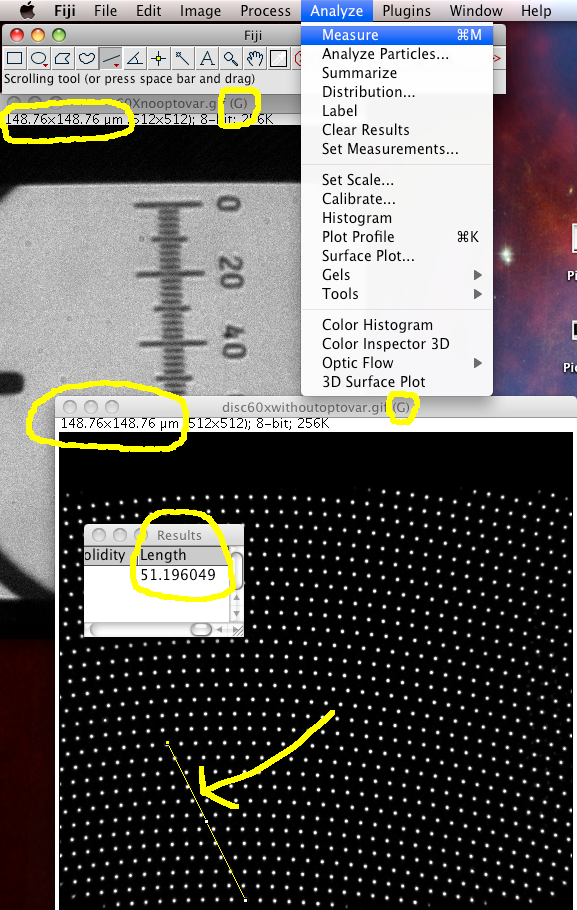
Now you will see that the test image is spatially calibrated. In the info bar at the top of the image, the numbers have spatial units! Notice the (G) in the name bar of both the images. That means calibration is being set the same for all open images.
-
Now make a line or area selection. If you use the measure function Analyze › Measure or ⌃ Ctrl + M, the results will be spatially calibrated.
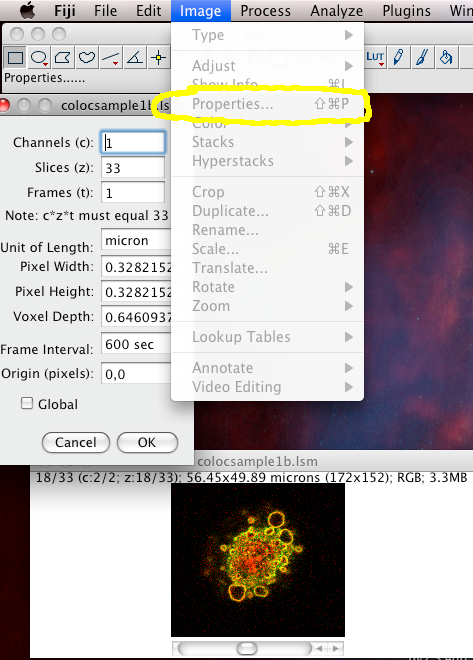
If you want to see the spatial calibration of an image, or even change it manually, you can use the “Image-Properties” menu function to view and change the xyz voxel sizes, time calibration, number of z slices, (colour) channels, and time point interval. This is handy if you need to rearrange the dimensionality of a stack of images (also, use the “Image-Hyperstacks” menu item functions for that).
- Q) Can we measure the real distance between the spots on the test image?
- Q) Can you measure the area of one of the spots?
- Q) The pixel size on the camera CCD chip used to take the images is 16 micrometers in x and y. What is the real magnification of the 60x lens that was used?