The content of this page has not been vetted since shifting away from MediaWiki. If you’d like to help, check out the how to help guide!
Introduction
This tutorial describes’ how to produce an image stack (or 3D image) from an input sequence of tiles’ using the Fiji plugins for stitching and registration.
Given the origin of the images used in this tutorial, the transformation between tiles can be modeled as a pure translation to generate the mosaic (of a slice). The transformation between slices can also be modeled as pure translation.
In the initial setup we need to ensure:
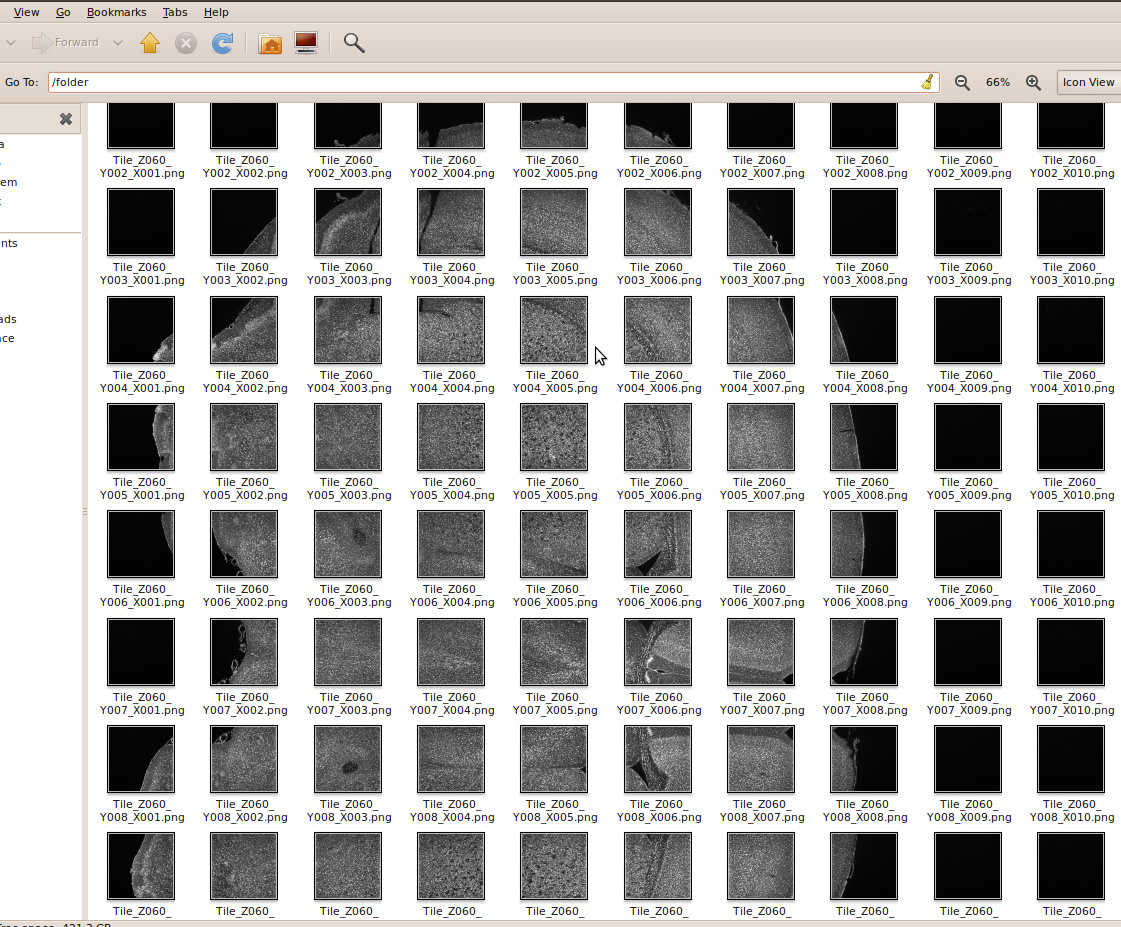
- All the images are stored in the same folder and have an intuitive sequencing name (such as Tile_X(xxx)_Y{yyy}_Z{zzz}.png), more information below.
- All slices of the stack are formed by a rectangular grid (NxM tiles) of a equally sized tiles.
In our test case, we have 19,600 images, i.e. 140 sections of 10x14 tiles:
Stitching
As a first step, we start Fiji and go to Plugins › Stitching › Stitch Sequence of Grids of Images:
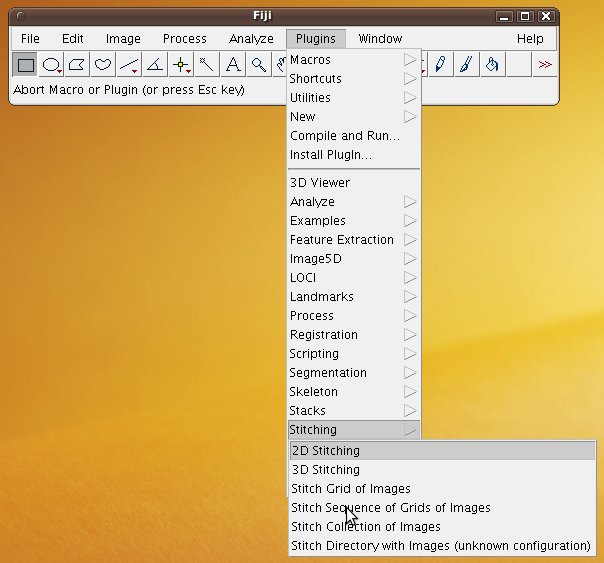
Then, the next dialog pops up to choose the stitching parameters:
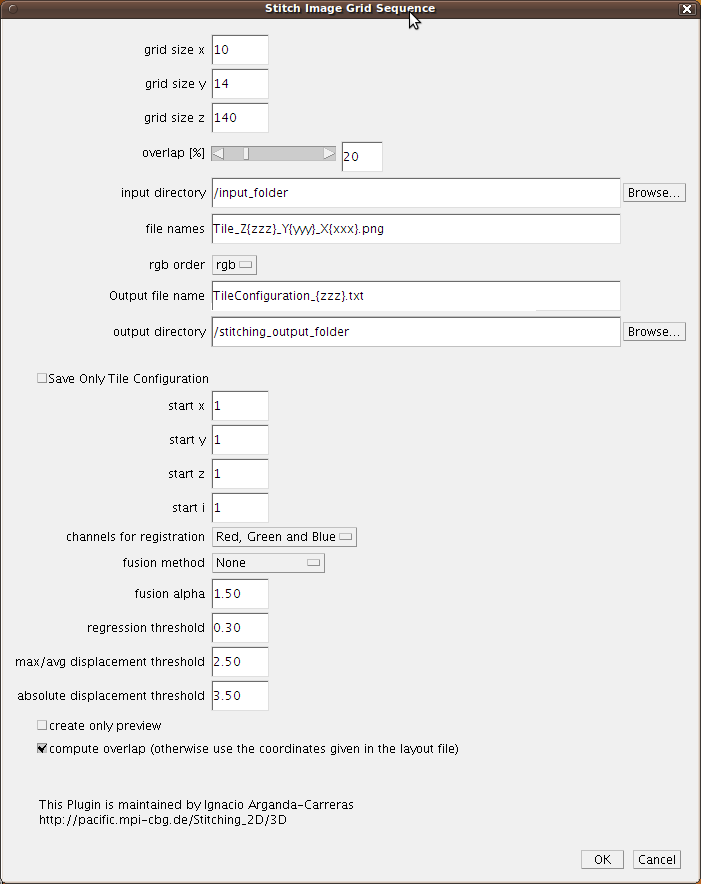
Here we have to set some important parameters (the ones we don’t mention can be left with their default values):
- Grid size in X, Y and Z: number of tiles per column, row and section. In our case: 10, 14 and 140.
- The input directory: the folder containing the image sequence. Notice here that you can drag and drop the folder into the text box and the path will be copied.
- The file names: the template of the file names. The Stitching plugin accept two types of templates, one with a specific number for each x, y or z position, and one with an absolute number (i). In this case, our files will have the template Tile_Z{zzz}_Y{yyy}_X{xxx}.png. That means the file corresponding to the first section, first column, first row, will be called Tile_Z{001}_Y{001}_X{001}.png.
- The output directory: the folder to store the resulting stitched images.
- The fusion method: the way the plugin will treat the overlapping areas. In our test case we won’t fusion the images, so we select None.
- The regression threshold: the number below with the plugin won’t accept correlation values as valid. The default value (0.3) is quite low, but in our test case works perfect.
We then click on OK and the stitching will take place. The plugin will display all intermediate results until the whole sequence has been stitched.
After processing the last grid/section, the plugin will display the following message:
As result, the stitched images are stored in the output folder:
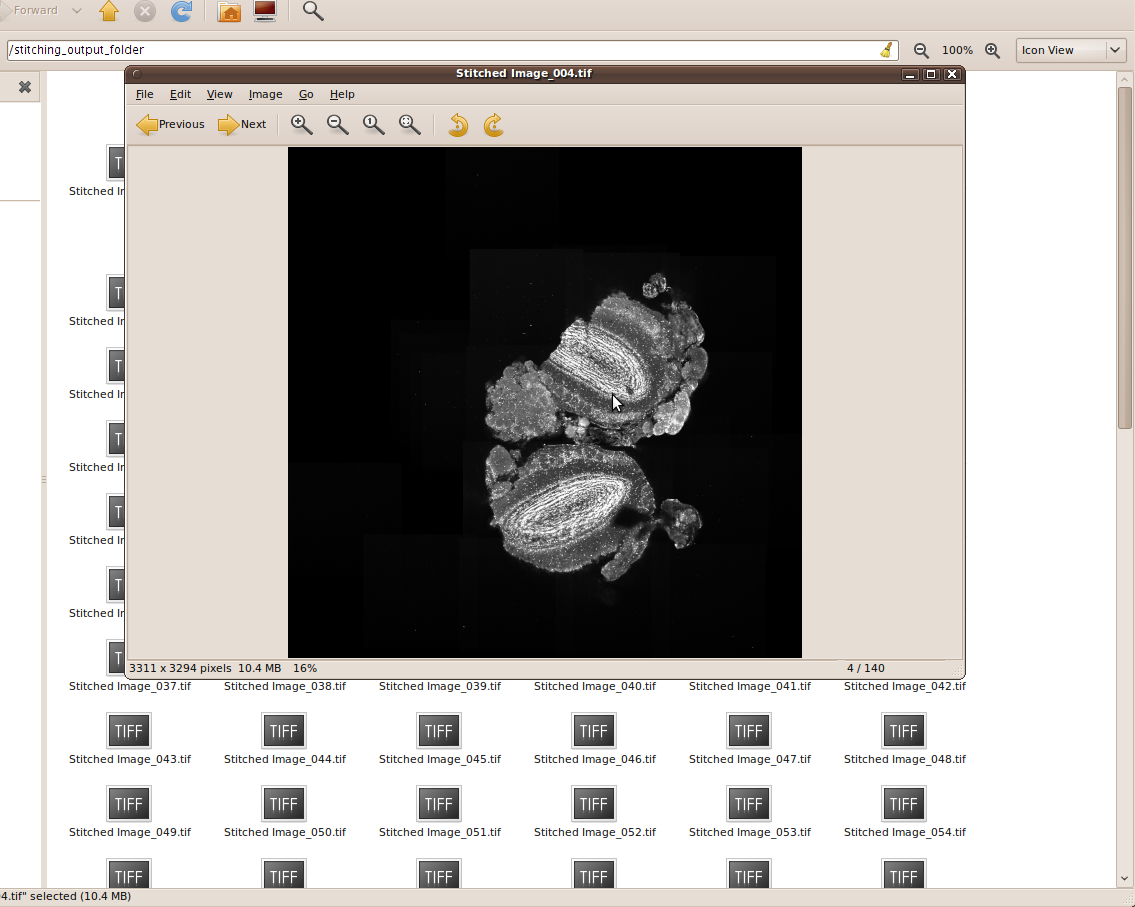
Performance: The stitching of the 19,600 images (732x732 pixels each) took around 117 minutes in a Intel Core Duo at 3GHz, 4GB of RAM, running on Linux 64-bit.
Alignment
For the alignment of the stitched slices we will use the plugin Register Virtual Stack Slices, under Plugins › Registration:
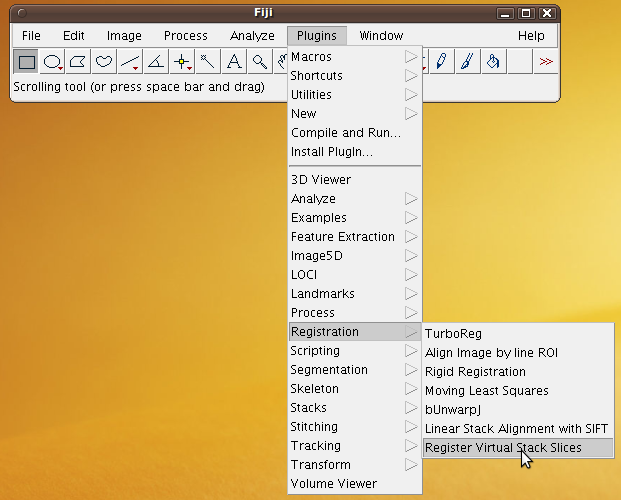
As before, a dialog will pop up where we have to choose the registration parameters:
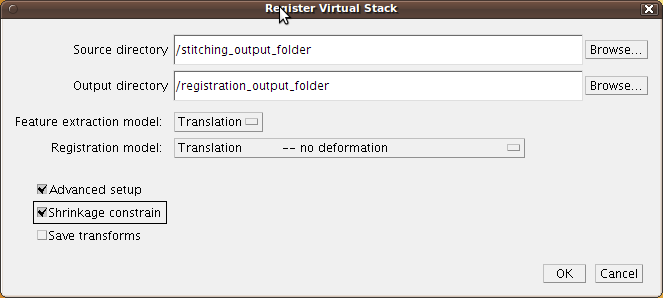
The relevant parameters are:
- The source directory: we set it to the stitching output folder so the plugins will align the stitched images.
- The output directory: we set it to the folder where we want to store the final aligned slices.
- The feature extraction and registration models: in this case, and as mentioned before, we only need a translation to model the transformation.
And we click on the first two check-boxes:
- Advanced setup, to specify the feature extraction parameters.
- Shrinkage constrain, in other registration models, this guaranties a non-shrinking registration. Since we chose translation, we don’t have this problem, but we checked this option anyways to guaranty a complete multi-thread registration.
When we click on OK, another dialog pops up to select the Feature extraction parameters:
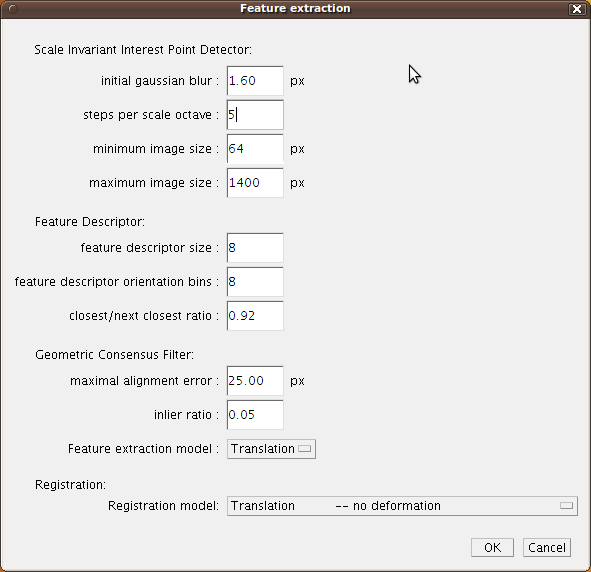
Here, we only increase the steps per octave scale to 5 to find more point candidates to correspondences, and the maximum image size to 1400 pixels, to use more image information.
NOTE: these values are usually a good choice, but they can be tuned when working with other types of images. For more details about the parameters, visit the registration plugin page.
We then click on OK and the alignment starts.
After few minutes (depending on the computer and number of CPUs), when the alignment is done, aligned images are saved to the specified output folder and results will be displayed as a virtual stack.
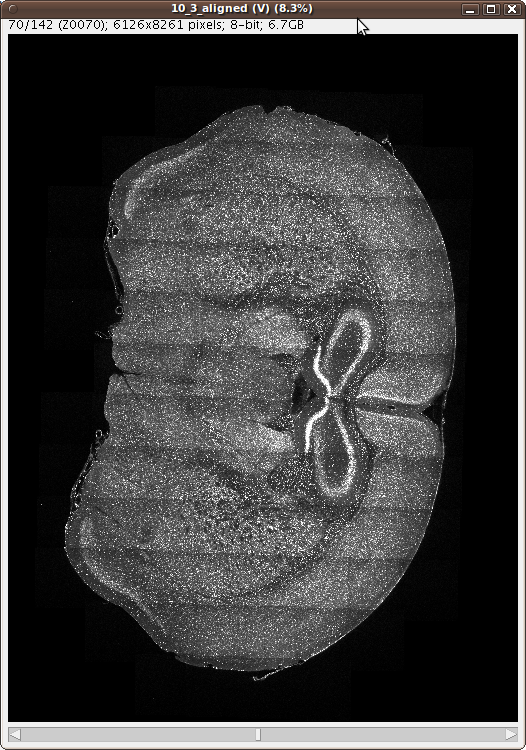
Performance: the alignment of the 140 slices (and their resizing) took around 20 minutes in a 8-CPUs Intel Core Duo at 3.4GHz, 32GB of RAM, running on Linux 64-bit.