This page describes a detector module for TrackMate that relies on Ilastik to segment objects in 2D or 3D. It is not included in the core of TrackMate and must be installed via its own update site.
Installation
For this module to work, you need three things:
-
Download and Install Ilastik on your machine. Follow the instructions on this page.
-
Subscribe to the ilastik update site.
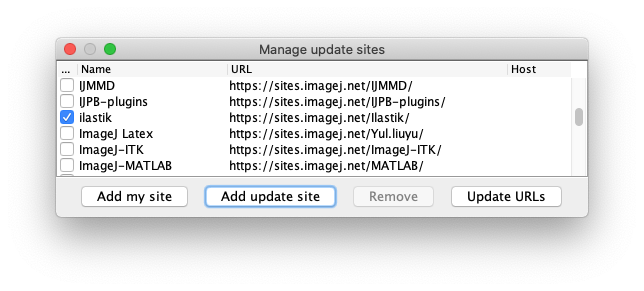
Run Fiji > Help > Update.
From the ImageJ Updater window, Open the Manage update sites window.
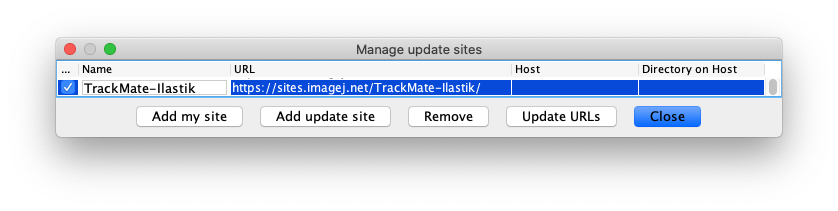
- And finally, subscribe to the TrackMate-Ilastik update site.
We rely on the capabilities of the ilastik Fiji import/export plugin, built by the ilastik team. It is documented in detail in the ilastik website.
Issue:
- If ilastik not installed in the default location, the path to executable must be specified in Fiji in Fiji > Plugins > ilastik > Configure ilastik executable location.
Preferences
ilastik allowed ressources on the system can be tuned in Fiji > Plugins > ilastik > Configure ilastik executable location. By default, it uses all ressources available. This can be heavy for some computer and can be tuned down, at the cost of the processing speed.
- number of threads ilastik can use
- maximum RAM ilastik can use
Tutorial
For this tutorial we will work with the Neisseria meningitidis bacterial growth dataset, that you can download on Zenodo.
![]()
The dataset contains the ILP file, which is the ilastik project file. We trained a pixel classifier on several images that Laure acquired previously, and that are distinct from the movie we will track. We will use the same ILP file in TrackMate so that it can run ilastik to yield objects.
Start trackmate
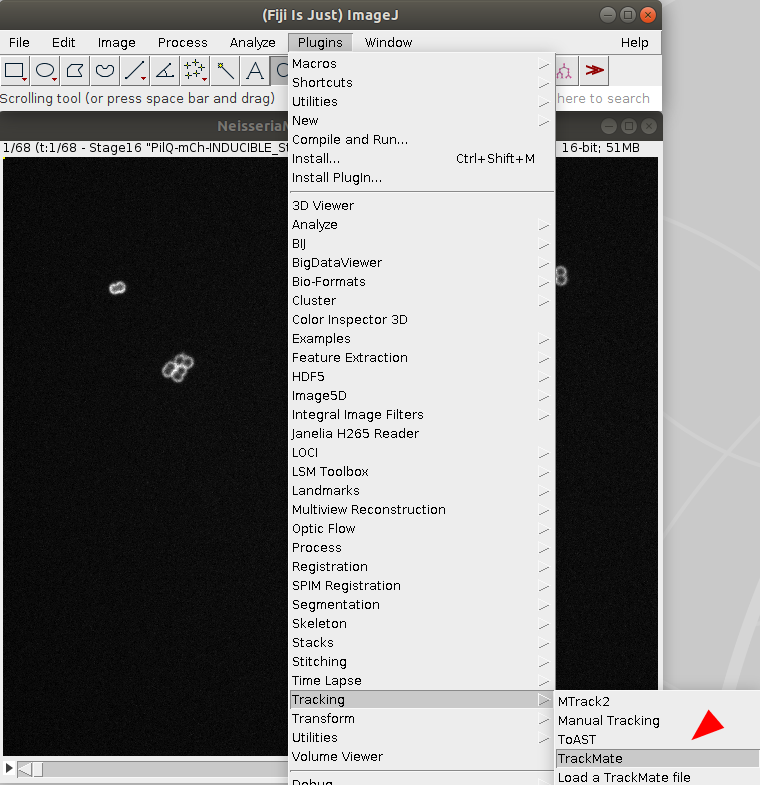
- Load the
NeisseriaMeningitidisGrowth.tifmovie into Fiji, and start TrackMate Plugins > Tracking > TrackMate.- (optional) specify a ROI with the selection tool of your choice.
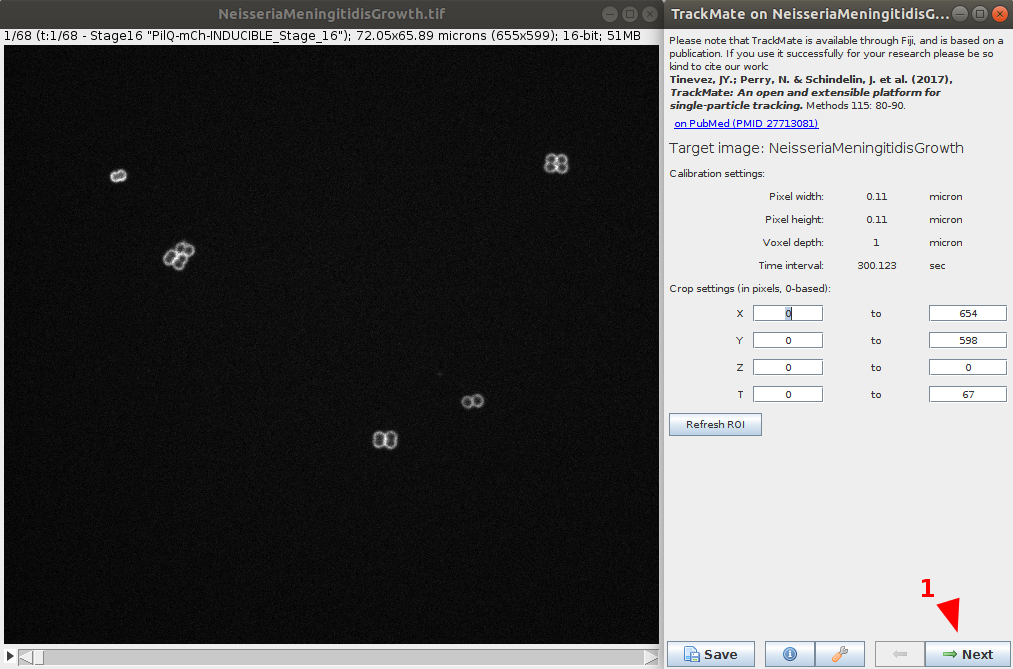
- After verifying the movie calibration settings are correct, go to the next step.
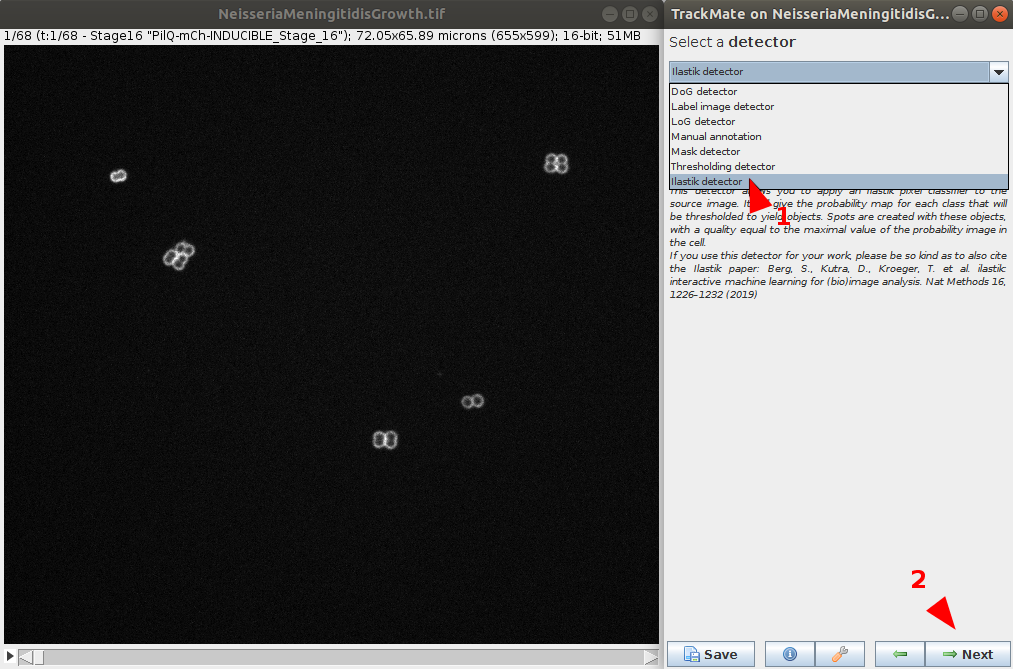
Select the detector
- In the Detector menu, choose the ilastik detector and go next.
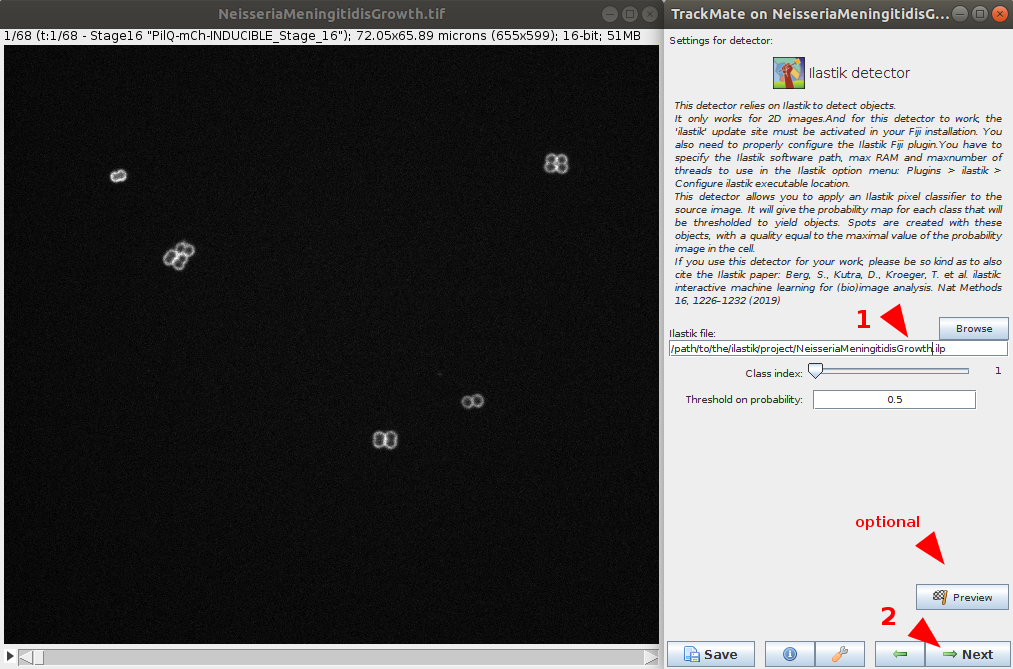
- Browse to the location to the NeisseriaMeningitidisGrowth pre-trained ilastik project file (e.g.
NeisseriaMeningitidisGrowth.ilpfile). Number of classes to detect and probability threshold can be defined. In this case, use the default values.- (optional) It is possible to test the detector and chosen parameters on the current timepoint using the preview button.
- If you want to use your ilastik model, please follow the ilastik pixel classifier tutorial.
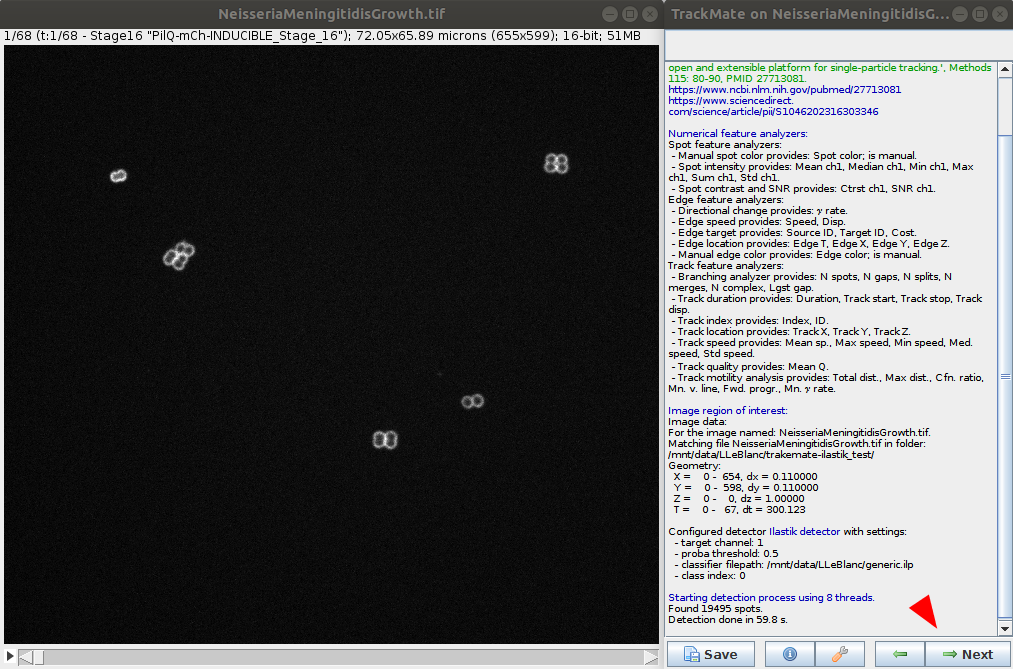
- The ilastik classifier will be applied to the data. Wait for the process to be done and go to the next step.
- Issues: a few WARNING and ERRORS in the console windows, in addition to DEBUG messages. No direct impact on the processing.
- You have the option to apply various filtering on computed features to remove some spots of the detection. This step has a direct impact on the quality of the tracking, it is worth to spend time on it to provide a clean spot detection before going to the next step.

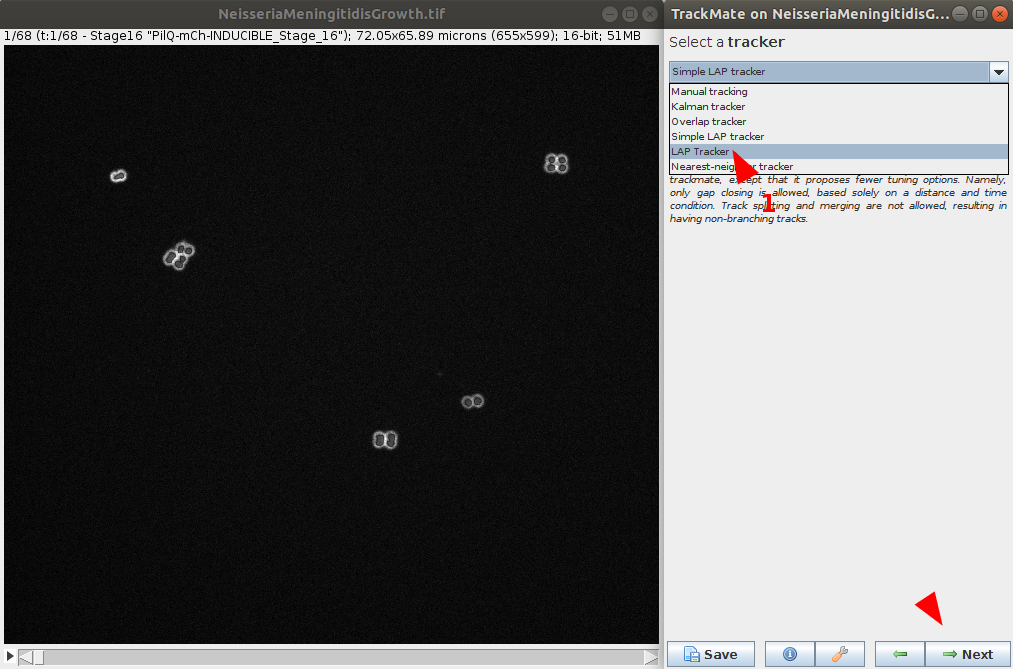
Select the tracker
- Now that objects are detected in each timepoint, we can select a tracker. Multiple choices are available and is dependent of the data to process. Please see the Tracker tutorial for more information on each tracker and help you decide which to choose. For this example, we will choose LAP Tracker as it allows split and merge behaviour.
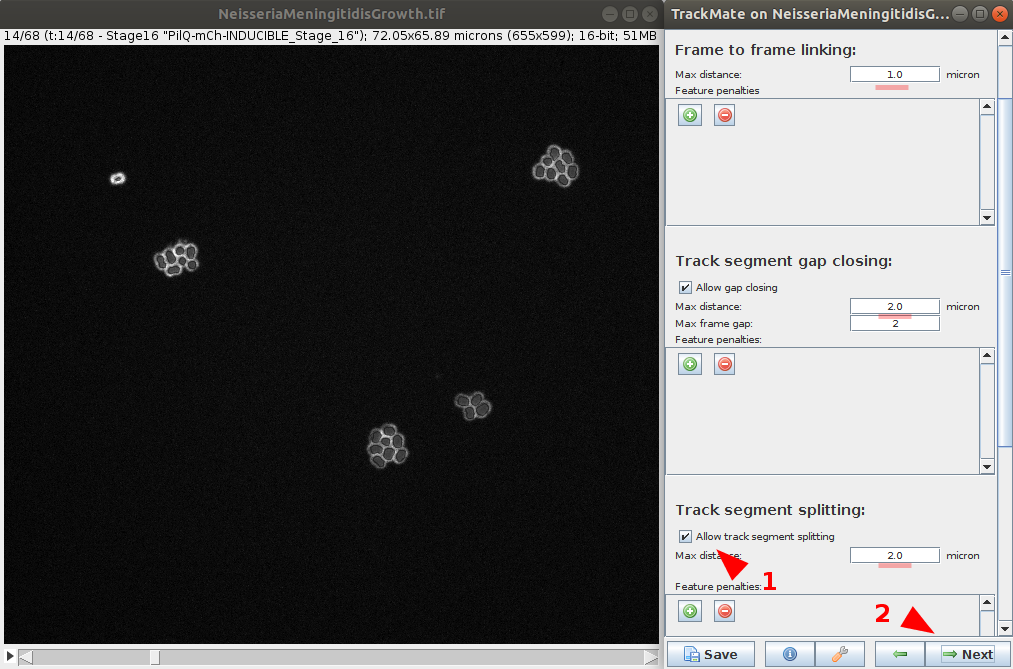
- Define tracker options. Those options depends on the chosen tracker and your data. In this example, as the LAP Tracker is use, we set Frame to frame linking to
1.0μmand gap closing at2.0μm. We will also enable segment spliting with a max distance to2.0μm. - Run the tracker. It is possible to return at the previous step to improve tracker parameters if needed. Continue to the next step.
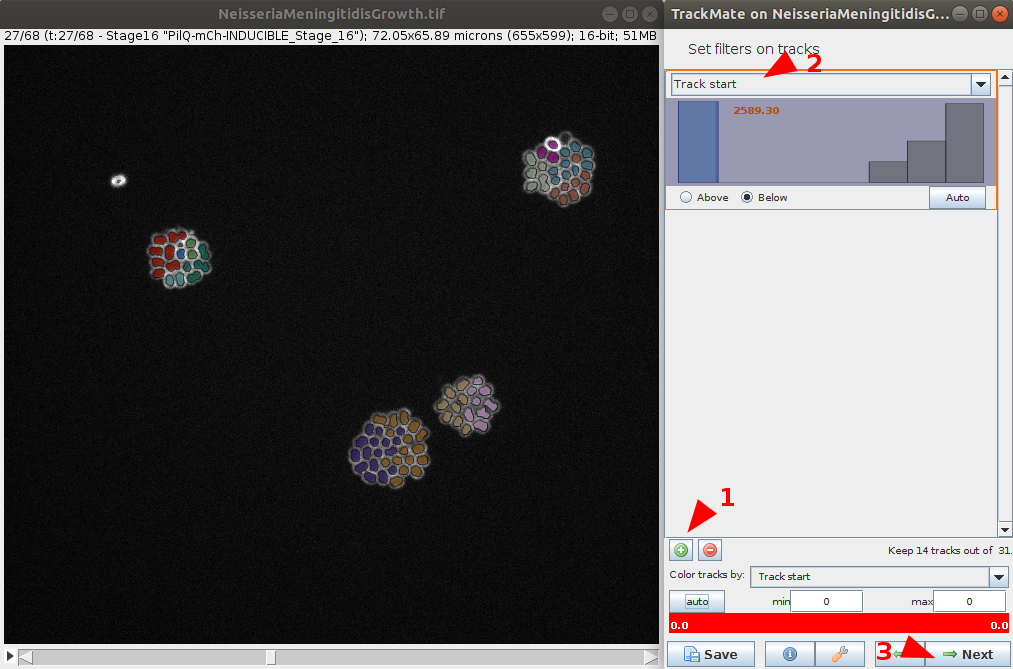
- Similarly as in the detection part, it is possible to filter the tracks based on various features. Here we can filter the Track start feature to only keep track which start at the first frame.
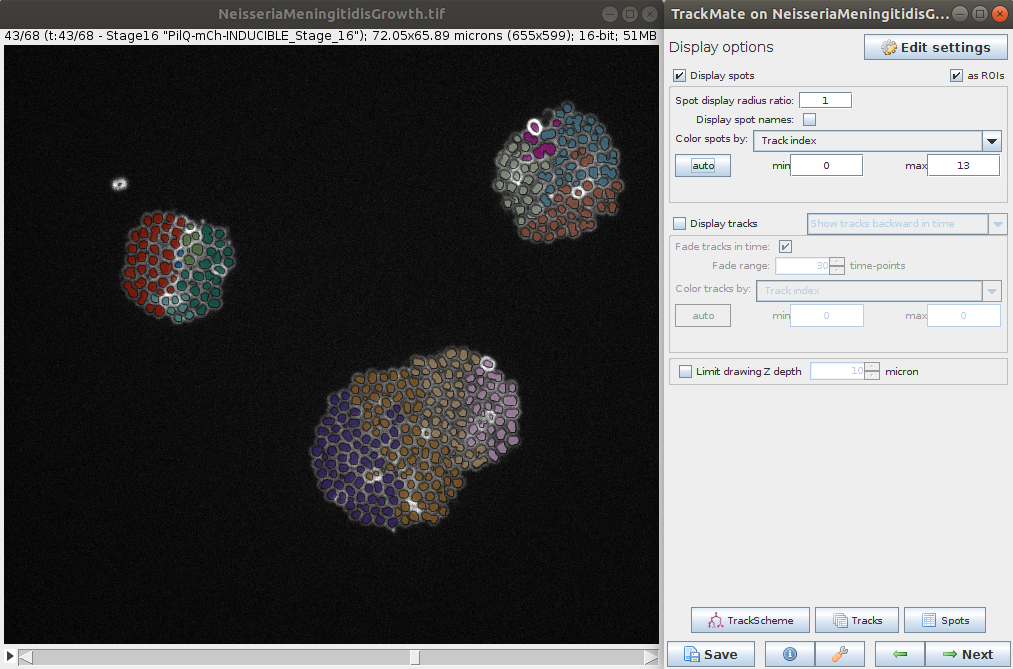
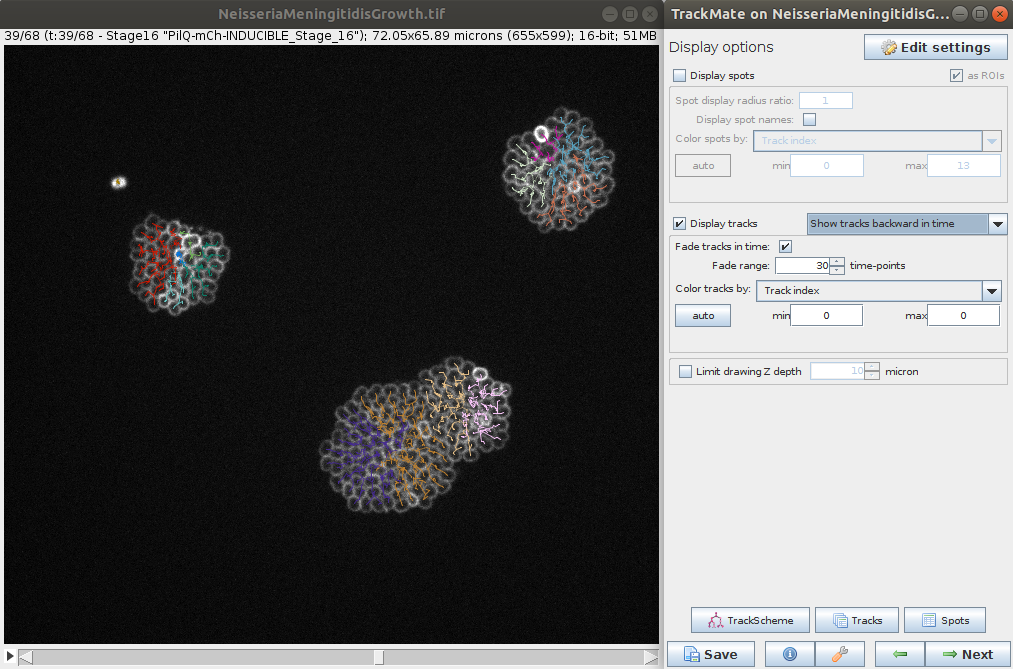
Explore results
- The last steps allows you to explore the tracking and computed features for the spots and tracks. It is also possible to export various results (e.g. tracks, lineage, segmentation, etc.) for further analysis.
Stéphane Rigaud - September 2021