TrackMate integration of the Trackastra transformer-based tracking algorithm, by Benjamin Gallusser and Martin Weigert. If you use this tracker in your work, please be so kind as to cite the paper that describes it:
doi:10.1007/978-3-031-73116-7_27
Installation
Install Trackastra
To use this tracker in TrackMate, you first need a working installation of Trackastra on your computer. Please follow the instructions on the GitHub repository of Trackastra: https://github.com/weigertlab/trackastra?tab=readme-ov-file#installation
The integration needs at least the version 0.2.2 of Trackastra.
Once done, let’s test that it works.
Supposing that you created a conda environment name trackastra, type the following in a terminal:
> conda activate trackastra
> trackastra track --help
This should print:
usage: trackastra track [-h] -i IMGS -m MASKS [--output-ctc OUTPUT_CTC] [--output-edge-table OUTPUT_EDGE_TABLE] [--model-pretrained MODEL_PRETRAINED] [--model-custom MODEL_CUSTOM]
                        [--mode {greedy_nodiv,greedy,ilp}] [--device {cuda,cpu}]

options:
  -h, --help            show this help message and exit
  -i IMGS, --imgs IMGS  Directory with series of .tif files.
  -m MASKS, --masks MASKS
                        Directory with series of .tif files.
  --output-ctc OUTPUT_CTC
                        If set, write results in CTC format to this directory.
  --output-edge-table OUTPUT_EDGE_TABLE
                        If set, write results as an edge table in CSV format to the given file.
  --model-pretrained MODEL_PRETRAINED
                        Name of pretrained Trackastra model.
  --model-custom MODEL_CUSTOM
                        Local folder with custom model.
  --mode {greedy_nodiv,greedy,ilp}
  --device {cuda,cpu}
Configure conda path in Fiji
You need to do the following only on MacOS and on Linux. On Windows, you can skip this step.
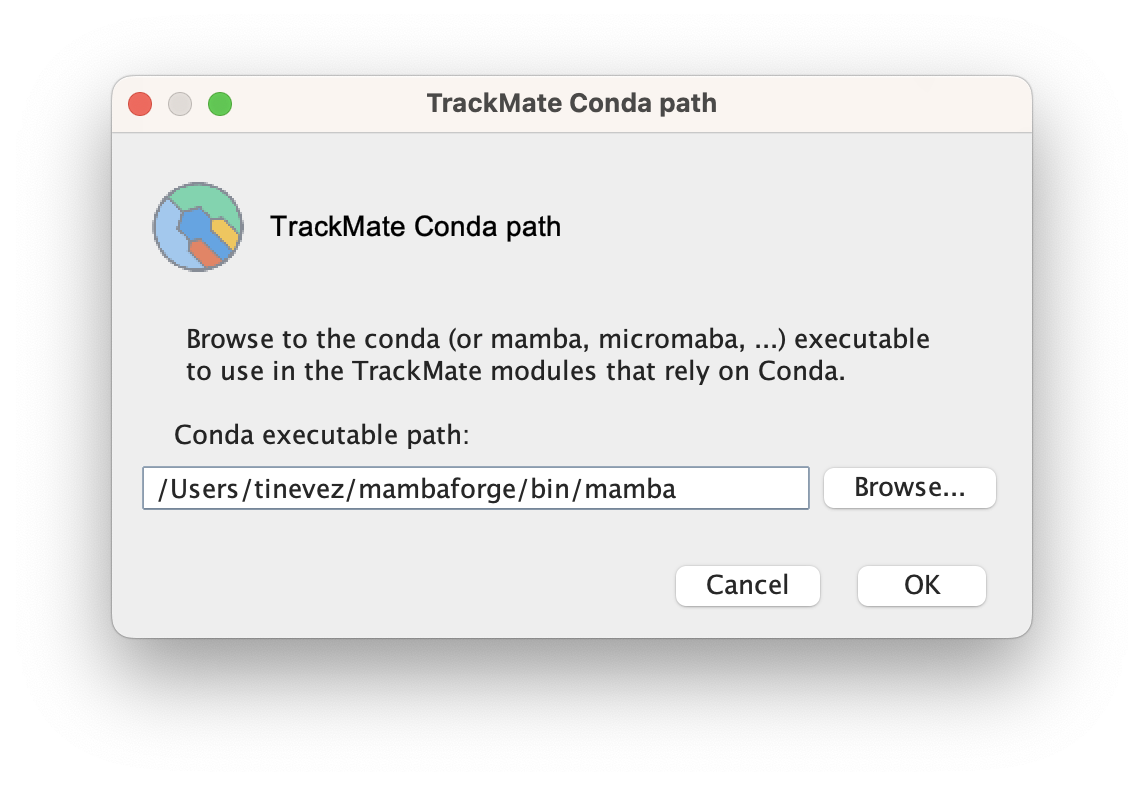
Because this integration relies on conda, we need to tell TrackMate where is conda on your system. There is a command to do this in the Edit > Options >Configure TrackMate Conda path…
You must find the actual executable of conda or mamba or micromamba on your system, not the alias.
This is typically where you installed your conda distribution, plus something like condabin or bin.
To find it on my system where I installed mamba I typed which mamba in a terminal:
> which mamba
/Users/tinevez/mambaforge/bin/mamba
I then browsed to this path in the configuration window then clicked the OK button.
Activate the TrackMate-Trackastra update site
In Fiji, go to Help › Update….
Update and restart Fiji until it is up-to-date.
Then go to the update menu once more, and click on the Manage update sites button, at the bottom-left of the updater window.
A new window containing all the known update sites will appear.
Add the unlisted site TrackMate-Trackastra, filling the information as follow:
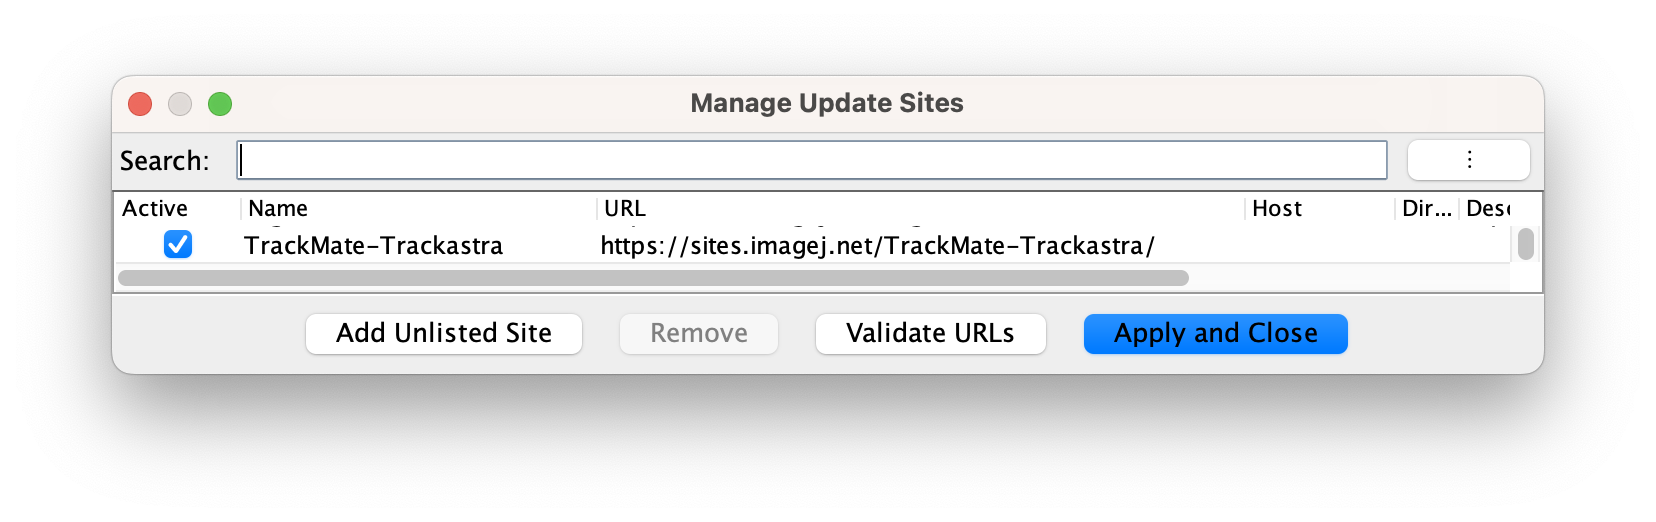
Then restart Fiji once more.
Tracking E. coli growth with Trackastra
We will use the same dataset that for the tutorial in the Trackastra code repository. Please download the archive below:
![]()
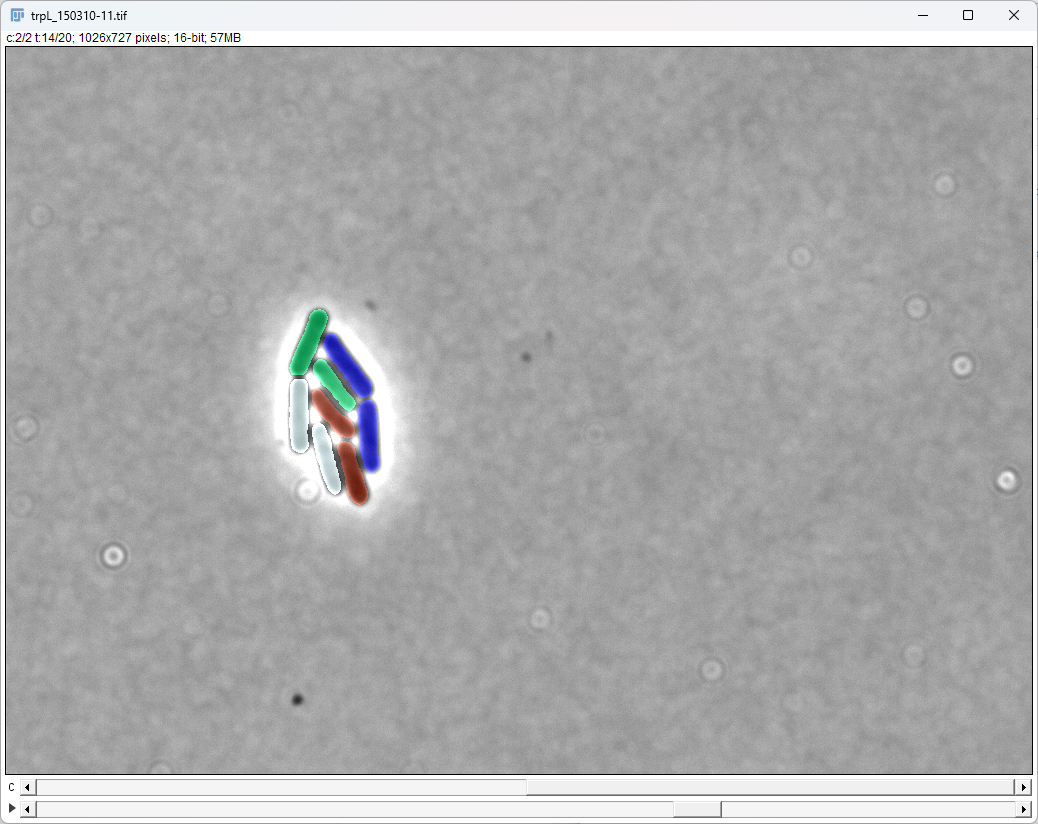
Open the TIF image in Fiji. It is a 2-channel movie of 20 frame. The first channel contains the segmentation results stored as a label image, and the second channel contines the source image. This movie follows the growth of two bacteria (Escherichia coli). While the bacteria divides, they move, probably because of sample or stage drift.
Launch TrackMate with this image selected (Plugins > Tracking > TrackMate), and in the detector selection. pick Label image detector. Click the Next button. In the detector configuration pannel, make sure the channel 1 is selected (the labels are in the first channel), and click the Next button again. TrackMate should tell you that it found 128 spots.
Go through the next panel, making sure you do not filter out any spots. When in the tracker selection step, pick Trackastra. This panel should then be displayed:
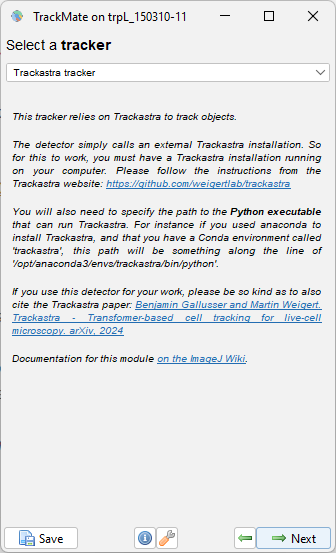
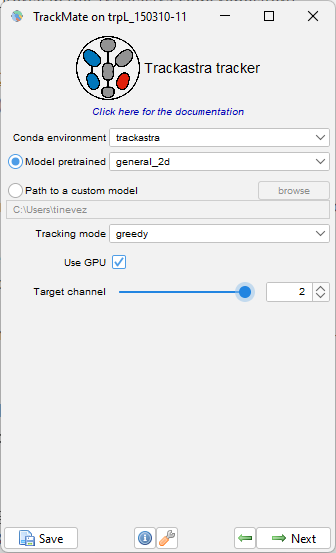
We don’t have to change much.
The first item lets you select a conda environment among the list of those TrackMate discovered.
Of course, you need to select in what conda environment is your instalation of Trackastra.
In my case, I simply named this environment trackastra, which is selected in the first item of the configuration panel.
Trackstra requires the source image for tracking, so we have to tell it in what channel of our multi-channel image the raw input is.
In our case it is the channel 2.
The general_2d pretrained model will work on this data, and since we want to detect cell divisions, we can simpy pick the greedy tracking mode.
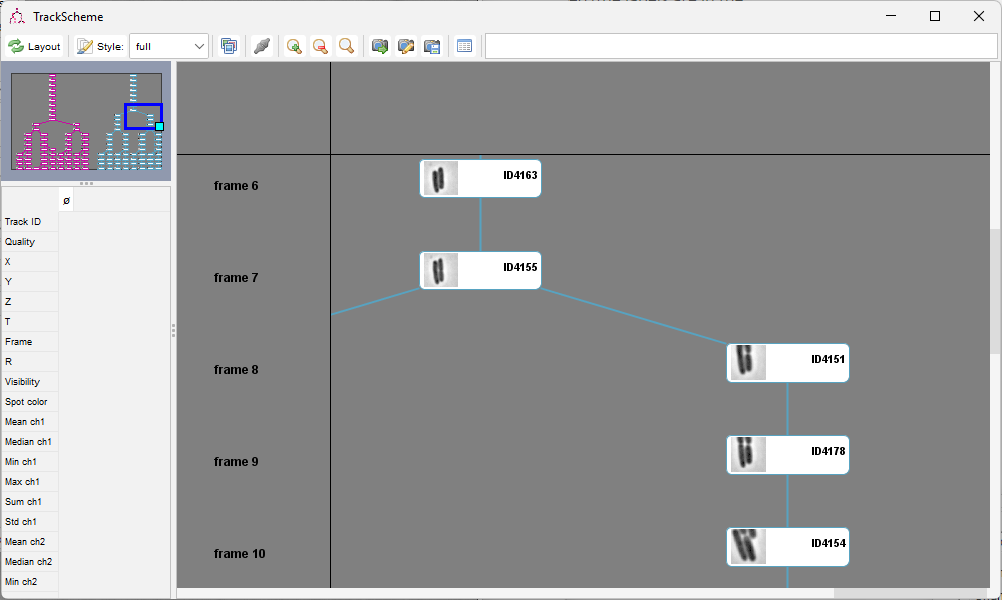
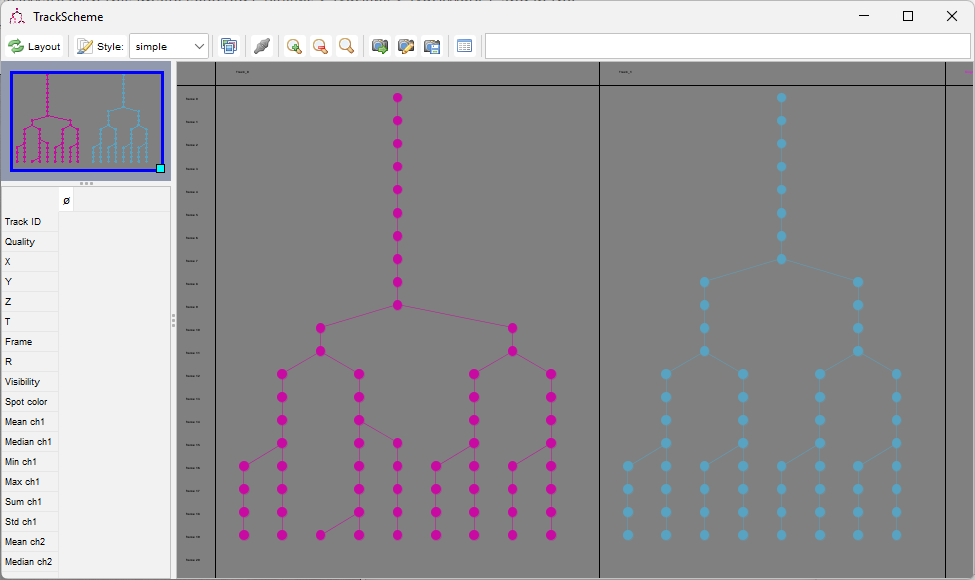
Click Next. Afer a while you should see the following log:
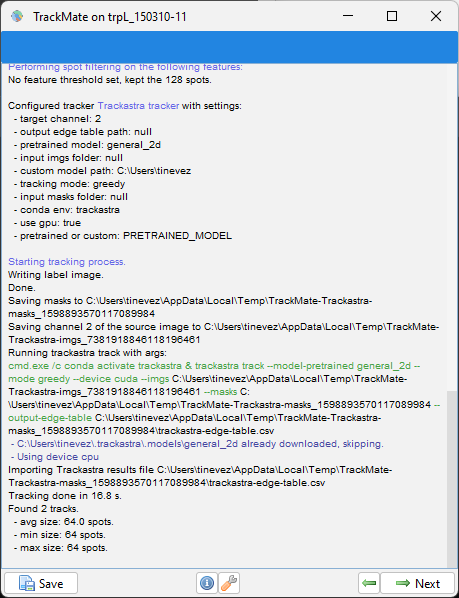
Et voila !