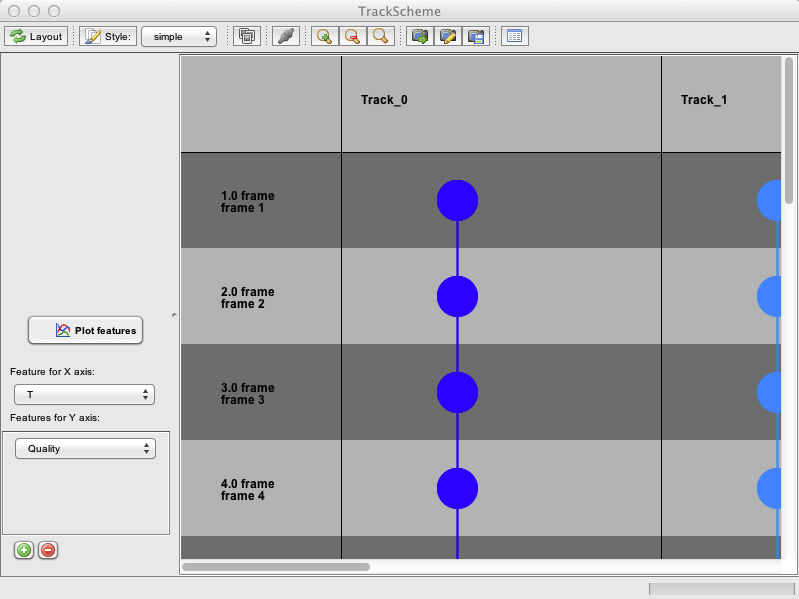
TrackScheme displays a kind of “track map”, where a track is laid on pane, arranged vertically over time, as a Parisian subway train map. Each spot is displayed as a cell in the map. Each cell displays a thumbnail of the spot.
TrackScheme in a nutshell
You can do quite some things using TrackScheme, notably track analysis. This is not the focus of this tutorial, we will simply be focusing on the track editing features. However, here is a brief description of what the toolbar buttons do.

We will be mainly using the Redo layout and button.
Removing single spots in TrackScheme
- Click on its cell in TrackScheme to select it. You should notice that the hyperstack displayer has moved to display the second frame, the central Z slice of the spot, and that the target spot is now colored in green. The TrackMate displayers and the TrackScheme are linked and share the same selection. This will become very handy soon.
- With the TrackScheme window selected, press the ⌦ Delete key. The cell disappears in TrackScheme, and the spot vanishes from the displayer.
- To refresh the view, click the Redo layout button in TrackScheme. Each column is re-populated and re-numbered.
Removing whole tracks in TrackScheme
- To select a whole track for deletion, there is two way:
- Draw a selection rectangle around the whole track representation.
- Select one spot or link in the track. Right-click anywhere on TrackScheme: a menu appears, in which you will find Select whole track.
- Notice in the displayer that the selected track appear with a green and thick line, so as to highlight it.
- To delete all of it, simply press the ⌦ Delete key in TrackScheme, or use the right-click menu to do so.
Press the Redo layout button when you are done. There should be four tracks remaining. Notice that their color changed as you deleted some of them. Their default color-map goes from blue to red and is re-adjusted every time the track number changes.
Editing tracks: creating links
Now we want to connect the lonesome spots to the track they belong to. This is all about creating links, and there are two ways to do that.
By drag & drop
You can create a link between two cells in TrackScheme simply by enabling the linking button on the TrackScheme toolbar, and dragging a line between the source cell and the target cell.
This is pictured below, where the first cell of the top track is attached to the track number 2, as it should. For visibility, I brought on this screenshot the target cell closer to the lane of the track 2. You can normally find it either on its own lane or on the far right of the panel.
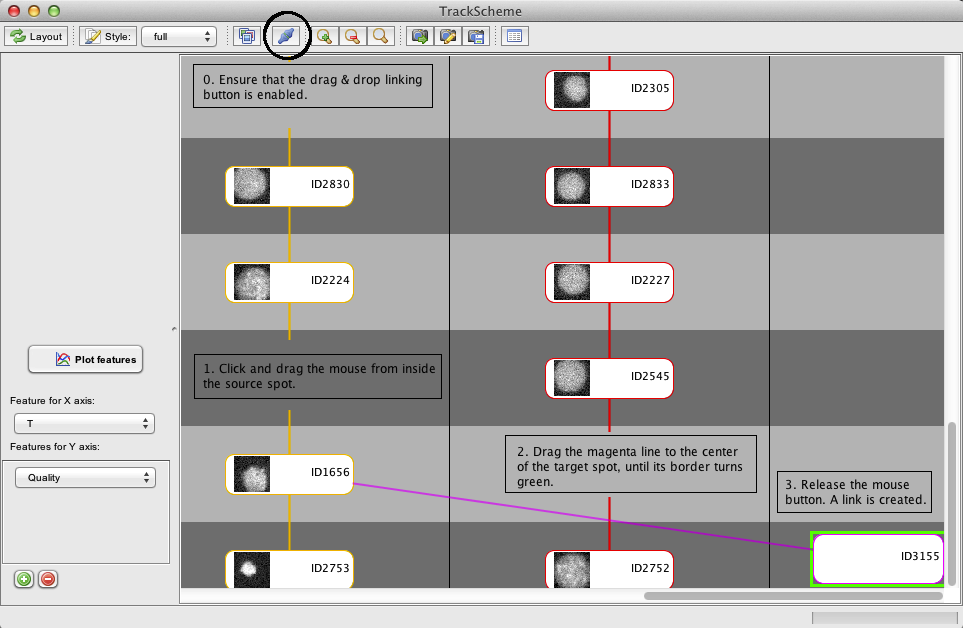
Press the Redo layout button to see the arranged result. The first spot is now incorporated in the right track.
Using selection and right-click menu
The cell in TrackScheme cannot be easily moved due to a very tricky bug we cannot solve. When the source and target cells are far away, it might be better to use another way to create links. We do this using the shared selection.
In TrackScheme, select a cell. It gets highlighted in the linked viewers: the displayed slice and time points are changed to display the spot, also highlighted in green.
We want to link this cell to another one. To do so, first select any cell by clicking on it, whether in the viewer or in the TrackScheme panel. It should get highlighted everywhere. Then,
- In the viewer, move to the frame that contains the target cell
- Hold the ⇧ Shift key
- Click on the target cell
It gets highlighted in the displayer, and in TrackScheme as well. You now have two cells in the selection.
To create a link between the two,
- Right-click anywhere in TrackScheme
- In the menu that pops-up, select Link 2 spots.
The newly created link is displayed in magenta. Note that the track arrangement is not changed; you need to press the Redo layout button to rearrange the tracks.
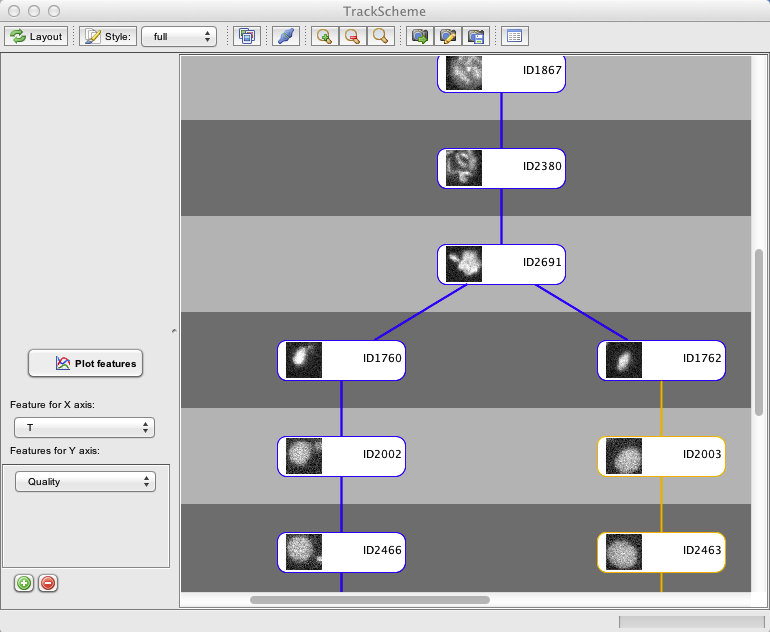
This can be used to create branching links, as picture below:
Creating several links at once
Using ⇧ Shift +  Left Click, we can put several cells in the selection, and create the links between each pair. Simply use ⇧ Shift + Left Click to add or remove cells from the selection. They get highlighted both in TrackScheme, in the linked viewer, and on TrackScheme sidebar.
Bring the right-click menu of TrackScheme, and select Link X spots. Links are created for cells that are consecutive in time, regardless of the frame interval between two consecutive cells. If creating these links generate a novel track, you should see that the track colors have changed in the displayer. No links are created between two cells if they are already linked, or if they belong to the same frame.
Editing tracks: deleting links
In TrackScheme, links are selectable, therefore deletable. Select the target link by clicking on it; it gets highlighted in the displayer as well. Press the ⌦ Delete key to remove it.
Removing a link often splits a track in 2 new tracks. To have them properly re-arranged, press the Redo layout button.
Jean-Yves Tinevez 5 August 2013 - 23 July 2021