N2V
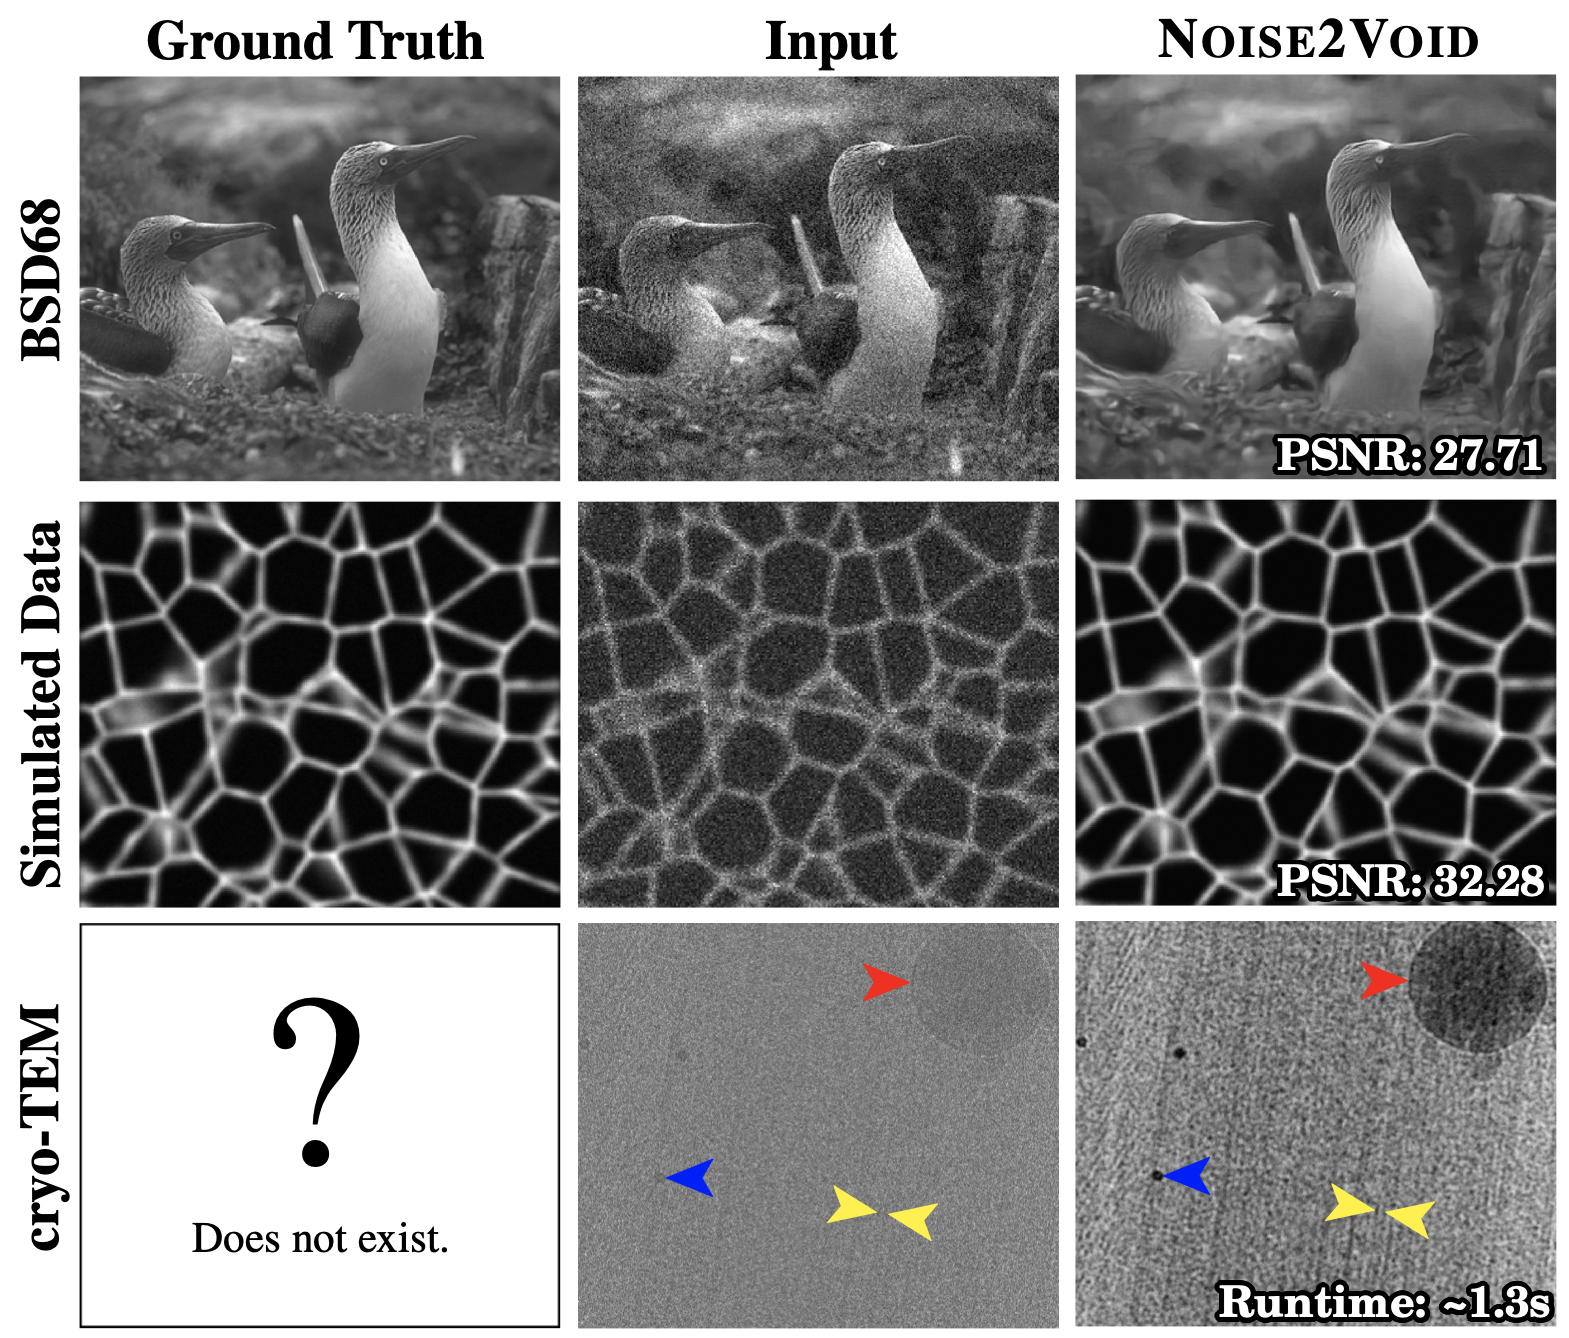
Noise2Void (N2V) is a powerful, context aware and flexible algorithm for image denoising. It uses artificial neural networks to learn about the properties of your images and how to best denoise them. N2V outperforms traditional denoising techniques.
This page describes the N2V FIJI plugin. The N2V FIJI plugin provides a very simple way to use N2V in FIJI. All you need is a computer with a NVIDIA graphics cards, a FIJI installation and your noisy images.
The execution of N2V has two steps. The first step will train the artificial neural network to remove the noise in the kind of images that you have. This training step is relatively slow, it might take around 12 h to get the best results. But don't worry. Just let your computer run the training over night. You don't need to do anything. Training only needs to happen once, and you will see a preview during the ongoing training. The result of the training is a model. The second step is called prediction. The prediction step will use the trained model to denoise your images. The same model can be used for any number of similar images. It typically takes less than a second per image. So high quality denoising of thousand images is easily possible within one day.
See the paper for a detailed description of the algorithm.
This FIJI plugin is part of CSBDeep. A set of open source neural network algorithms in FIJI. For more information, examples and images, click here.
Contents
Publication: Noise2Void - Learning Denoising from Single Noisy Images
Abstract
The field of image denoising is currently dominated by discriminative deep learning methods that are trained on pairs of noisy input and clean target images. Recently it has been shown that such methods can also be trained without clean targets. Instead, independent pairs of noisy images can be used, in an approach known as Noise2Noise (N2N). Here, we introduce Noise2Void (N2V), a training scheme that takes this idea one step further. It does not require noisy image pairs, nor clean target images. Consequently, N2V allows us to train directly on the body of data to be denoised and can therefore be applied when other methods cannot. Especially interesting is the application to biomedical image data, where the acquisition of training targets, clean or noisy, is frequently not possible. We compare the performance of N2V to approaches that have either clean target images and/or noisy image pairs available. Intuitively, N2V cannot be expected to outperform methods that have more information available during training. Still, we observe that the denoising performance of Noise2Void drops in moderation and compares favorably to training-free denoising methods.
Installation
- Start ImageJ / Fiji
- Open the updater via
Help > Update... - Click on
Manage update sites - Select the
CSBDeepupdate site - Click on
Apply changes - (optional) read this page for GPU support
- Restart ImageJ / Fiji
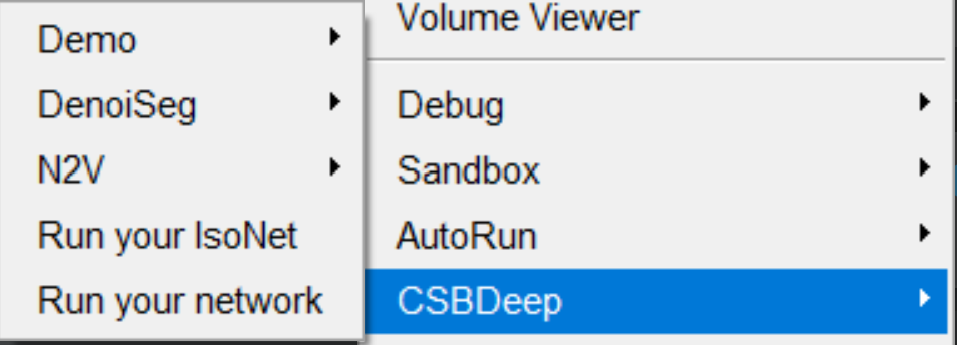
You should now have access to these plugins:
Usage
Training
Training without GPU support is possible, but will take ages. Please read the notes on this page for how to run the tools on the GPU.
Training on a single image
- Start ImageJ / Fiji
- Open a noisy image of your choice (it should be sufficiently large)
- (optional) open another noisy image for validation (judging how well the training is performing)
- Click on
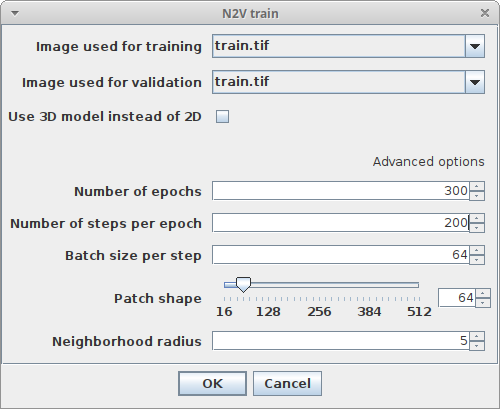
Plugins > CSBDeep > N2V > N2V trainand adjust the following parameters:-
Image used for trainingChoose the image which will be used for training -
Image used for validationChoose the image which will be used for training (you can also choose the same for both images, in this case 10% of the tiled image will be used for validation and 90% for training) -
Use 3D model instead of 2DSelect this checkbox if you want to train on 3D data (this needs much more GPU memory) -
Number of epochsHow many epochs should be performed during training -
Number of steps per epochHow many steps per epoch should be performed -
Batch size per stepHow many tiles are batch processed by the network per training step -
Patch shapeThe length of X, Y (and Z) of one training patch (needs to be a multiple of 16) -
Neighborhood radiusn2V specific parameter describing the distance of the neighbor pixel replacing the center pixel
-
- Click
Ok - Look below at the What happens during and after training section for what happens next
Training and prediction on single images (one-click solution)
- Start ImageJ / Fiji
- Open a noisy image of your choice (it should be sufficiently large)
- Open another noisy image you want to denoise directly after training (this will also be used for validation)
- Click on
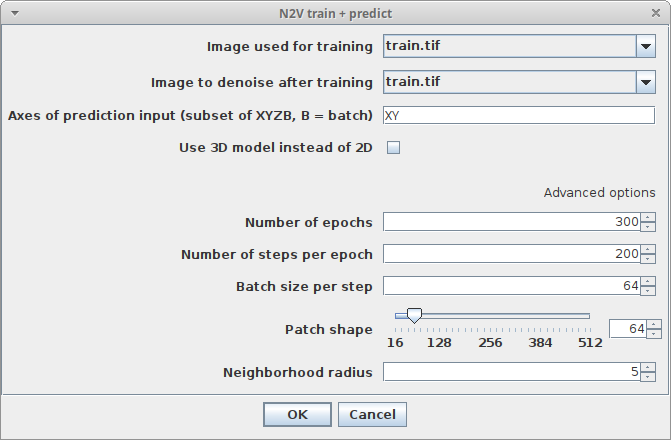
Plugins > CSBDeep > N2V > N2V train & predictand adjust the following parameters:-
Image used for trainingChoose the image which will be used for training -
Image to denoise after trainingChoose the image which will be used for prediction -
Axes of prediction inputThis parameter helps to figure out how your input data is organized. It's a string with one letter per dimension of the input image. For 2D images, this should beXY. If your data has another axis which should be batch processed, set this parameter toXYB - Regarding the other parameters please have a look at the descriptions in Training on a single image
-
- Click
Ok - Look below at the What happens during and after training section for what happens next
Training on multiple images
- Start ImageJ / Fiji
- Click on
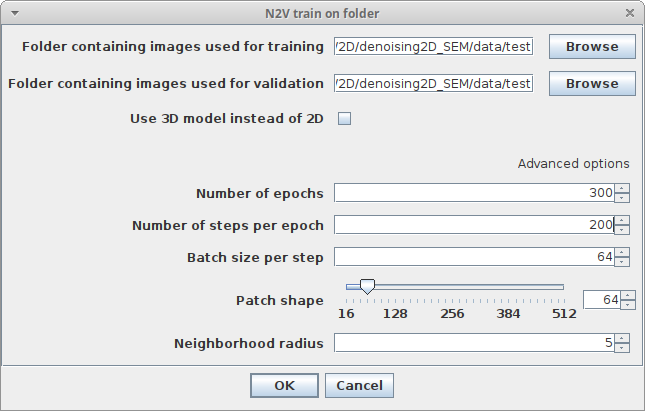
Plugins > CSBDeep > N2V > N2V train on folderand adjust the following parameters:-
Folder containing images used for trainingChoose the folder containing images which should be used for training -
Folder containing images used for validationChoose the folder containing images which should be used for validation (can be same as training folder, in this case 10% of the generated tiles will be used for validation and 90% for training) - Regarding the other parameters please have a look at the descriptions in Training on a single image
-
- Click
Ok - Look below at the What happens during and after training section for what happens next
What happens during and after training
During training, you will see two windows:
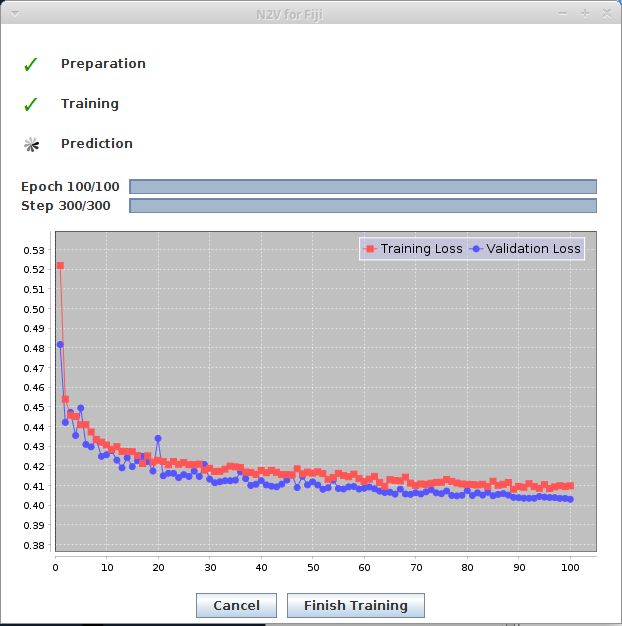
- The progress window keeps you updated of the steps the training process is going through. It also plots the current training and validation loss.
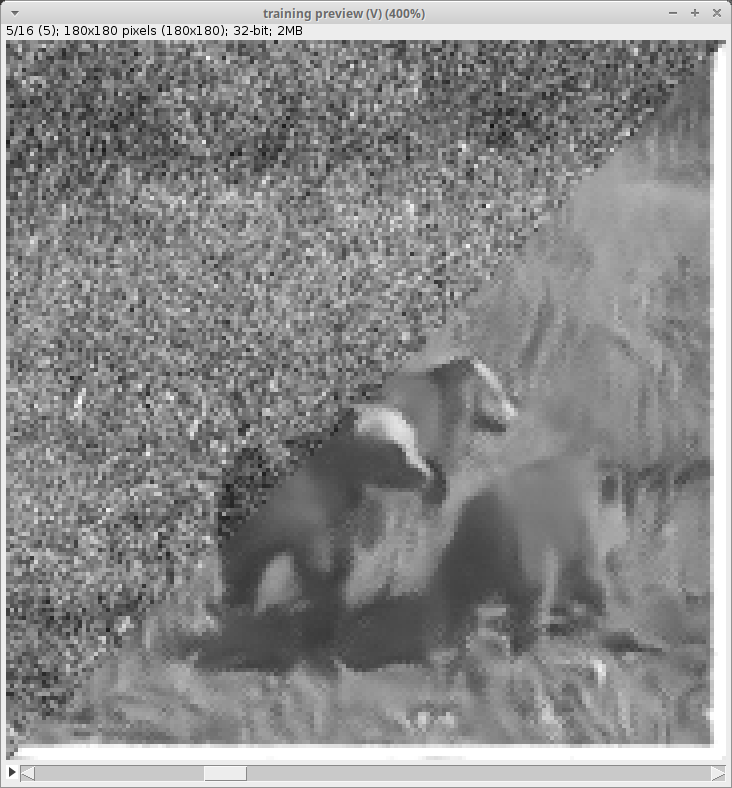
- The preview window is generated from the first validation batch. It is slit into two parts. The upper left part displays the original noisy data, the lower right part displays the prediction at the current state of the training.
After training, two additional windows should appear. They represent two trained models. One is the model from the epoch with the lowest validation loss, the other one the model from the last epoch step. For N2V, using the model from the last epoch is almost always recommended. The windows will look similar to this:
They are stored to a temporary location which you can see in the Overview section of the model window under Saved to...
Copy the model from there to another permanent destination on your disk if you want to keep this trained model.
Prediction
There are two ways to predict from a trained model.
You can open the model directly:
- Start Fiji
- Open an image you want to denoise and for which you have a pretrained model available as ZIP file
- Click
Import > bioimage.io.zipand choose your trained model. The model will open in a window as depicted above - Click
Predictin the model window and adjust the following parameters:-
InputThe image you want to denoise -
Axes of prediction inputThis parameter helps to figure out how your input data is organized. It's a string with one letter per dimension of the input image. For 2D images, this should beXY. If your data has another axis which should be batch processed, set this parameter toXYB
-
Alternatively, you can use the N2V menu:
- Start Fiji
- Open an image you want to denoise and for which you have a pretrained model available as ZIP file
- Click
Plugins > N2V > N2V predictand adjust the parameters as described above, with this addition:-
Trained model fileThe ZIP file containing the pretrained model (it should end with.bioimage.io.zip)
-
Exporting trained models from Python to ImageJ / Fiji
It's possible to train a Noise2Void neural network using Python. The required code and instructions can be found here. The model that has been trained in Python, can be used in FIJI as well:
- In Python, run this at the end of you training:
model.export_TF() - Locate the exported model file
- Proceed as described in Prediction
How to handle macros / scripts / models from the first early release of N2V for Fiji
Thank you for testing the first early release version! Here is what changed, if that does not help you getting already trained models or scripts running, please write a post in the forum!
Update Site
You don't need the N2V update site any more, the CSBDeep update site is sufficient. Please remove the N2V update site.
Macros / Scripts
- the
predictcommand was renamed toN2V predict - the
traincommand was renamed toN2V train - the
train + predictcommand was renamed toN2V train + predict - the
train on foldercommand was renamed toN2V train on folder - there is a new mandatory prediction parameter called
axes(see documentation above) - the training parameter
batchDimLengthis gone for good - the training parameter
patchDimLengthwas renamed topatchShape - the training output
latestTrainedModelPathchanged tolatestTrainedModel(it's a displayable model object now) - the training output
bestTrainedModelPathchanged tobestTrainedModel(it's a displayable model object now)
Trained models
Models trained with the first N2V for Fiji version cannot be used with the newer commands for model prediction. Please upgrade them first by using the command Plugins > CSBDeep > N2V > Upgrade old N2V model.
! Note: When testing this, I had to unzip and zip the new model before it was usable. I'll try to fix this, but if you run into problems with the converted model, try unzipping and zipping it again.
