Online Manual for the
MBF-ImageJ collection

1 Installing MBF ImageJ bundle
The official version of NIH ImageJ can be downloaded from the official ImageJ website.
1.1.1 32-bit Windows
If you already have ImageJ installed, it may be worthwhile uninstalling it and following the installation instructions below. This will match your copy of ImageJ to this manual. Extra plugins can be easily added later - see below for instructions on how to do this.
1. Download the MBF_ImageJ_setup.exe (~23Mb)
2. Run the program.
3. A shortcut will be installed on your desktop and in your Start menu.
The setup program will add ImageJ to the registry (with the line: HKEY_CLASSES_ROOT\Applications\ImageJ.exe\shell\open\command" Value: {"path}\ImageJ.exe" "%1").
Note: Windows can throw a security alert when ImageJ first starts.
When the software is first
run it automatically sets
Memory allocation thanks to George Silva's modifications of the
ImageJ.exe file. Also, thanks to George's work, files can be associated
with ImageJ by:
a. Right-click on file;
b. Select pop-up menu item "Open With/Choose Program"
c. Select "ImageJ Launcher" from list and check the "Always use this
program..." checkbox.
1.1.2 64-bit Windows
Using 64-bit windows and the the Java runtime environment for 64-bit Windows allows the allocation of greater than 1.7Gb of RAM. I have found the main advantage of this is when using the Deconvolution plugins.
1. Download JRE for Win64 from Sun's website http://java.sun.com/javase/downloads/index.jsp
2. Install to to "ImageJ/jre"
3. Restart ImageJ and set memory allocation to 2/3 physical RAM. (menu command (Edit/Options/Memory).
If this is greater that 1.7 Gb you will be warned that this may cause ImageJ to not function correctly. This is in reference to the Win32 version.
5. Restart ImageJ.
1.2 Mac and Linux
The MBF ImageJ installation is for Windows.
1. Download your OS specific version of ImageJ from the ImageJ website.
2. Download MBF ImageJ bundle plugins only (~2Mb) and unzip to ImageJ/Plugins folder.
(This contains only the plugins, IJ preferences, LUTs
and plugin source code).
3. For Mac: The IJPrefs.txt file needs to be moved from
the ImageJ folder to
the Library/Preferences folder.
1.3 OS2
ImageJ will run on OS2; however, for Biorad users running OS2, ImageJ installation is complicated by the 8.3 filename limitation required by the LaserSharp software. Contact me (email tonyc) for help with this.
1.4 QuickTime functionality
When QuickTime is installed with its default settings, Java functionality is not installed with it; this renders the QuickTime functions of ImageJ non-functional. QuickTime needs to be installed with a custom installation, with the QuickTime for Java option checked. This option is unchecked by default and is some way down the installation options list, so keep scrolling until you find it. This requires you to be logged in with “administrative privileges”. See http://rsb.info.nih.gov/ij/plugins/qt-install.html.
1.5 Upgrading
1.5.1 ImageJ core program
Upgrades are currently being released almost on a weekly basis. Details of the upgrade features can be found on the News page link on the ImageJ homepage site.
Windows
This is most simply done via the “Upgrade
ImageJ” icon in the Windows “Start/Programs/ImageJ” menu. This will
backup the current ImageJ version (calling it “ij.old”) and also back up you
preferences to the file “IJ_Prefs.bak”. This automated upgrade is courtesy of
Ales Kladnik (ales.kladnik
at bf.uni-lj.si).
You do not need to be logged in as an administrator to do this, but ImageJ must be closed. ImageJ upgrades are very frequent, and major bugs addressed within days so ImageJ itself should be upgraded routinely. You can check your version of ImageJ by either noting the version that appears below the toolbar at start up, or by finding the version at the bottom of the ImageJ property list which can be called via the menu command “Plugins/Utilities/ImageJ properties…”
MacOSX
This can be done
automatically with the Gilles Carpentier's ImageJ Updater script. Detailed
description of how to update the IJ.JAR file can be found at
Gilles Carpentier's
ijupdater website.
Briefly, this involves dragging-and-dropping the existing IJ.JAR file on to the
ImageJ Updater script icon.
Further information on updating can also be found on the ImageJ website.
1.6 Plugins
The ImageJ/News page also has details about new plugins. Plugins come in three file types:
*.java = uncompiled plugins (a.k.a. source code)
*.class = compiled plugins
*.jar = compressed compiled and uncompiled source code files
For *.class or *.jar files they simply need to be saved to the plugins folder or subfolder in (only one level).
Since *.class files are sometimes troublesome to email, the uncompiled version of the plugin is often distributed. These *.java files need to be saved in the plugins folder (or sub-folder) and must be compiled.
To compile a *.java plugin:
1. run ImageJ
2. Menu command "Plugins/Compile and Run" and select the *.java file.
3. A *.class file will then be generated as the compiled plugin and should run.
4. Restart ImageJ and the plugins should now appear in the "Plugins" menu.
If you see this error when you
try to compile the plugin:
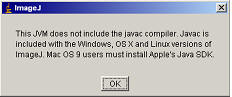
Your Java version is incomplete. See below on how to upgrade your Java. You should not see this if you are using the MBF ImageJ Windows installation.
1.7 Java Runtime Environment
1.7.1 About
ImageJ runs in a “Java virtual machine” which is part of the “Java runtime environment” (JRE) from Sun. So long as the computer has the correct JRE, ImageJ will work, independent of the operating system (MAC, Win, OS2, Linux, SGI, etc.).
The latest and older versions of JRE can be found by following the links on the ImageJ/Links web-page. Periodically, check to see if the Windows JRE has been upgraded by Sun. Sometimes the upgrade is worthwhile; sometimes it is not. The Software Development Kit (SDK) also available from Sun alongside the JRE has JRE as a component as well as other development resources.
1.7.2 JRE version comparison
The ImageJ Windows installation from the ImageJ website contains JRE1.3; the ImageJ from the MBF website has JRE1.5 Beta 1.
1. JRE1.3 is the most stable of the JRE’s to date and is distributed with the ImageJ Windows installation from the ImageJ website.
2. JRE1.4.0 allowed the use of the System-clipboard plugin to copy and paste between ImageJ and other applications (PowerPoint, CorelDRAW etc.).
3. JRE1.4.2 introduced a bug that caused ImageJ to crash whenever a measurement was made.
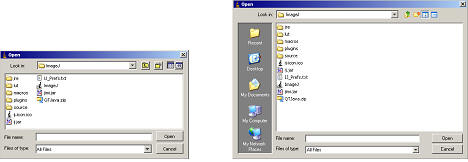
4. JRE1.5 Beta 1 has larger window-paned “Open file” dialog boxes making it much easier to find your images. (You may at this point see strange effects on dialog fonts in Win98.)
|
|
|
|
JRE1.4 File/Open dialog |
JRE1.5 Beta 1 File/Open dialog |
1.7.3 Installation of JRE
1. Log in as Administrator for WinXP/NT/2000.
2. Uninstall any existing version of Java Runtime (Start/Settings/Control Panel/Add-Remove programs or something like this).
3. Run the new installation file.
4. Select Custom installation.
5. When prompted for the installation directory, click the Change button and change it to C:\IMAGEJ\JRE
6. Then OK all dialogs.
Installing SDK rather than JRE will mean that javaw.exe will not be in the expected place. You need move the contents of the JRE folder installed by JDK to C:\IMAGEJ\JRE.
1.7.4 Compiling ImageJ plugins with a new JRE
The JRE from Sun does not include the tools.jar file needed for the menu command "Plugins/Compile and Run" to work. Without this file you will receive the error message left.
The MBF
installation can be used to compile plugins. If you upgrade the JRE the files
required for compiling plugins may also require upgrading. When you try to
compile a plugin with an old version of tools.jar you receive an error
message in the “Errors” log along like this:
“Note: sun.tools.javac.Main has been deprecated.
error: Invalid class file format in C:\ImageJ\jre\lib\rt.jar(java/lang/Object.class). The major.minor version '49.0' is too recent for this tool to understand.”
The tools.jar file is distributed in the Sun SDK, not the JRE.
-
Download and install the SDK. Note the location of the destination folder.
-
Delete or rename Image/jre.
-
Locate the jre sub-folder in the SDK folder.
-
Copy it to the ImageJ folder.
-
Copy sdk/lib/tools.jar to ImageJ/jre/lib/ext.