Stack-slice Manipulations
| Cookbook Topics | |
|---|---|
| Introduction and Installation | |
| Annotating Images | |
| Color Image Processing | |
| Deconvolution | |
| Image Intensity Processing | |
| Importing Image Files | |
| Particle Analysis | |
| Saving and Exporting | |
| Stack-slice Manipulations | |
| T-functions | |
| Z-functions | |
Contents
Slice shuffling/removing/Adding
The slices in a stack can be manipulated in many ways. Some of these functions are described below.
Deleting a single slice: “Image/Stacks/Delete Slice"
- Deletes the currently displayed slice in a stack.
Deleting a number of slices: “Image/Stacks/Tools/Slice remover”
- Indicate the first and last slices in the range to remove, as well as the increment of slices to remove between the first and last slices.
Select the slices to remove: “Image/Stacks/Tools/Make substack”
- Indicate a range or list of slices to include in new substack; increments are possible.
- Option to delete the slices from the original stack.
Stack to images/Images to stack: “Image/Stacks/Stack to images” (Images to Stack…).
- “Images to Stack” requires images to be the same size. If different sized images are used, you will be presented with options to make the size uniform.
- When using "Images to Stack", the original images will close once the stack is formed.
Montage: "Image/Stack/Make Montage…"
- Many settings are self explanatory.
- Ideal for generating a montage of a stack for a lab book.
- Can do reverse operation with "Image/Stack/Tools/Montage to Stack", but will need to specify the number of rows and columns to ensure the correct number of slices.
Reversing stack: “Image/Stacks/Tools/Reverse"
Concatenate: “Image/Stacks/Tools/Concatenate"
- Stacks must be the same dimension and image type.
- "Open as a 4D Image" option interprets separate stacks as belonging to a single 4D dataset. For example, concatenating two 25-slice stacks would result in a 25-slice stack with two different time points at each slice.
Stack Combine: “Image/Stacks/Tools/Combine”
- Can choose which stack comes first
- If the two stacks contain a different number of slices, the shorter will have blank slices appended to the end so they are the same length.
(De)Interleave: “Image/Stacks/Tools/DeInterleave” and “/Interleave”
- Deinterleave will distribute slices between new stacks as indicated by the specified number of channels.
- Interleave is the reverse process and may be applied to two stacks at a time.
Stack Inserter: “Image/Stacks/Tools/Insert"
- Used with two stacks, one is the source and the other the destination.
- Superimpose the source by specifying the X and Y coordinates for the location of the upper left hand corner.
- No automatic resizing, so the smaller stack should not be used as the destination.
Stack Sorter: “Image/Stacks/Tools/Stack Sorter”.
- Control the position of individual slices or groups of slices.
- Advanced “Insert” functionality.
Stack dimension manipulations
Images and stacks can be resized and rotated with native functions or with the more sophisticated TransformJ set of plugins from Erik Meijering. More details about each TransformJ plugin can be found on this website.
E. H. W. Meijering, W. J. Niessen, M. A. Viergever, Quantitative Evaluation of Convolution-Based Methods for Medical Image Interpolation, Medical Image Analysis, vol. 5, no. 2, June 2001, pp. 111-126.
An alternative method for cropping a stack is found with "Plugins/Stacks/Crop (3D)" After selecting 'OK', you will be presented with panels of the ZY and XZ planes, as well as the original stack, where you can use the mouse to crop the stack in any of the three directions.
Window for the Crop (3D) plugin.
Zoomify plugin
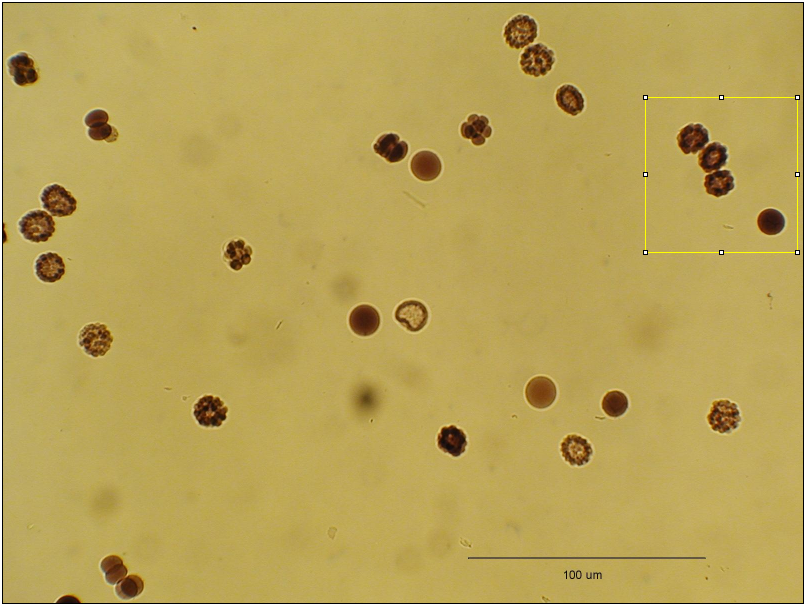
The Zoomify plugin will generate a movie sequence such that the first frame includes the whole image and the last is the user defined ROI at 100%. The first slice image is the whole of the original image, scaled so that it fits into the framesize of the ROI. The intermediate images are progressively scaled so that the last frame is 100%. The scale factor is noted as the label slice in the stack.
To use this plugin, select an ROI which will become the final frame, but do not apply the ROI using "Edit/Draw". After the ROI is selected, run the plugin and you will be prompted for the desired number of frames in the movie.
Image with selected ROI
Series generated with zoomify
Align slices in stack
The plugins StackReg (to align a stack) and TurboReg (to align more than one image or stack) can be used for alignment and are found at "Plugins/Registration/StackReg or TurboReg". StackReg takes a stack with misaligned slices and aligns the slices with respect to the current slice. Open the stack, scroll to the most centered slice and run the plugin. The "Rigid body" method typically produces the best results for microscopy images. The TurboReg plugin must be installed before using StackReg.
Based on:
P. Thévenaz, U.E. Ruttimann, M. Unser, "A Pyramid Approach to Subpixel Registration Based on Intensity," IEEE Transactions on Image Processing, vol. 7, no. 1, pp. 27-41, January 1998.
Time series before alignment
After


