The content of this page has not been vetted since shifting away from MediaWiki. If you’d like to help, check out the how to help guide!
See this helpful workshop on Image Segmentation for another great overview of Segmentation!
Introduction
Image segmentation is “the process of partitioning a digital image into multiple segments.” (Wikipedia)


It is typically used to locate objects and boundaries.
More precisely, image segmentation is the process of assigning a label to every pixel in an image such that pixels with the same label share certain visual characteristics.
Easy workflow
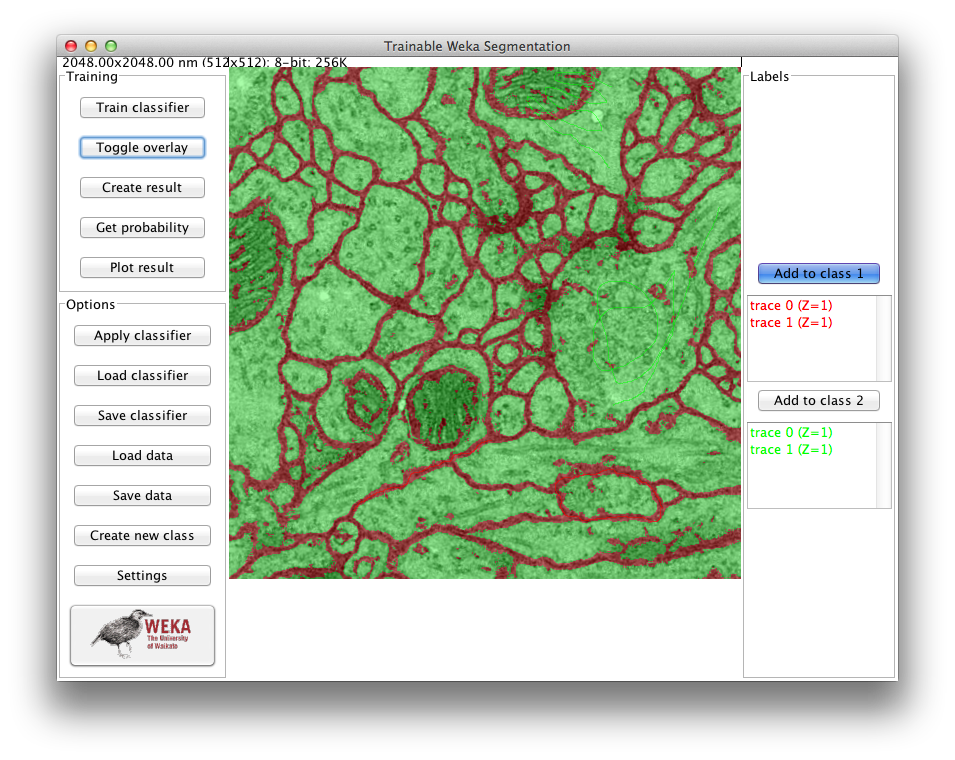
One plugin which is designed to be very powerful, yet easy to use for non-experts in image processing:
|
Plugin Name |
Short Description |
Highlights |
Plugin Snapshot |
|
A tool that combines a collection of machine learning algorithms with a set of selected image features to produce pixel-based segmentations. |
|
|
|
Give it a try—you might like it!
Flexible workflow
One good workflow for segmentation in ImageJ is as follows:
- Preprocess the given images
- Apply an Auto Threshold
- Create and manipulate a mask
- Create and transfer a selection from a mask to your original image
- Analyze the resulting data
Preprocessing
Preprocess the image using filters, to make later thresholding more effective. Which filter(s) to use is highly dependent on your data, but some commonly useful filters include:
Adjusting Threshold
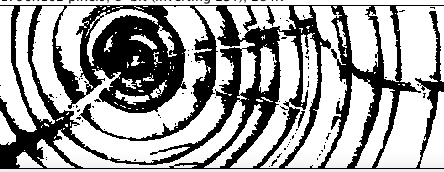
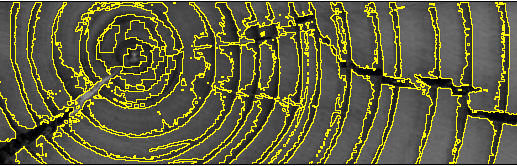
Tree ring sample image with a threshold applied for a B&W image
Ideally you want to use one of the auto-threshold methods, rather than manually tweaking, so that your result is reproducible later on the same data, and on multiple other datasets.
- Open your image
- Select Image › Adjust › Threshold…
- Specify whether or not the background should be dark or light
- Adjust the minimum and maximum sliders until you are satisfied with the saturation level of your image
Creating Masks
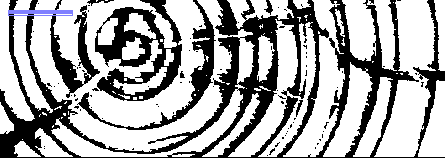
Over-saturated mask is eroded around the center tree ring
- Select Edit › Selection › Create Mask
- Based on the image and set threshold, some portions of the image may be over/under saturated
- One quick way to split overlapping objects is the Watershed command.
Selections
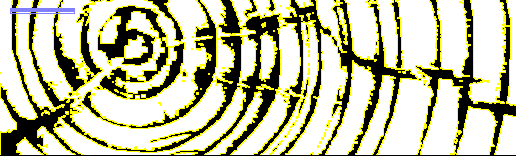
Selections on the mask
Creating Selections
- Select Edit › Selection › Create Selection to select the objects within the mask
- To deselect a portion of the image, select ⇧ Shift +
 Left Click
Selections on the reverted image
Transferring Selections
- Before transferring the mask’s selections, revert the image to its original form by selecting ⇧ Shift + E
- Select first the mask, then the original image, and select ⇧ Shift + E to transfer the mask’s selections
Analysis
Do some numerical analysis on the selected data:
- Measure the entire selection directly.
- Control which measurements are done using Set Measurements.
- Use Analyze Particles to extract desirable objects from your selection and report individual statistics on them.
- Use the ROI Manager to Add the selection and then Split it (under the More button), then use Multi Measure (also under More) to report statistics on the objects.
- Write a macro to automate this sort of analysis, loop over objects in the ROI manager, measure and manipulate them, etc.
See also
- The Introduction to Image Segmentation using ImageJ/Fiji workshop.
- The Segmentation with Fiji workshop slides.
- List of extensions, a list of ImageJ extensions, which you can filter by the Segmentation category.