Update sites are a fantastic way to get new functionality in your ImageJ app. Unfortunately, they are also one of the easiest ways to break an installation, by adding an update site that clashes with another update site, or even the ImageJ core. So, before enabling a new update site, it’s safest to back up your installation.
Introduction
This tutorial will explain how to add an update site to your install of ImageJ such that the plugins maintained there will be installed and updated just like core ImageJ plugins.
Start the Updater
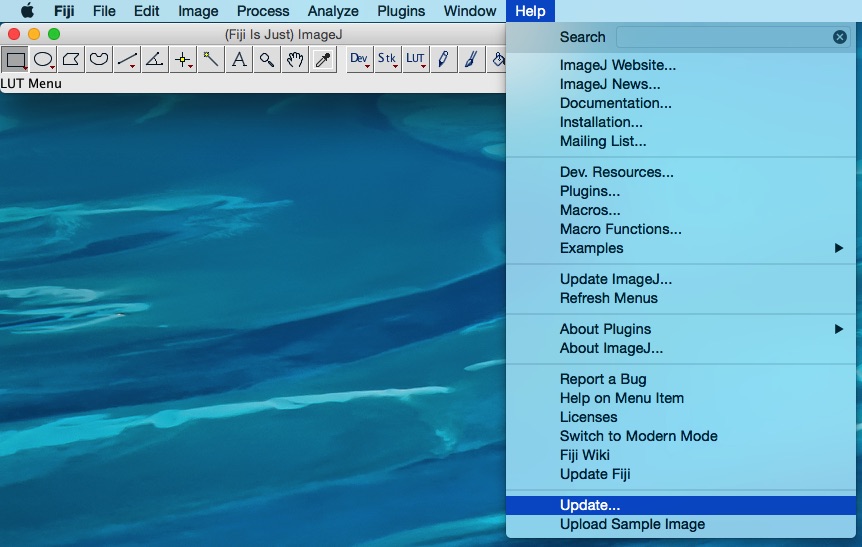
First, start the updater:
Add update sites
Click on the Manage update sites button to bring up the site management dialog:
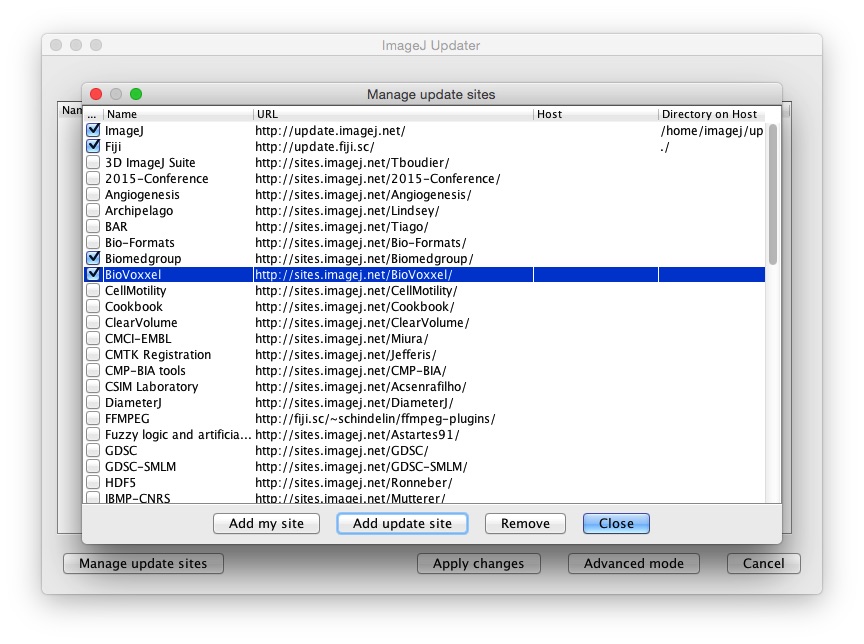
If the update site you want to follow is listed, just click the checkbox next to its name.
Adding unlisted sites
To add follow an update site that is not listed, click the Add Unlisted Site button and fill in the name of your choice for the site and the URL, which would be provided by the plugin’s author or distributor.
The list of update sites shown by default is generated from a special page, which you can view and edit here. Update site maintainers are encouraged to add their update site to this list, as it both helps the community and the developers.
Verify new files
After you have selected your desired update site(s), close the dialog. The list of files that will be installed or updated from the chosen sites will now show up:
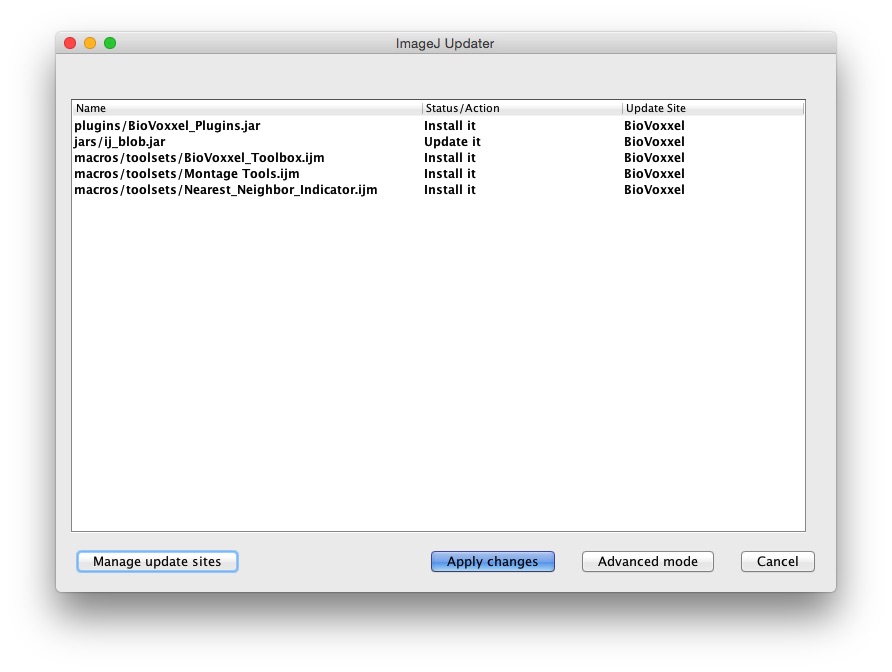
If an entry’s action is Update It, that means it is changing an existing plugin. This action is dangerous and can break other plugins, or ImageJ itself.
Ideally the maintainers of these sites would work with the core ImageJ maintainers to centralize important plugins.
When you find plugin conflicts between update sites, you can greatly help the community by starting a discussion with the maintainers!
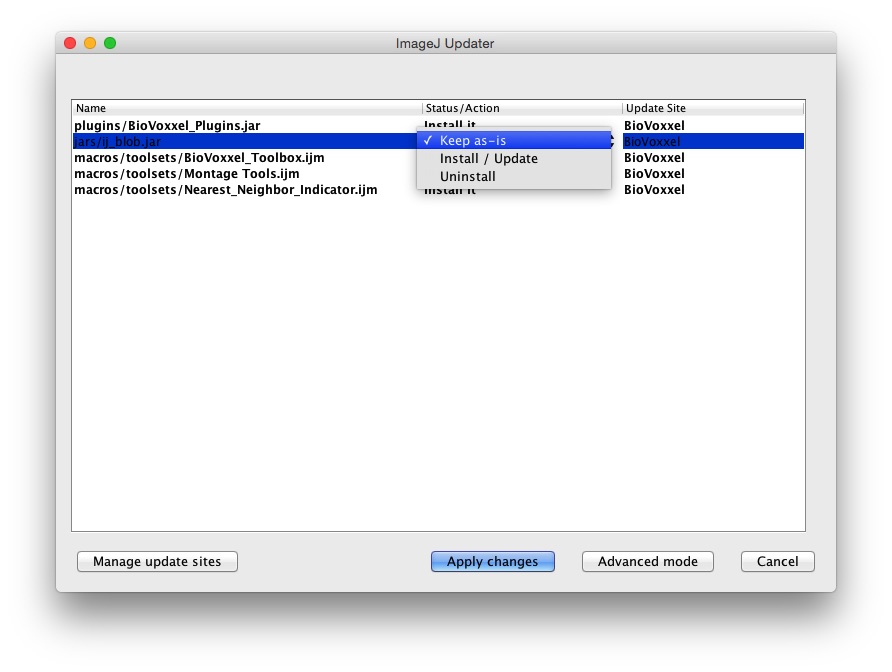
By default, all files from the new update site(s) will be installed or updated. However, if needed you can select whether you want to install a particular plugin by clicking in the Status/Action column and changing the option - for example, select Keep as-is to avoid installing a clashing plugin.
Once you are happy with what will be installed, click on the Apply Changes button to download your updates.
Verify install
An update is not finalized until restarting the application. After initiating an update, do not modify your ImageJ installation manually until after restarting at least once.
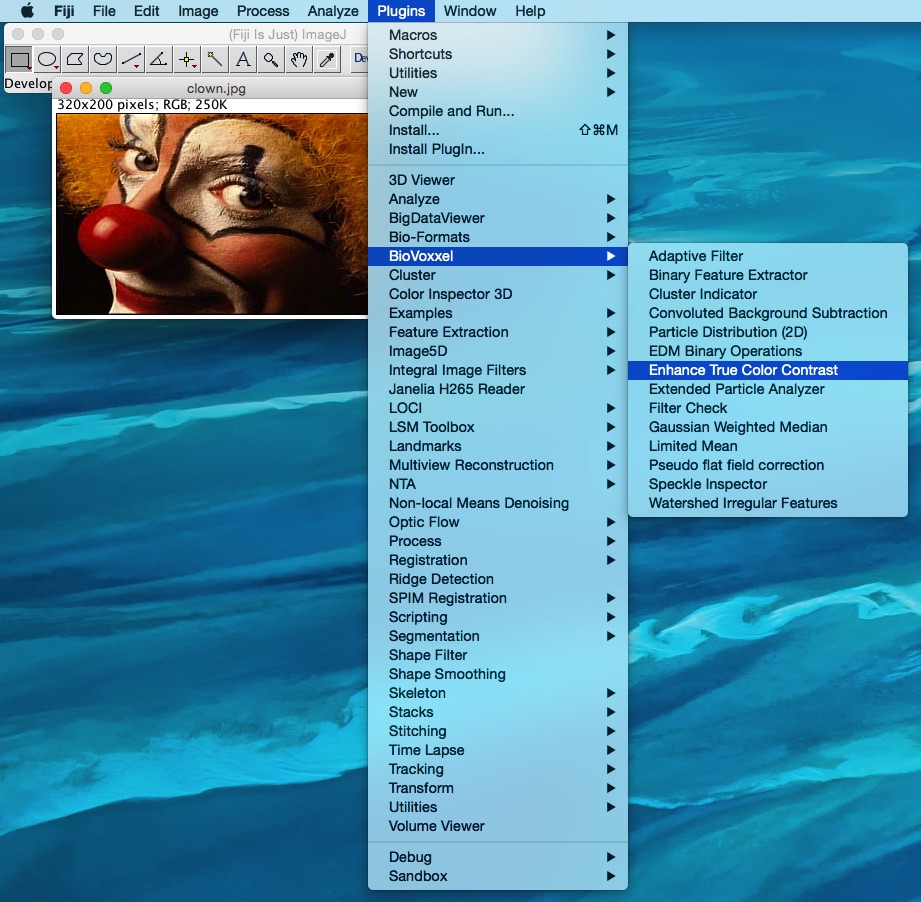
Restart ImageJ as instructed to finish the install. Check to see that the plugin was installed:
…and that it works:
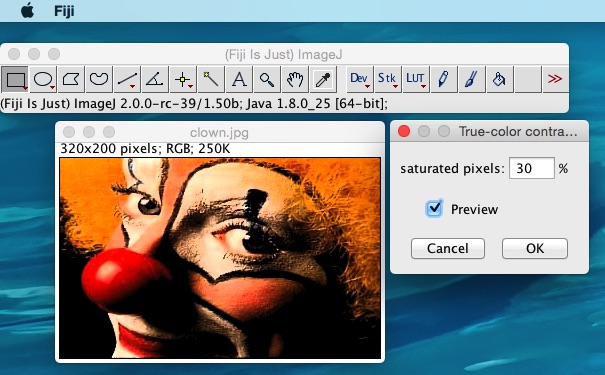
…and that’s all there is to it.